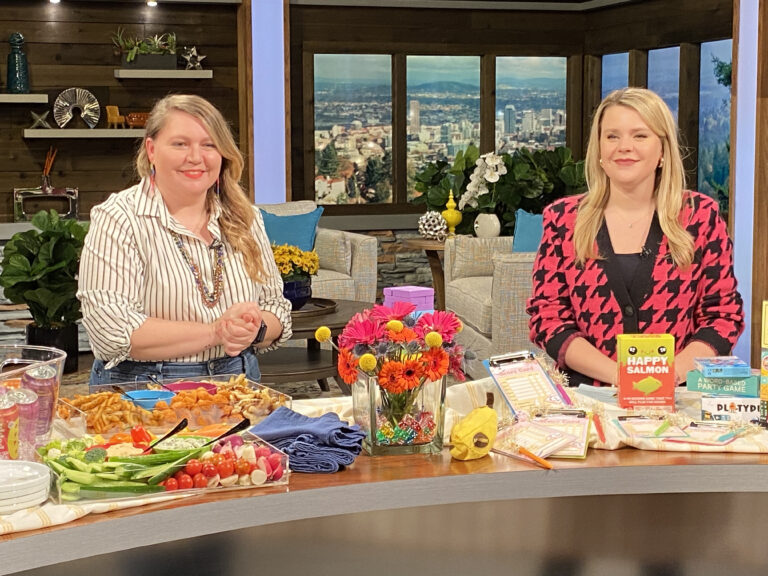
Tag

slider

Browsing

This is another non-recipe recipe that my blog is likely famous for. (My blog is not famous… maybe because I have non-recipe recipes.) But, what can I say? I like SIMPLE and DELICIOUS and EYE-CATCHING for my home entertaining. So, these Butter Dipped Radishes are perfect for your next Spring potluck, Easter brunch, or afternoon snack.

The most complicated thing about this recipe is getting the butter to the right consistency. I over-melted my butter at least three times. But, between the fridge and the microwave, I eventually got it. You want your butter to be melted enough that you can DIP your radishes in the butter and it will coat the radishes in its buttery-goodness, but not so melted that it basically falls right off. The time I got it completely right with JUST the melting, I put my butter in the microwave at half power for 15 seconds, stirred, and continued to doing that until it was correct. However, the time I over melted it and put it in my fridge and checked on it and stirred until it hit the right consistency? It dipped just as well!

This post contains affiliate links. Affiliate partnerships help this blog produce content for free for users. Purchases made on affiliate links provide modest payouts to this blog at no additional cost to the purchaser. Thank you for supporting this blog. All affiliate links are identified with an asterisk (*). 

You can dipped a couple of times if your butter isn’t quite right. In the end, you want a good layer of semi-solid butter before you add salt. If you add it to too-melted butter it will incorporate into the liquid and still be delicious, but lack the desired visual effect.

In elevating this simple appetizer I used a high quality non-salted butter and a Maldon flaky salt.* What kind of butter? Tillamook, of course.

The other, semi-controversial part to this appetizer comes down to the greens. You can absolutely trim ALL the greens off this appetizer. Radishes and butter are delectibe. Period. However, I like the nod to Spring that the greens give. I trimmed the greens down and tried to pick out any droopy ones before serving. These serve as a handle for those who are noshing as they go, but also don’t interfere or look dirty.

Butter dipped radishes

Butter Dipped Radishes

Jenni
A simple Spring appetizer that is eye-catching, delicious, and EASY.

Ingredients
  

  • 1 Bunch Radishes
  • 1 Stick Unsalted Butter
  • 2 tbsp Maldon Sea Salt

Instructions
 

  • Clean your radishes and trim off the bottom to make a flat bottom to stand on end.
  • Trim greens so there are enough to grab, but not so much that they droop into your finished radish.
  • Very slowly melt the butter in the microwave. Use the lower power settings. Your goal in melting the butter is not a transparent yellow, but rather a muddy white. If you over-melt your butter, put it in the fridge to firm a bit and stir/melt until you get the right consistency. You want it a dipping consistency, but not so thin that it runs right off the radish.
  • Dip the clean, dry radish into the partially melted butter. You can dip a couple of times if you feel that the coating isn't good enough.
  • Sprinkle with Maldon Sea Salt
  • Put in fridge to firm up
  • Plate and serve!
Keyword appetizer, butter, radish, salt, spring

Let me know if you try this appetizer! I’d love to know what you or your guests thought of it!

A splash of paint, a dash of gin, and a gaggle of your favorite friends and you have a recipe for a super fun ladies night in. Host a painting night (also known as a Sip & Paint) with your favorite gal pals and give the gift of a fun evening in and a party favor that’ll decorate their homes! Read on to see my recent Galentine’s Day version of a painting party along with some tips to host your own!

This party certainly doesn’t have to be done as a Valentine’s Day celebration. However, since this party happened to be near the day of hearts and love… I decorated the party space to reflect that. I kept it mostly simple using graphic black, white, and pink elements. Xs and Os and hearts helped move the theme from the painting space to the bar and food space.

How to Host a Painting Party

The supplies for a painting party can be as simple as a painting surface and some acrylic paint. Fingers make great brushes! However, if you want to keep it a bit more clean, paint brushes are a good addition. To keep costs down you can even just grab the essential colors of paint (black, white, red, yellow, and blue) and let guests mix their own combinations.

I knew I’d be hosting more than one of these events, so I picked up some easels, larger boxes of paint ranging colors, prepped canvases, and paint brushes. The below links are to the actual items I got for my painting party and are affiliate links which means I get a small payment if you make a purchase (at no additional cost to you).

Painting Party Supplies (affiliate links):

Tips for Painting

I really love the idea of going to one of those Paint and Sip venues with friends. I’ve been several times and always have a good time. However, one of the things I don’t like about it is I’m often left with a piece of art that I probably wouldn’t have chosen to decorate my house with if not for the cost of the party. So, when I host a painting party… I sorta let everyone do their own thing. I love how creative everyone gets!

Not everyone loves to paint like I do and some people majorly underestimate their skill. So, the below tips are how I encourage people to paint.

  1. Stick with abstract. Unless you are great at drawing…abstract is where it is at.
  2. Pick colors that go with your home decor already.
  3. Search for artwork in that color scheme to inspire your painting. For instance, if you decorate in blue and yellow do a Pinterest or Google search for “abstract art blue and yellow” and see what comes up!
  4. Don’t try to copy. Look a the shapes and brush strokes on the art pieces you are drawn to and imitate that, but don’t hold yourself back.
  5. Stop throughout your painting to let paint dry and to step back and see how it is shaping up. If you feel stumped…. turn your artwork on its side or upside down and see if that inspires you.
  6. Don’t be afraid of white space. Seriously… sometimes less is so much more!

The Extras… Food & Drink

I hosted this party during the dinner hour so I wanted to provide some hearty snacks that could substitute as a meal, but was also able to sit out a bit so people could snack throughout the painting process.

Ladies Night Menu:

  • Romaine Lettuce and Spring Greens Dressed in Vegan Caesar Dressing and gluten free croutons with sides of Parmesan cheese and grilled chicken for those who wished to add them.
  • Tuscan White Bean Italian Salad (a hit!)
  • A charcuterie platter featuring Trader Joe’s Gormet Deli Selection (3 types of meats), unexpected cheddar, goat cheese stuffed peppers, blue cheese, fontina cheese, apples, strawberries, crackers, and gluten free baguette slices.
  • A vegetable platter featuring carrots, cucumbers, radishes, cherry tomatoes, hummus, and spinach dip.
  • A sweets platter with cream puffs, eclairs, macarons (from Trader Joe’s), meringues (from Trader Joe’s), berries, and candies.

Belly Up to the Bar at Ladies Night

I think the beverages are always my favorite part of parties. If you look through my blog you’ll notice that I have more beverage recipes than anything else. They are such a FUN way to give a little something extra to a party. I always make sure there are a selection of fun non-alcoholic beverages at every party including water. For this party I served some cucumber water along with a selection of Bubly sparkling waters and sparkling grapefruit juice. I also had a bar with the makings for martinis and gin & tonics.

Martini Bar Ingredients:

  • Coupe Martini glasses (affiliate link)
  • Shaker & Jigger (affiliate link)
  • Ice
  • Vodka (yes, you can totally use gin, but I’m a vodka martini gal)
  • Dry vermouth (store that in the fridge!)
  • Olive Juice
  • Olives
  • Lemon Twists (Citrus Peeler – affiliate link)

Make sure you add the directions for making a martini so your guests can make their own.

A Gin Dependent Woman Gin & Tonic Bar Ingredients:

  • Glassware – I used rocks glasses (affiliate link)because I like them, but traditionally high ball glasses (affiliate link) are used.
  • Ice
  • Cocktail spoon (affiliate link)
  • Jigger (affiliate link)
  • Gin
  • Tonic Water
  • Sparkling Grapefruit Juice
  • Blood Orange simple syrup
  • Citrus (lime, lemon, grapefruit, blood oranges)
  • Herbs (Thyme & Rosemary– though, basil would be a great addition!)
  • Cucumber slices
  • Strawberries

Make sure you add directions to this as well and add in some ideas for combinations!

Gin & Tonic Bar Directions:

  1. Fill glass with ice
  2. Add 1.25 oz of Gin to glass
  3. Add in your mixers – squeeze citrus, crush herbs, mash berries/cucumber, etc.
  4. Add in any simple syrup or juice (half an ounce or less)
  5. Top with tonic water

Suggested combos:

  • Strawberries, thyme, grapefruit slices, grapefruit juice, gin, & tonic.
  • Lime, cucumber, gin, & tonic.
  • Blood orange simple syrup, rosemary, blood orange slices, gin & tonic.

We had a fantastic time at this painting party and plan to make crafting/painting parties a regular occurrence after this event. Honestly, I think an event like this would be great for a birthday party or shower as well. Wouldn’t it be awesome to host a painting party baby shower and have the guests paint abstract paintings in the colors of the nursery? Or, perhaps a wedding shower where guests paint paintings for the couple’s home together or for the wedding tables! The ideas are endless.

Have a great painting party!

Would you go to a painting party? Share in the comments what would draw you to a party like this or what else would make it a great event!

I’d love that if this idea inspires you that you share it with me by tagging me on Instagram or Twitter (@JenniBost).

Every Spring I get overly excited about eating artichokes. These slightly intimidating vegetables are just so good and really not too difficult to make! I’m always doing things like steaming, grilling, or roasting my artichokes. But, when hosting a party where people aren’t easily able to eat and dispose of the artichoke leaves, a great way to introduce this tasty vegetable to the table is by creating this cheesy, slightly spicy, and very delicious artichoke dip!

This post is in partnership with Imperfect Produce. All opinions are my own. Imperfect Produce is a delivery company that sources “ugly” produce straight from the farm and delivers it to your door at 30-50% less than grocery store prices. 

artichoke dip

Artichoke Dip

I have been making this recipe for years, but this was the first time to try it with fresh artichokes. This recipe can be made with several fresh artichokes by steaming the artichokes, removing leaves until you just have the artichoke heart, and adding some lemon juice and salt to them. It takes about 15 fresh artichokes to make this dish. I often opt to create it with two cans of artichoke hearts which is what the recipe calls for. If you prefer to do it with fresh artichokes then don’t waste the outer leaves, dip them in your favorite sauce and have a snack! Toss your artichoke hearts in the juice of one large lemon and 2 teaspoons of kosher salt.

Ingredients: 

  • 2 cans of artichoke hearts packed in water, drained, and chopped
  • 2 boxes of cream cheese
  • 1 teaspoon garlic powder
  • 1 teaspoon onion powder
  • red pepper flakes to taste (I use about 1 tsp)
  • salt to taste ( I use about 1 tsp)
  • 1 cup parmesan (half for in the mixture, half to top)

Directions: 

  1. Mix the chopped artichoke hearts, cream cheese, onion powder, garlic powder, salt, red pepper flakes, and 1/2 cup of parmesan with a hand mixer until well incorporated.
  2. Transfer to an oven safe dish and bake at 400 degrees Fahrenheit for twenty minutes or until heated through.
  3. Top with parmesan cheese and put back in oven for about five minutes or until cheese has browned slightly.
  4. Serve with chips, crackers, or vegetables!