Author

Jenni

Browsing
Jenni is a blogger and marketing professional in Portland, Oregon. A Well Crafted Party is a blog about all the little things to celebrate in life. Follow Jenni or A Well Crafted Party with BlogLovin, RSS feed, Facebook, Instagram, or Pinterest.

Green, the color of life. Forever my favorite color. And the color of most vegetables I consider a vegetable and one delicious, beautiful, favorite vegetable that counts as a starch in my house. I know, I’m weird. In our house dinner has to have 3 vegetables. Why? Because it has HARD to get vegetables in for breakfast or lunch so we hope for between all meals we get five (or more) servings of vegetables or fruits a day. So, what does that have to do with this appetizer? Not really anything aside from Peas do not count as vegetables in our family. So, if you’re looking for a delicious appetizer with Spring-flavor, and partial vegetable goodness, look no further. 😉

I believe I’ve made every blogging mistake in that first paragraph. However, I long ago realized that blogging was a thing I did because I loved sharing tid bits about myself and my life along with (hopefully) useful tips. So, you are very welcome to just scroll down to the recipe. Most of you are (understandably) here for that. However, the rest of you… if you’re here for my very weird beliefs in vegetables.. I’m so here for you.

This post contains affiliate links. Affiliate purchases help this blog create content at no cost to the purchaser. All affiliate links are marked with an asterisk (*). 

On to the recipe…

All crostini recipes are based on the fact that things piled on bread are delicious. Sure, you can have a dip and bread and have a similar effect on the taste buds, but crostini offer the perfect bite in each little appetizer. These are really so simple. Like I was able to make them on TV while absolutely frazzled and stressed on time. Sure I made a mess. But, were they delicious? YES THEY WERE.

Spring Pea Crostini Tips:

  1. Toast up thin slices of a delicious French Baguette. Other breads work, sure, but this is tasty. The key with any crostini, in my opinion, is a thin slice. When something is too thick it is too hard to eat! I toasted up my French Baguette slices in the broiler for a minute or two with a bit of olive oil and salt on top.
  2. You can get fresh peas and par boil them and shock them in ice water to keep them green. OR you can get a bag of frozen green peas and put them in a colander. Pour boiling water over them to get them soft and ready to go! Rinse with cold water to stop the cooking process and keep the beautiful green color.
  3. Garnish with pea shoots! The delicious green will add to the nutritional value (counts as a vegetable in my book!) If you don’t have access to pea shoots, try chives or another fresh green.
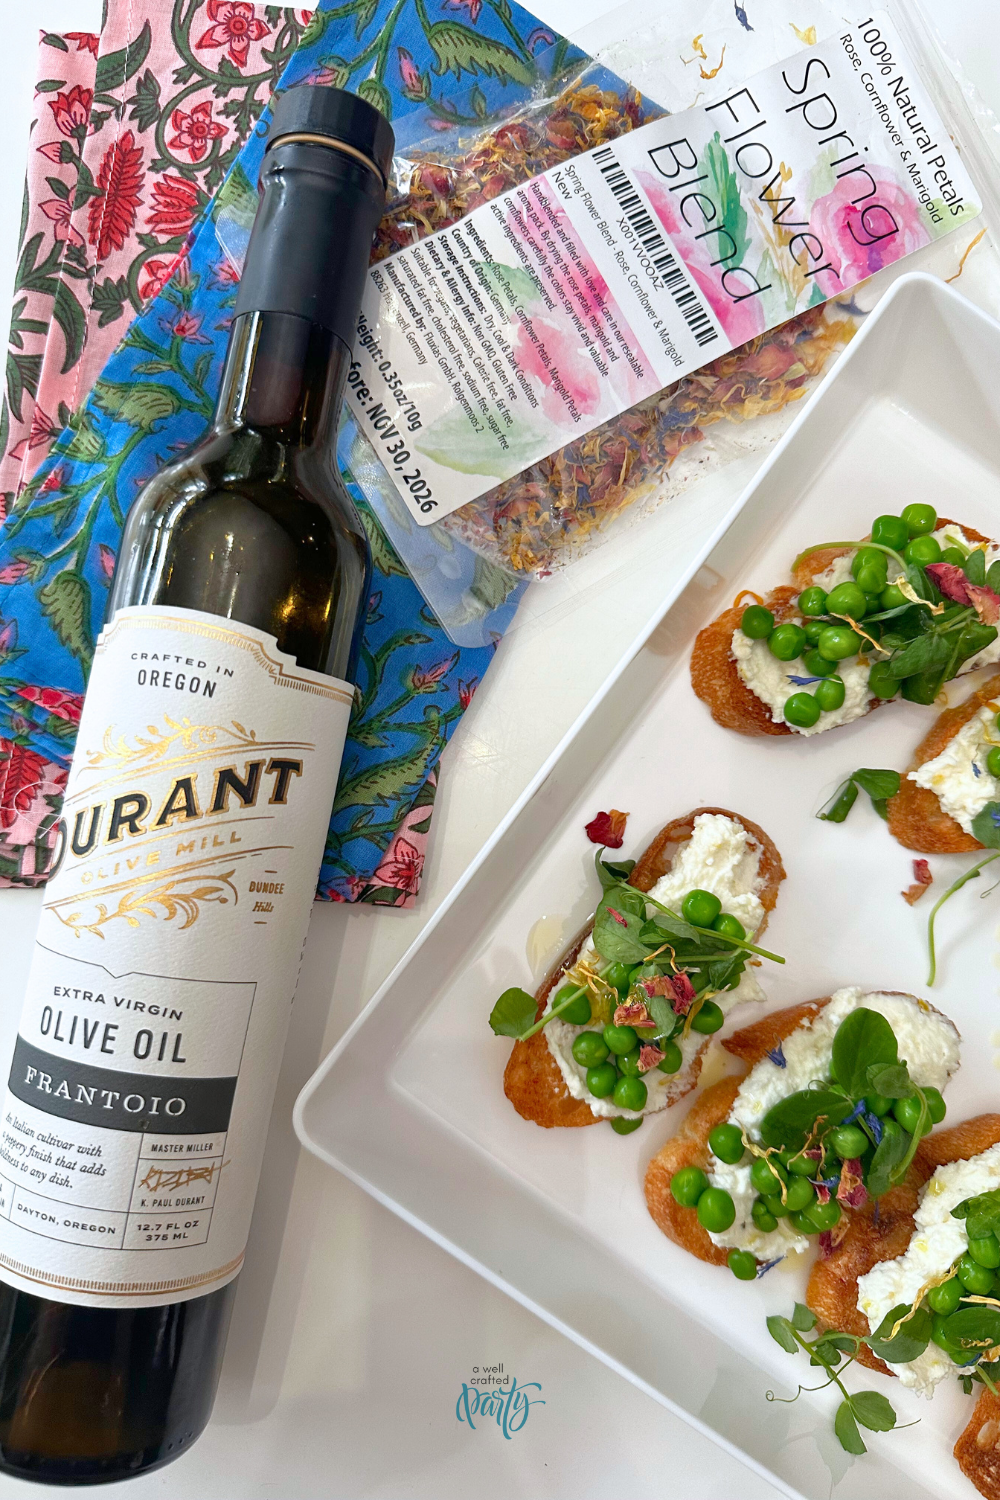
  4. Use a good olive oil to top them off.
  5. To really take it up a notch, top it with edible flowers. You can get edible flowers at your local speciality grocer during certain seasons. Or, purchase them dried!*

Spring Pea Crostini

Jenni
This easy appetizer is the perfect thing to grab last minute from the grocery store and whip up for your next Spring brunch or potluck. It'll get raving reviews.

Ingredients
  

  • 1 large French Baguette
  • 16 oz Ricotta
  • 8 oz Parmigiano Reggiano grated
  • 2 Zest of Lemons
  • 1 cup Pea Sprouts
  • 2-3 tbsp olive oil drizzle optional
  • 1 tsp pepper
  • 1 tsp salt (or to taste)
  • 1/4 cup edible flowers
  • 16 oz Frozen Peas

Instructions
 

  • Slice French Baguette thinly, brush with olive oil, and toast under broiler until just toasted. It only took mine around 2 minutes to be perfectly toasted.
  • Add the full 16 oz Ricotta, 1 cup of grated Parmigiano Reggiano, Zest of two lemons, salt, and pepper to taste into a mixing bowl and mix until well incorporated with a large spoon.
  • If you really like lemon, I suggest adding the juice of 1 lemon to the mixture for an extra pop of flavor!
  • Prep fresh peas by dropping into boiling water and letting them cook for 1 minute then straining them into a bowl of ice water. Prep frozen peas by running hot water over them until no longer frozen.
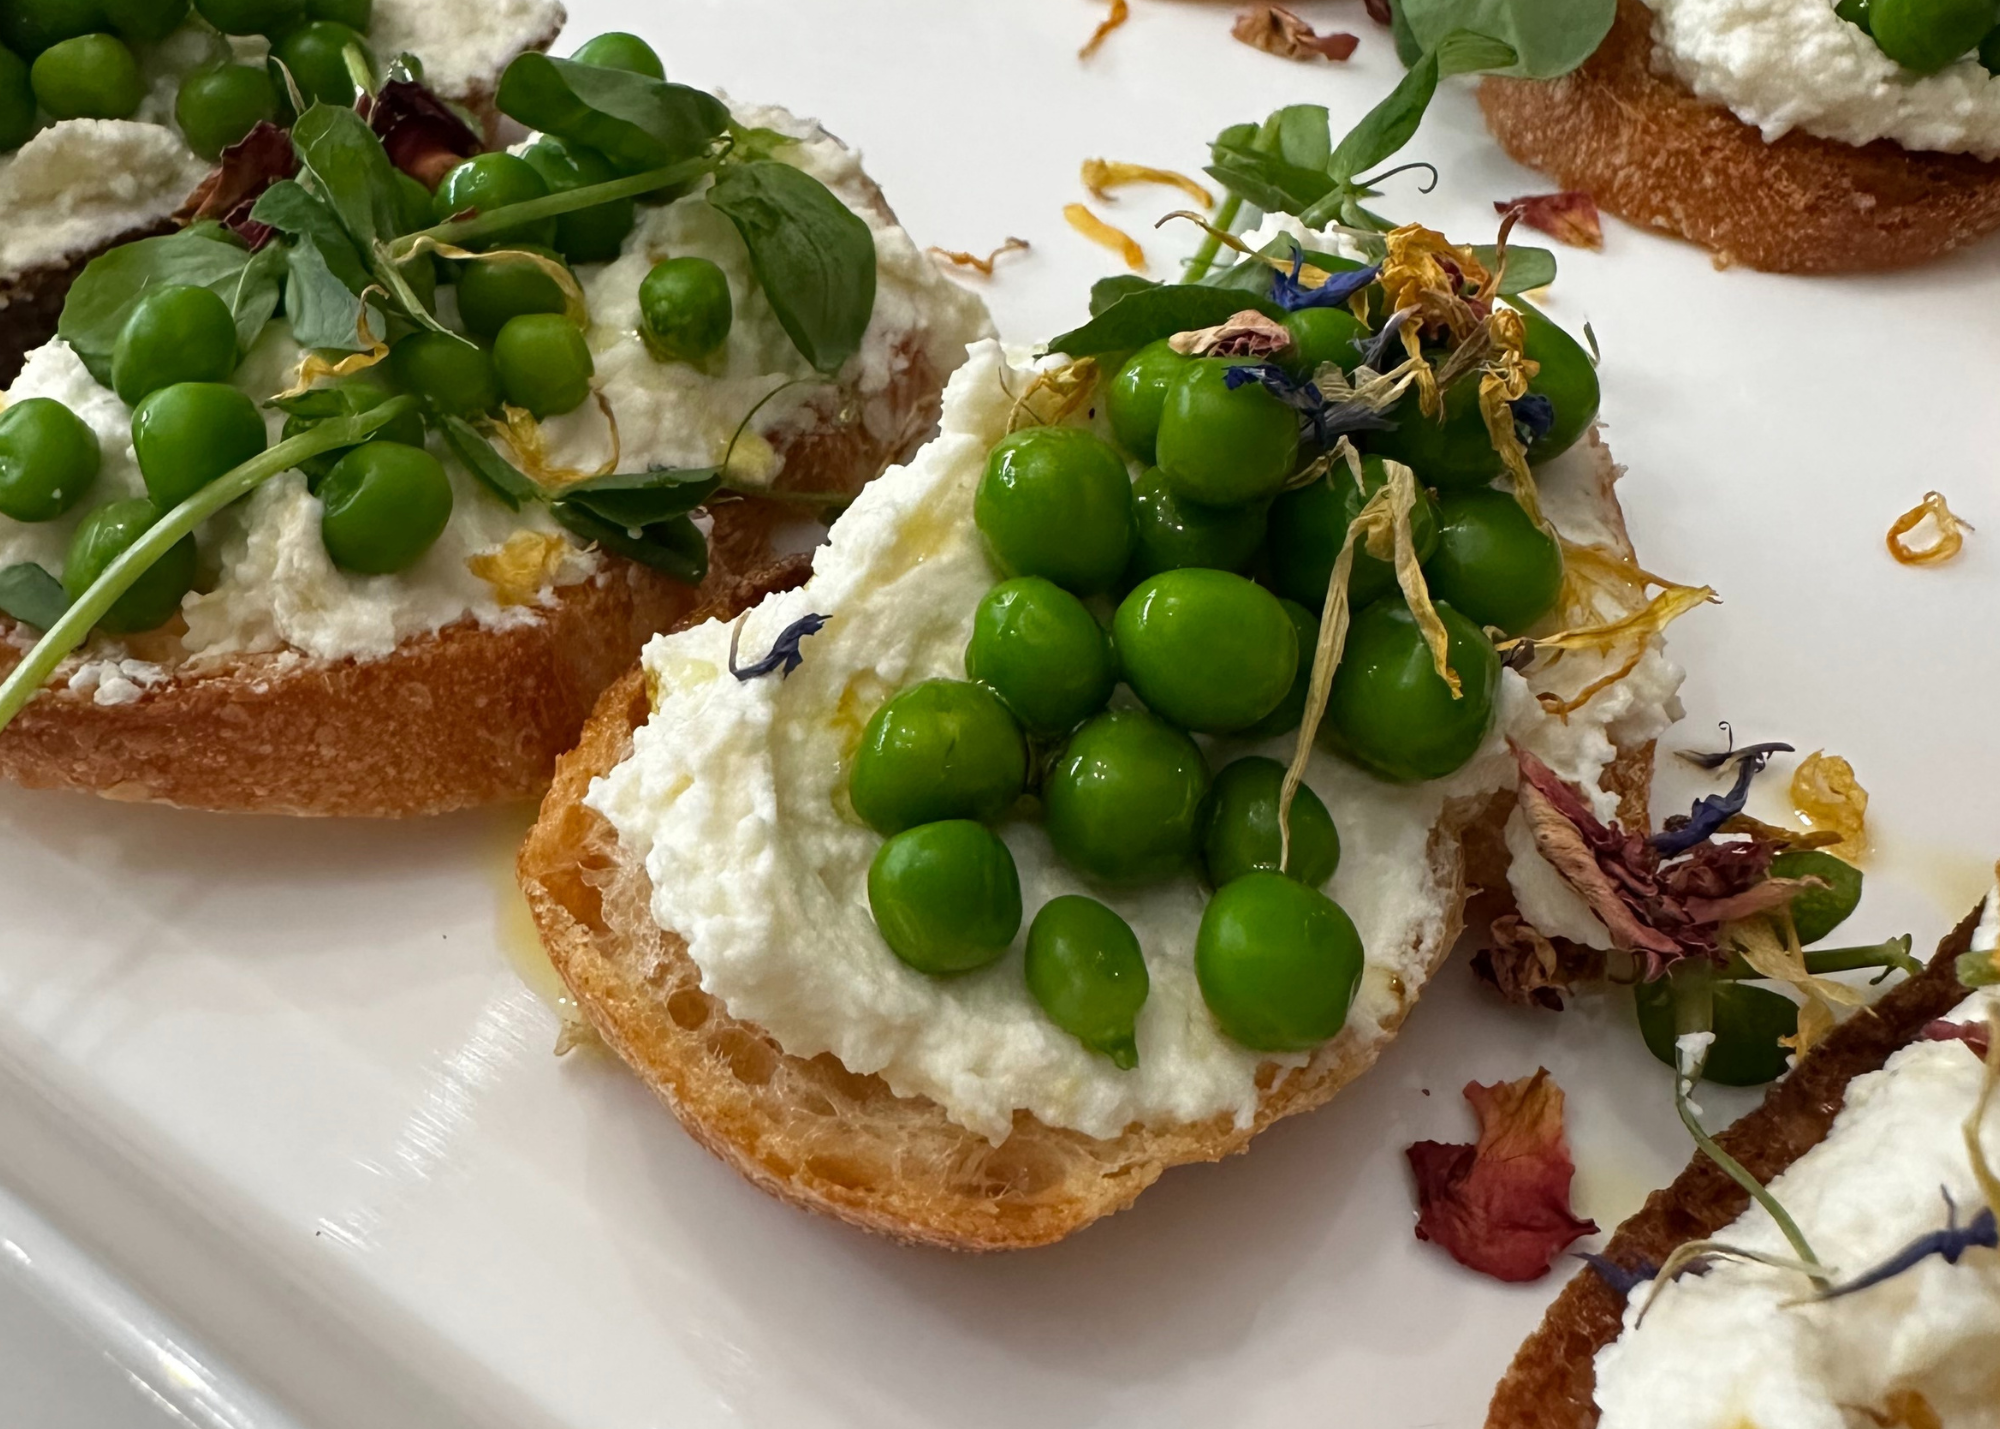
  • Place a spoonful of the ricotta mixture on a slice of toasted baguette and spread with the back of the spoon. Top with peas.
  • Garnish with pea shoots, a drizzle of good quality olive oil, and edible flowers for a special treat.

Serve these at your next Spring get-together and your friends and family will not be disappointed! What is your favorite type of Crostini? I’d love to know what things you like to top your toasted bread with for a quick and delicious appetizer.

This is another non-recipe recipe that my blog is likely famous for. (My blog is not famous… maybe because I have non-recipe recipes.) But, what can I say? I like SIMPLE and DELICIOUS and EYE-CATCHING for my home entertaining. So, these Butter Dipped Radishes are perfect for your next Spring potluck, Easter brunch, or afternoon snack.

The most complicated thing about this recipe is getting the butter to the right consistency. I over-melted my butter at least three times. But, between the fridge and the microwave, I eventually got it. You want your butter to be melted enough that you can DIP your radishes in the butter and it will coat the radishes in its buttery-goodness, but not so melted that it basically falls right off. The time I got it completely right with JUST the melting, I put my butter in the microwave at half power for 15 seconds, stirred, and continued to doing that until it was correct. However, the time I over melted it and put it in my fridge and checked on it and stirred until it hit the right consistency? It dipped just as well!

This post contains affiliate links. Affiliate partnerships help this blog produce content for free for users. Purchases made on affiliate links provide modest payouts to this blog at no additional cost to the purchaser. Thank you for supporting this blog. All affiliate links are identified with an asterisk (*). 

You can dipped a couple of times if your butter isn’t quite right. In the end, you want a good layer of semi-solid butter before you add salt. If you add it to too-melted butter it will incorporate into the liquid and still be delicious, but lack the desired visual effect.

In elevating this simple appetizer I used a high quality non-salted butter and a Maldon flaky salt.* What kind of butter? Tillamook, of course.

The other, semi-controversial part to this appetizer comes down to the greens. You can absolutely trim ALL the greens off this appetizer. Radishes and butter are delectibe. Period. However, I like the nod to Spring that the greens give. I trimmed the greens down and tried to pick out any droopy ones before serving. These serve as a handle for those who are noshing as they go, but also don’t interfere or look dirty.

Butter dipped radishes

Butter Dipped Radishes

Jenni
A simple Spring appetizer that is eye-catching, delicious, and EASY.

Ingredients
  

  • 1 Bunch Radishes
  • 1 Stick Unsalted Butter
  • 2 tbsp Maldon Sea Salt

Instructions
 

  • Clean your radishes and trim off the bottom to make a flat bottom to stand on end.
  • Trim greens so there are enough to grab, but not so much that they droop into your finished radish.
  • Very slowly melt the butter in the microwave. Use the lower power settings. Your goal in melting the butter is not a transparent yellow, but rather a muddy white. If you over-melt your butter, put it in the fridge to firm a bit and stir/melt until you get the right consistency. You want it a dipping consistency, but not so thin that it runs right off the radish.
  • Dip the clean, dry radish into the partially melted butter. You can dip a couple of times if you feel that the coating isn't good enough.
  • Sprinkle with Maldon Sea Salt
  • Put in fridge to firm up
  • Plate and serve!
Keyword appetizer, butter, radish, salt, spring

Let me know if you try this appetizer! I’d love to know what you or your guests thought of it!

Valentine’s Day is upon us and if you haven’t gotten together the class valentine’s yet this year, don’t fret! There is still time! All you need is a printer (or a trip to a local 24 hour print shop), cardstock, ribbon, and some fun treats. Your soccer-loving kiddo will love handing out these soccer-themed Valentine cards to all of their friends.

soccer themed Valentine printables and soccer valentines for school

Soccer-themed Valentines

These cards really can be used on their own, but they are extra special attached to a small gift! Use these free printable soccer Valentines with any of the following gifts (many of which can be purchased last minute!):

Soccer themed valentines with soccer fidget spinners

Ideas for Soccer Valentine Gifts

This post contains affiliate links. Affiliate links help this blog earn a small return on purchases made from suggested products with no cost to the purchaser. Thank you for supporting this blog!

  • Soccer Ball Fidget Spinners found on Amazon (they are same-day shipping for me, but that may vary by location)
  • Mini Soccer Balls are great for smaller class sizes, a small Valentine’s Day Party, or a gift for your kiddo! They can be found at sports stores or even in most Target and Walmart locations in the Sports section.
  • Game-day snacks like popcorn, chips, or cookies!
  • Soccer Stress Balls found on Amazon (they are same-day shipping for me, that may vary by location)
  • Soccer Stickers found on Amazon (they are same-day shipping for me, that may vary by location), Soccer Stickers can also be found at many craft stores.
Soccer themed free printables for valentine's day

Free Printable Soccer Valentine Tags

Download the free printable soccer Valentine Tags and print in full-color on cardstock. These can be printed at a local print shop as well, choose the 8.5X11 cardstock option. Cut out around each of the designs. If giving on it’s own, sign the cards and hand out. If attaching with ribbon, punch out the marked area with a single hole-punch and attach to gift with ribbon. Don’t have a hole punch? Attach to a gift using a stapler or tape!

Download your free printable by clicking the link below and saving it to your computer. If you do use this and happen to grab a picture, I’d love it if you shared it with me on Instagram by tagging @JenniBost or Facebook by tagging @AWellCraftedParty!

Download Your Free Printable Soccer Themed Valentine Tags PDF

A Well Crafted Party
Privacy Overview

This website uses cookies so that we can provide you with the best user experience possible. Cookie information is stored in your browser and performs functions such as recognizing you when you return to our website and helping our team to understand which sections of the website you find most interesting and useful.

You can adjust all of your cookie settings by navigating the tabs on the left-hand side.

View our entire privacy policy.