
Photo booths are all the rage right now for a very good reason… they get people up and interacting, they provide great memories from the event, and well, they are just plain fun. I wanted to incorporate a photo booth in our 10th Anniversary Party and I also wanted to somehow include photos of our friends and family from over the past ten years. I contemplated a variety of different ways to do those items seperately before realizing that I should just combine the two which is how this photo memory black and white photo booth backdrop was born. Getting it put together was quite a feat and there are things that I didn’t like about the finished project which I’ll add in my tips below to avoid those issues. Overall, the photo memory backdrop and photo booth ended up being one of my favorite projects from the day. A big shoutout to Mary Boyden Photography for all of the event images.
DIY Photo Memory Black and White Photo Booth Backdrop
When designing this backdrop I knew that I would want to have a few things right off the bat:
- An impressive sized backdrop featuring images from over the past 10 years.
- Black and white images that would end up being a fun photo backdrop.
I debated a couple of different ways to create this backdrop. My first thought was to use a few photos blown up and printed as engineering prints for a big bold backdrop. I decided against this option because I wanted to use photos of our guests and us and there were just too many to narrow it down to just a few larger images. My second thought was to use a ton of images printed as 4X6 images in black and white. Because it was going to be photographed I wanted it to not have a big shine factor so I knew I wanted matte prints. I guess I could have gotten 5X7 images or 8X10 images but the cost of that seemed to be a lot more than the 4X6 prints. Finally, I decided to put a white border around each of the prints so that there was some uniformity and white space in the backdrop.
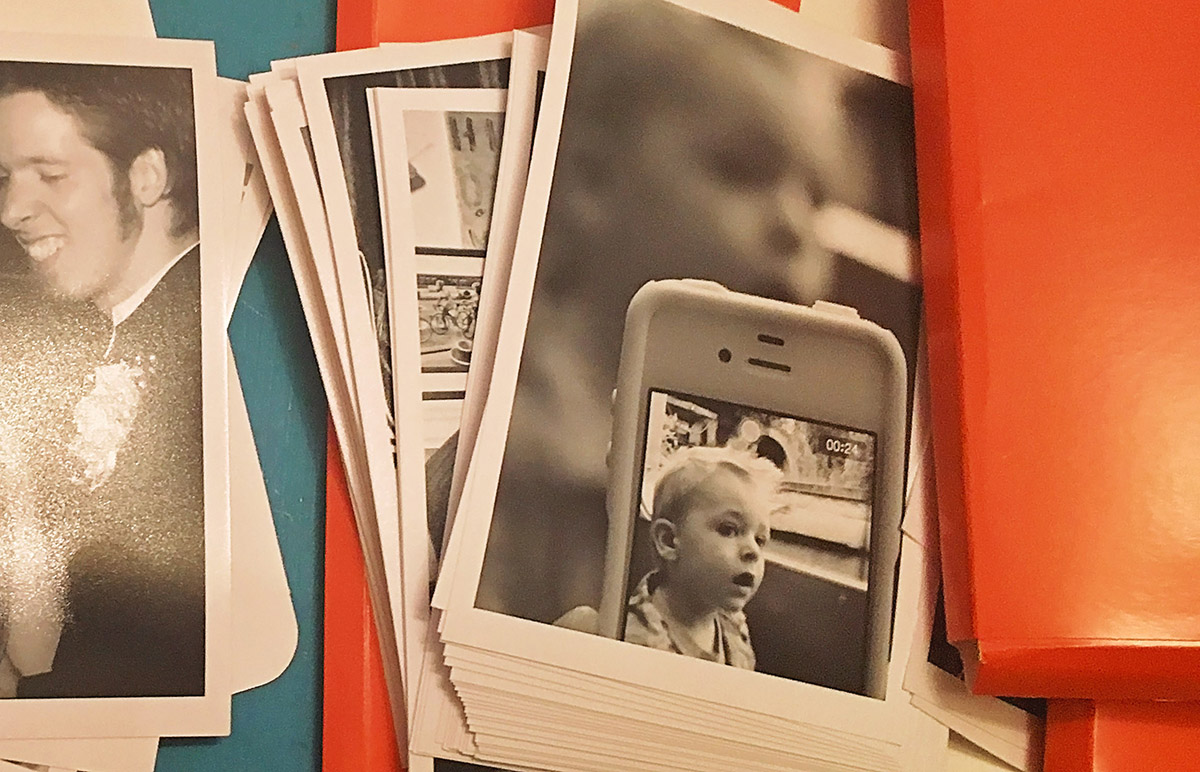
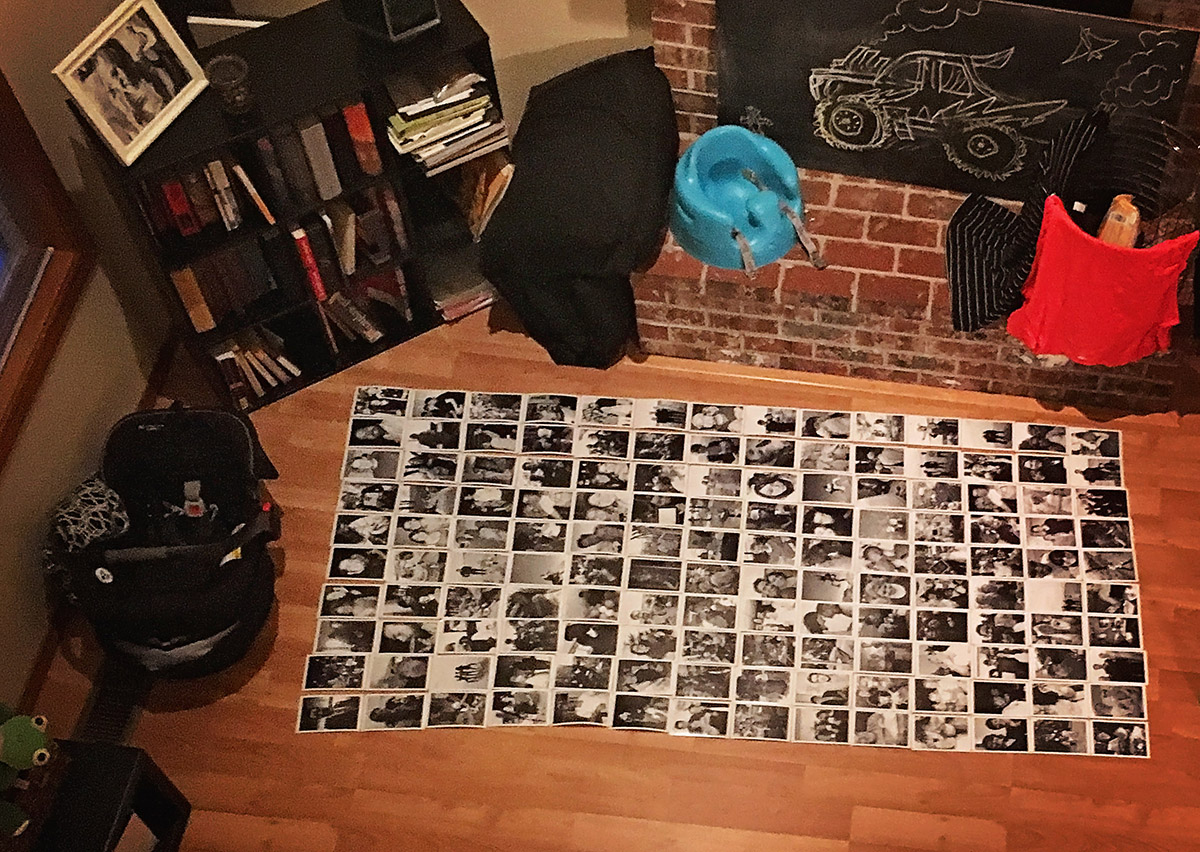
Putting the backdrop together took some time, patience, and a big open space on the floor. The backdrop was approximately 10 feet across and 7 feet tall. I did the math and found that I needed approximately 420 4X6 images to create my backdrop. I purchased the images using Shutterfly. I saved a ton of money using coupons and ended up spending approximately $35 on the whole thing. If you paid full prize at Shutterfly it would only cost around $63 (before shipping) which is amazing for a project this large. (Note: This post is not sponsored in any way… just sharing the company I used for this project.)
Items Needed for this DIY Photo Booth Backdrop:
(Affiliate links marked with *)
- 4X6 vertical photos in black and white with a white border around them – to find out how many you need simply do the following math equation:
- A = Number of Feet Wide you want your backdrop
- B = Number of Feet Tall you want your backdrop
- (A x 12)/ 4 = C (Number of photos wide you need)
- (B x 12)/ 6 = D (Number of photos tall you need)
- C x D = Number of Photos Needed
- For instance: My backdrop was 10 feet wide and 7 feet tall so my equation looked like this— ((10X12)/4)X((7X12)/6))=420 Photos
- I should also note that I am not a mathematician. If you have a better way of putting this then please feel free to drop me a line!
- Stapler* & Staples * – I used gold staples just because I wanted a bit of a touch of gold in the backdrop. It was a tiny detail that only I noticed however!
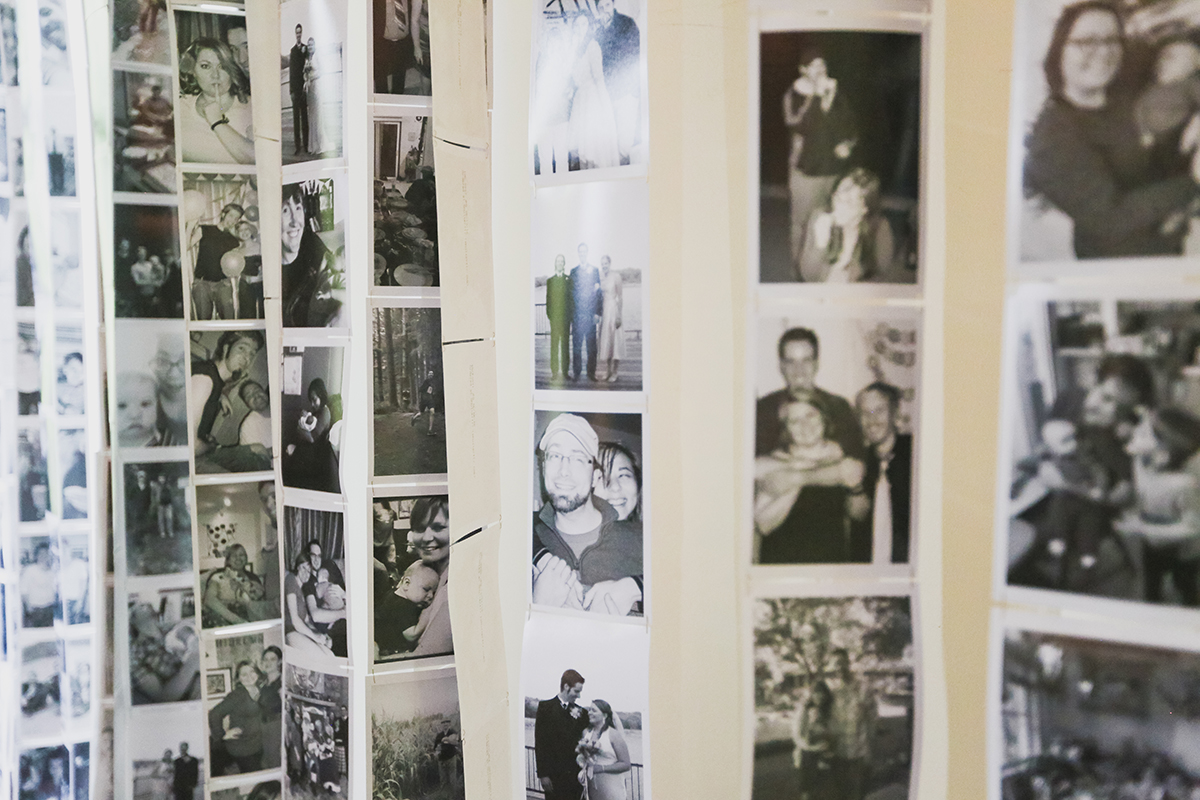
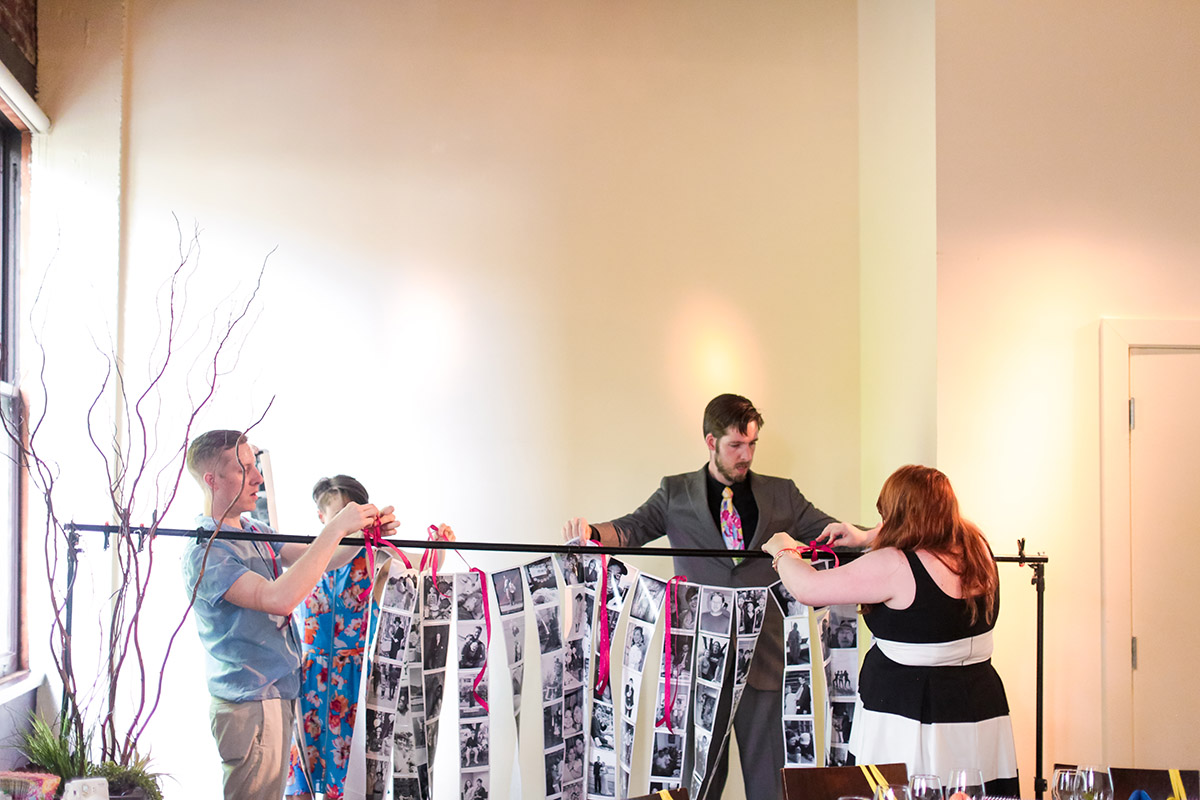
- Either a wall you can attach the finished project to or a photo backdrop support system* (note: my wall of photos became a little unweildy on my backdrop system… I would have preferred to put it directly on the wall to get the nice flat image)
- I used ribbon to attach the photos to the photo backdrop. Tape on the wall would also work.
- Instant camera or digital camera for guests to take pictures with.. I used the Instax Mini 8 and the photos turned out SO cute.
Directions:
1. Get your favorite photos printed in black and white with a white border around them. When using Shutterfly you cannot use their mobile app to get this effect.
2. Lay out the photos how you’d like them to look. Staple photos together at their corners.
3. If needing to hang, attach ribbons with staples to the top row of photos. If using tape to apply to wall you may skip this step.
Tip: When traveling with this set up you’ll want to carefully fold the columns of images and then loosely roll the rows. Don’t try folding it up as it will tear the staples out.
Some photos from Social Media using the backdrop:
So much fun! Love these ladies. #awellcraftedmarriage
The B ladies 🙂 #awellcraftedmarriage
A photo posted by Julie Sachiko 幸子 (@julie_sachiko) on


2 Comments
What a wonderful and creative idea! I think this turned out amazingly. Thank you so much for sharing! Love it.
McKenzie recently posted…Our graphic designer ROCKS!
Such a cool backdrop! It made for some awesome photographs for your booth. I’ll definitely have to try this!