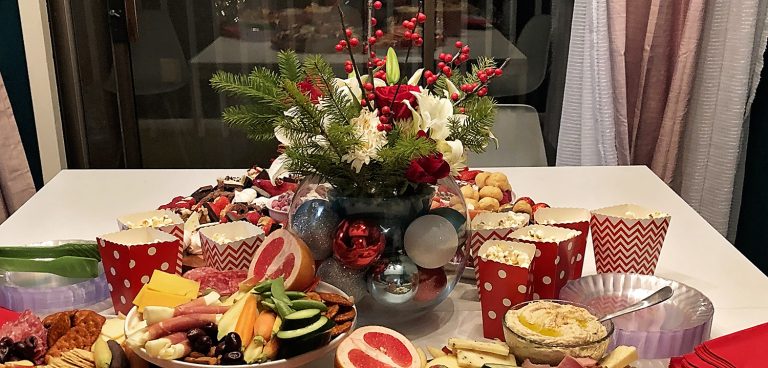
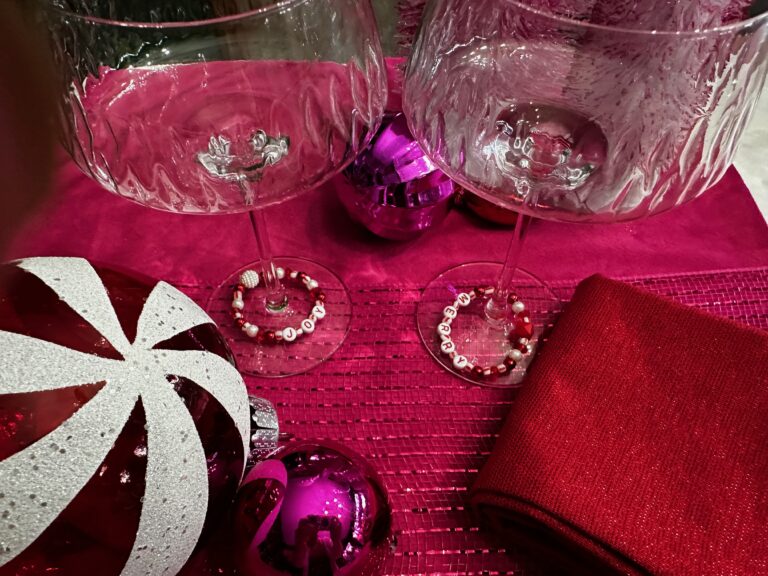
Tag

Christmas DIYs

Browsing

In the good year 2023, the year of Taylor Swift, Beyoncé, and The Barbie Movie, I say… lean in to the fun, the sparkle, the pink, and the friendship bracelets. Don’t just stop at the viral friendship bracelet Christmas tree garland (genius I say) but go ahead and keep on stringing the nostalgia to add fun sayings to other holiday essentials. Namely, the stemware.

This post contains affiliate links, marked with an asterisk (*). Affiliate links help this blogger earn money with purchases made without any added cost to those who purchase. Thank you for supporting my blog!

To say that this is a tutorial would be a stretch of the word to be sure. I simply found a friendship bracelet kit and used my stemware to estimate the sizing for each individual piece. I’ll give my best tips and links below, but this craft can be done with the simple kits found at your local craft store or more elaborate beads. You can use charms or words to make your bracelets unique. But, the key to this craft comes down to using stretchy string, tying a strong knot, and keeping each piece unique enough that it can identify a glass.

Wine Tag Friendship Bracelet Sizing

For my upcoming party I have two types of glasses that I want to help guests keep straight. One is a stemless champagne flute and the other a stemmed coupe glass. This required me to make two slightly different sized bracelets. I made a slightly larger bracelet (around 2.25 inches around) for the stemless glass so that it could go down far enough to not impede drinking but far enough up to not be annoying to the glass holder. The stemware had to be big enough to stretch over the bottom of the glass, but not large enough to get snagged or fall off. They ended up being more like 1.50 inches around.

TIP: When cutting your string go ahead and cut more than you need and measure to the glass often. It will make it easier to hold and to knot. You can then cut off the excess string.

Holiday Wine Tag Sayings

This was the most fun! Since these are much smaller than traditional friendship bracelets I had to stick with one holiday-centric word for each tag. Guests will be able to remember the word and keep track of their glass.

Suggested Holiday Tags: (This is not an exhaustive list– there are SO many options!)

  • Holly
  • Jolly
  • Santa
  • Elf
  • Joy
  • Merry
  • Bright
  • HoHoHo
  • Christmas
  • Noel
  • Star
  • Gift
  • Snow
  • Carol
  • Cheer
  • Bells

Holiday Friendship Bracelet Wine Tag Resources

I grabbed my beads on a holiday clearance rack while out shopping, but I’ve shared some resources below. I stuck to red and white for my colorscheme, because I want to use them throughout the years and tend to pull these two colors in most of my Christmas themes. However, you can mix it up to match your own holiday decor!

Dare I say that this would make for a fun gift as well? Or an added pizzazz to a cute gift of thrifted stemware? I’d find it charming!

May your drinks stay with their intended this holiday season and may this season of friendship bracelets, sparkling outfits, and powerful women live well into the new year!

I love beautiful floral arrangements as much as the next person. What I don’t love is spending an arm and a leg for them. I absolutely believe there are times where it is SO worth it. The pros are pros for a reason. However, when the budget is a concern and I have the time, I will put together a floral arrangement using budget blooms from my local grocery store or supermarket. Read on for tips on creating your own holiday centerpiece using supermarket flowers.

This is the ninth post of my 12 Days of Christmas DIYs for 2018. Each day for the next twelve days I share DIY projects, recipes, entertainment, and more, that you can incorporate in your holiday season. Most will be super simple!

DIY Holiday Floral Centerpiece | A Well Crafted Party

Tips for creating a beautiful holiday centerpiece with supermarket flowers

Supermarkets generally have really pretty flowers, but not necessarily beautiful arrangements. (I’m sure that some supermarkets will prove me wrong!) Below are some tips to help you create a great holiday centerpiece with supermarket flowers and below are the directions I followed to create my centerpiece!

  • Grab a few bunches of different flowers: While you can absolutely make a pretty arrangement with a single bloom, for this particular centerpiece I opted to give it a bit more dimension. When choosing your floral bunches consider getting the following: 1 bunch of large bloom, 1 bunch of medium-sized blooms, 1 bunch of filler blooms, and two bunches of greenery.
  • Incorporate non-floral holiday items to your centerpiece: I used holiday baubles for my arrangement. However, some other ideas include ribbon, favorite ornaments, or candy canes!
  • Think about structure: Using cellophane tape or floral wire can really go a long way in helping you build the shape you like for your centerpiece.

How to create a red, white, and green holiday centerpiece

This year I mostly used red and white (with pops of green, pink, and teal) in my holiday decor. So, when creating the holiday centerpiece I wanted to stick to a red/white/green color scheme. I used holiday baubles to give it a bit more interest as well. Below I use affiliate links. I receive a portion of a sale made from my affiliate link with no added cost to you my reader. Affiliate links help support this blog.

DIY Holiday Floral Centerpiece | A Well Crafted Party

Step One: Prepare your vase.

  • For this centerpiece, I chose to use a large round Libby glass bowl.
  • I filled the bowl with my holiday ornaments and then sat another bowl inside. The second bowl sat on top of the baubles.
  • I filled the second bowl with a water.
  • I then taped a grid onto the top of the bowl with clear tape. Floral tape would work okay here as well as long as it adhered to the bowl and didn’t show up too much.

DIY Holiday Floral Centerpiece | A Well Crafted Party

Step Two: Build the base of the floral arrangement.

  • Starting with the largest blooms (I used big white lilies), place throughout the grid on that you put on the second bowl. The grid will help keep a bit of the structure before you have other stems keeping things in place. I usually go with odd numbers here adding either three or five large blooms.
  • Add in your medium-sized blooms (I used red roses). Again using an odd number, put your medium-sized blooms throughout the arrangement.

DIY Holiday Floral Centerpiece | A Well Crafted Party

Step Three: Fill in the arrangement

  • Now, taking your filler blooms (I used some mums) fill in the arrangement making sure to separate any of the large and medium-sized blooms.
  • Taking your two greens (I used evergreen branches and berry branches) place the greens throughout the arrangement. This step actually helps solidify the structure of your arrangement. Cutting your greenery down to match the shape of the arrangement is really important here. There is no need to put an entire branch in the arrangement.

Leftovers…

I always have leftover blooms when creating a centerpiece. I usually use the leftovers to make smaller complimentary arrangements to use throughout the party space. If one bloom breaks too near the head of the bloom don’t throw it away! Float it in a clear vase filled with water for a simple, modern floral arrangement.

Happy floral arranging!


I’m always looking for great solutions for affordable, useful, and fun gifts to give my neighbors and coworkers. This DIY is mostly gathering pre-made items and putting them together. You can absolutely purchase all of the items to create similar neighbor gifts or you can use these free neighbor gift printables to create part of the gift.

This is the fifth day of my 12 Days of Christmas DIYs for 2018. Each day for the next twelve days I share DIY projects, recipes, entertainment, and more, that you can incorporate in your holiday season. Most will be super simple!

I personally am a very busy person. Seriously, aren’t we all? So while I love giving gifts to people and want them to be touching and useful… well, I also really like them to be EASY. These gifts have few supplies and can be made quickly and in multiples pretty easily making it the perfect neighbor gift or coworker gift.

Neighbor Christmas Gifts | A Well Crafted Party

Supplies:

Most of these supplies can be found locally in any of your favorite full-service department stores. Below are some suggested links that are affiliate links.  I receive a small portion of sales of these items with no extra cost to the buyer. These purchases help support the content that I create on this blog. Thank you for supporting this blog!

  • Wrapping paper – I purchased this adorable “Is it Christmas Yeti?” paper at Target. However, you can get some great holiday wrapping papers in bulk!
  • Tape
  • Gift Tags (use the free printable or purchase some!)
  • Ribbon
  • Cellophane bags to put the tags and tape in
  • Gift tag to explain gift — Use my free printable or add a Christmas card or tag of your own.
  • Hole punch & Scissors (if using free printables)

Neighbor Christmas Gifts + Free Printables | A Well Crafted Party

How To:

You can get as creative as you want with these gifts. Add in things like ribbon or baubles to really make it an over-the-top gift. However, it is also a great present to give the gift as pictured: wrapping paper, gift tags, and tape. Below are some suggested steps for creating this gift:

  1. Print out the free printables! But out around the edges lined in black. Use a hole punch on all the tags where the holes are located.
  2. Put all of the smaller gift tags into a cellophane bag along with the tape. Fold the bag.
  3. Punch a hole through the cellophane bag.
  4. Thread the cellophane bag and large gift tag on a roll of wrapping paper using ribbon.
  5. Don’t forget to sign the large gift tag!

Happy Gifting!