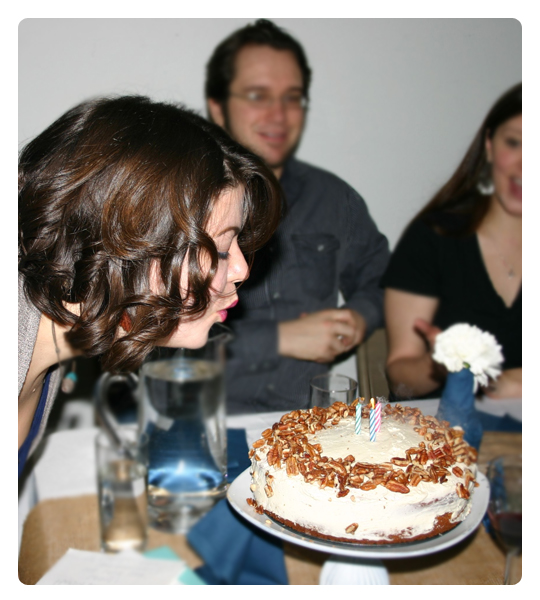
Mmmm… birthday cake. Is there anything better?
I really enjoy making my friends birthday cakes or cupcakes. I like to play around with flavors and frostings. I like using things I have on hand or going to buy something special. I made this cake (featured in the
Rustic Birthday Party Post from yesterday) using some of the sweet potatoes that came in my weekly veggie box delivery.
And, boy oh boy was it a good use of vegetables!
The cake didn’t look perfect. My frosting job was a little wonky. But, it tasted pretty awesome.
The sweet potatoes made the cake moist. The marshmallow gave the frosting a fun kick.
Then, the crunch of the walnuts made me want another slice.
Sweet Potato Cake Recipe
Recipe loosely based on epicurious.com recipe
changes and additions made by me
INGREDIENTS:
- 4 8-ounce red-skinned sweet potatoes(yams)
- 2 3/4 cups all purpose flour
- 3 teaspoons pumpkin pie spice
- 1 teaspoon baking powder
- 1 teaspoon baking soda
- 1/2 teaspoon salt
- 1 1/2 cups sugar
- 1/2 cup maple syrup
- 3/4 cup vegetable oil
- 4 large eggs
- 1 teaspoon vanilla extract
Topping:
- Marshmallow Buttercream Frosting (see recipe below)
- Walnuts (or pecans)
DIRECTIONS:
1. Poke yams with fork and bake until tender (about 1 hour at 375 degrees F). You can also do this in the microwave or used leftover mashed sweet potatoes ( approximately 2 cups worth). Peel yams and smash once done.
2. While yams are baking prepare a pan for cooking. You can use a muffin tin with liners for cupcakes. I used a springform pan and sprayed it with a little cooking spray and dusted it with a little bit of flour to prevent sticking. Preheat oven to 325 F.
3. In a medium bowl sift together (or put in bowl and stir around with a whisk or fork) flour, pumpkin pie spice, baking powder, baking soda, and salt.
4. In a large bowl mix 2 cups of (cooled and mashed) yams with sugar, vegetable oil and syrup. Then mix in eggs 2 at a time. After mixing in eggs add in the flour mixture and mix until just incorporated. Add in vanilla extract and mix one last time. (I use a hand-held mixer, but if you are lucky enough to own a kitchen aid stand mixer then I’m sure that would work as well.)
5. Pour cake batter into prepared pan. Bake at 325 for about one hour or until a toothpick inserted into the center of the cake comes out clean.
After the cake was done and cooled I sliced it in half, brushed the tops with a little bit of whiskey (a simple syrup would work as well) to keep it moist, and then frosted it. I put marshmallow icing and walnuts on the first layer before addign the top layer. I then frosted the entire cake with marshmallow icing and topped with walnuts.
Marshmallow Buttercream Frosting
I improvised this frosting recipe using my basic butter frosting as a base
INGREDIENTS:
- 2 sticks butter- room temperature
- 1 8 oz jar of Marshmallow Cream
- 2 cups powdered sugar
- 1/2 tsp salt
- 1 tsp vanilla
- milk or cream if needed for consistency
DIRECTIONS:
1. Whip up two sticks of room temperature butter until fluffy. (I use my handheld mixer.)
2. Add in 1 8 oz jar of Marshmallow Cream- whip until incorporated. I spray my handheld mixer with a little bit of cooking spray to help keep the marshmallow cream from sticking to my mixer.
3. While mixing, slowly add in powdered sugar.
4. Add in vanilla and salt and mix.
5. If the frosting is too thick add in tsp of milk or cream. If it is too runny add in a little bit more powdered sugar. I found that I usually don’t need any additional milk or sugar.
Add candles and a song and then you’ve got yourself a birthday cake!
I’d love to know if you decide to make this cake.


