It is almost Halloween… can you believe it? I’ve been prepping for our annual Halloween party and have been so swamped with preparations that I haven’t really had the opportunity to sit down in front of my computer for any extended period of time. If you are feeling just as swamped as I am then you might need a few last minute Halloween decoration ideas! Hey, you may even appreciate getting some for free.
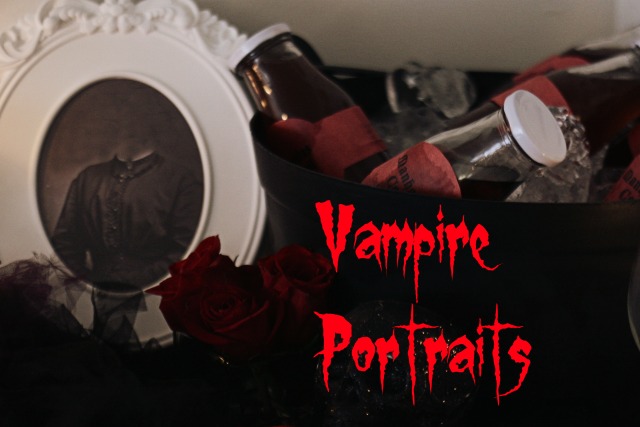
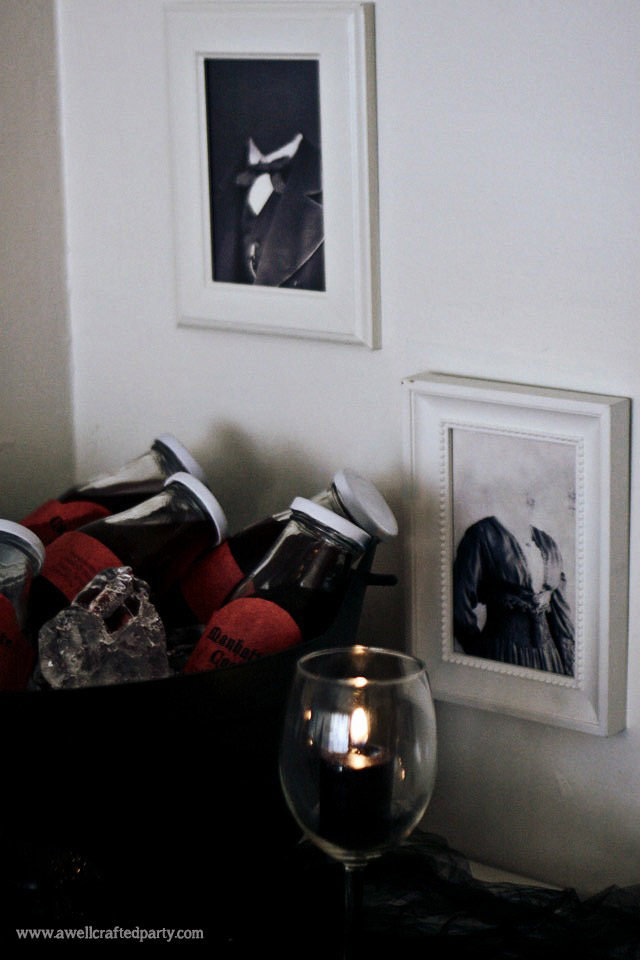
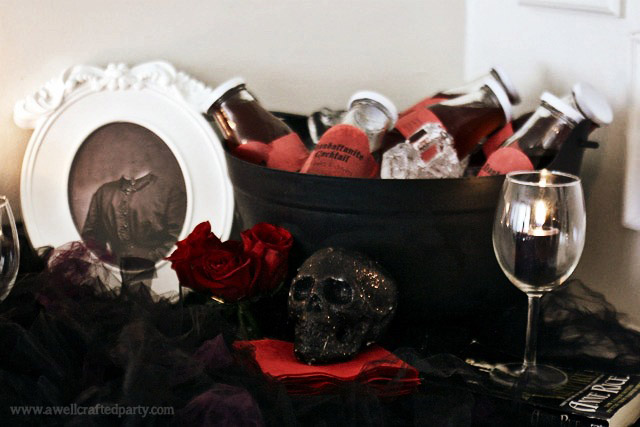
Using vintage images, I created a few Vampire Portraits that you can print off and put in frames around your home. How do I know what a vampire looks like in a portrait? Well that is easy! Vampires don’t show up in mirrors or film of course. These vampires sit in front of the camera to produce eery images of people without descernable bodies.
Vampire Portrait Free Printables
Directions:
Download the image of your choice (see below)
Print – You can print these off on your home computer and cut out or you can print at any photo processing source.
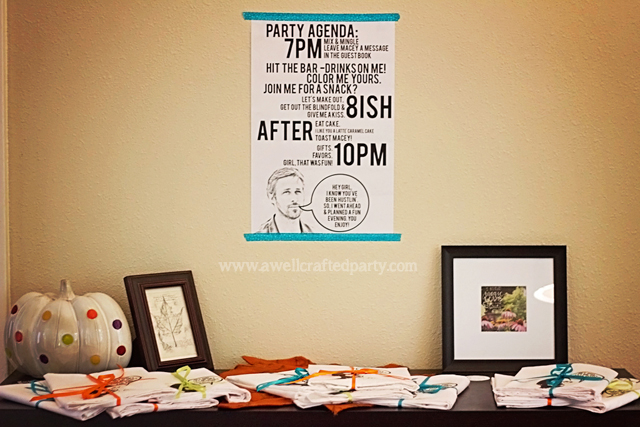
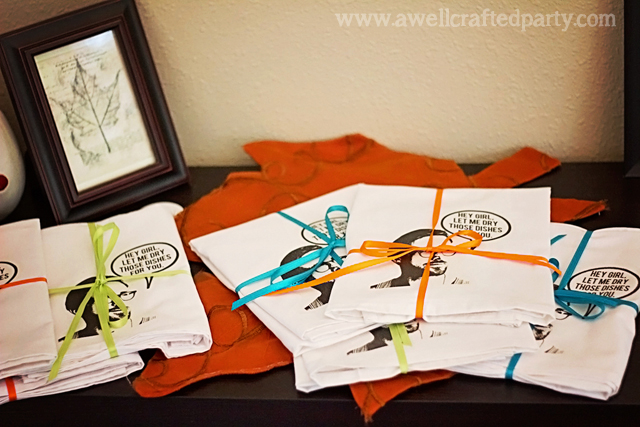
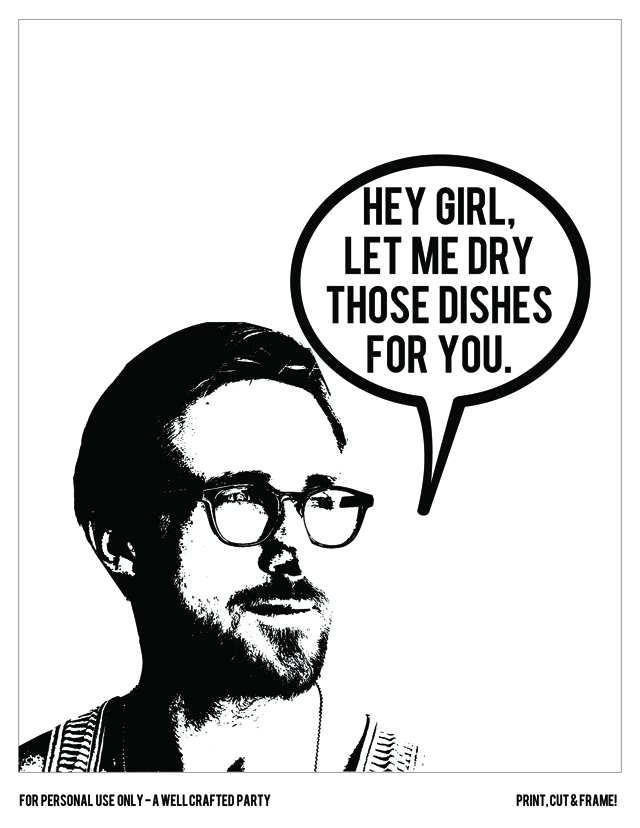
When I got to thinking of the whole “Hey Girl” Meme for the Ryan Gosling themed party the ideas sort of over-took my brain. I wanted to do SO much. But, as I advise every bride/diy event planner … I started out with lots of ideas and then began to narrow them down. The favor idea was one of my FAVORITE ideas, so I spent some time figuring out the best way to go about it. I loved the idea of giving guests tea towels (who doesn’t need more of those!?) that were a simple black and white that had a “Hey Girl” message of “Hey girl, let me dry those dishes for you.”
My first attempt at making these tea towels did NOT go well. I was determined to screen press the tea towels. I borrowed my friend Suzannah’s Ryonet home screen printing press and tried following her tutorial and the Ryonet YouTube tutorial. The whole process is very, very involved. The kit included everything I needed and the instructions were great! But, I didn’t give myself near enough time or room for error. It was one of those DIY fails that just really sucks. After I dried my tears of frustration, I scrapped the screen printing idea and went with the iron on transfer method.
I typically don’t enjoy the way the iron on transfer looks on fabrics. There is usually a line around the image that is slightly more glossy than I want. When the paper gets too hot it can yellow. Also, I never know how long it will last. I was pretty thrilled with the way these tea towels turned out though and would recommend the iron-on transfer as an easy way to make these. Follow the instructions on the iron on transfer paper.
Tips for best results when using the iron-on transfer method:
Prep your fabric. Wash, dry and iron your fabric before you apply the transfer. Will the transfer take if you skip this step? Yep. But, I think it benefits the entire project to take those other steps. I feel like the transfer goes on better and that it lasts longer.
Transfer the RIGHT image. Most transfer papers require you to print a mirror image of your image. Transfer paper, while not super expensive, isn’t cheap either. Losing an entire sheet due to a printing mistake would be a bummer.
Stick to single colors. I have found that when I use multiple colors I don’t like the look as much as I do when there is only one color in the image. This is totally a preference though!
Don’t use an ironing board. The instructions for my package of transfer paper said not to use an ironing board. This was the first time I’ve ever done it this way and I was thrilled with the results. Instead of an ironing board you want to find a sturdy surface that is about waist-high with an ironed pillowcase placed on top. It really makes the difference to have the leverage to apply even force while ironing.
Want to make your own Ryan Gosling tea towels?
Download my Hey Girl Tea Towel print and get started! Image of Ryan Gosling was licensed under CC 2.0 — sourced via Raffi Asdourian . I then modified the image. Tutorial coming!
Free printable—Click here to download your free transfer printable! I created it two where there are two per 8.5X11 inch page.
And, just because I thought this would also make for a cute framed print above a drying rack in the kitchen I also made an 8×10 printable. Click here to download you own free Ryan Gosling themed printable!
Love the idea but just don’t wanna make your own tea towels? These sketched tea towels by Dear Colleen are AMAZING and would make for a fantastic gift! They’d be a better quality and have THREE images of Ryan Gosling… so, there is that too!
(PS. I will give screen printing a shot again sometime soon.)
(PPS. Ryan, if you’re reading this… first, EEEEE! Second, we share because we love your work and enjoy the meme. Will take down with a note from you! )
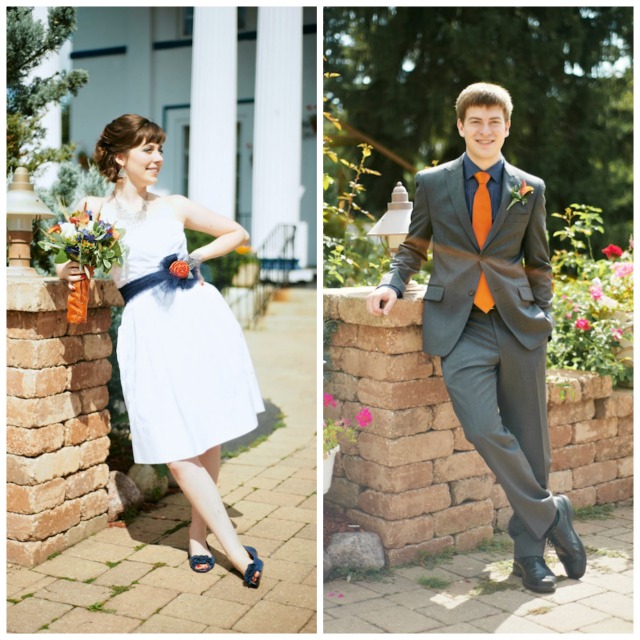
I am so honored to share my “wedding” on A Well Crafted Party! I have wedding in quotes because the long and short of it is–we were already married! My husband Kevin and I (who I refer to most often on my blog as Ktams) were married right out of college (we are Illini–I-L-L!) as we both agreed it made the most sense to start out in the real world as a team, and the easiest way to do this was to tie the knot! We were technically married in June of 2010, but at that point we had no money to have the wedding we imagined. So once the official stuff was out of the way, we began planning. Just over a year from the date we planned to throw a big party to celebrate our marriage with friends and families. We felt this was a great excuse for our friends to come back together and for family to share in the fun (as when we were married originally we only allowed our parents to be present–that’s right–no siblings, grandparents, or anyone else! We just felt like it was a slippery slope!). Looking back now, I realize how many diy wedding ideas I used to make the day a success–and I am excited to share!
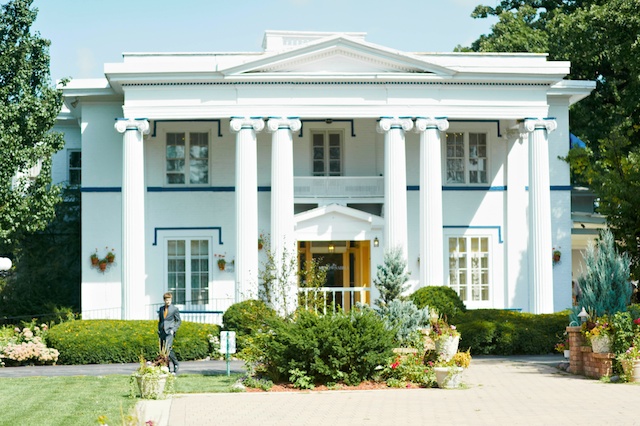
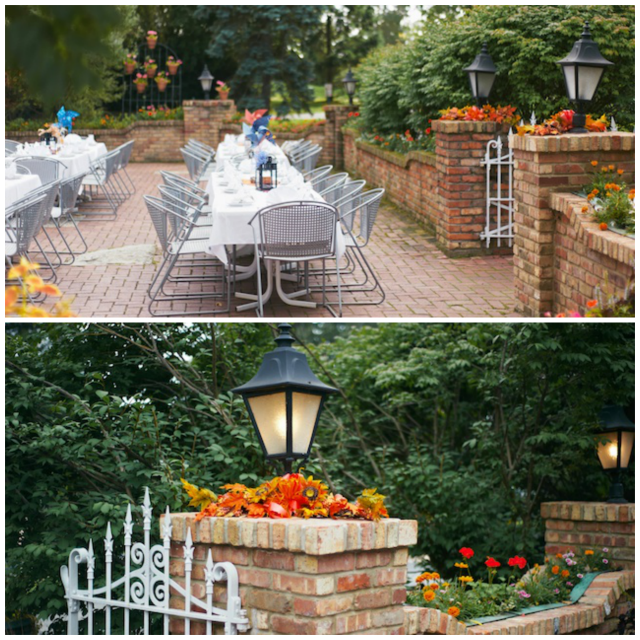
We picked a venue that would be a one stop shop–it was our one of our favorite spots–a Spanish tapas restaurant located near downtown Naperville, IL. Meson Sabika was a rehabbed old mansion on an expansive piece of land. We held the entire event out in their bricked patio, and left the doors open to get more drinks at the bar.
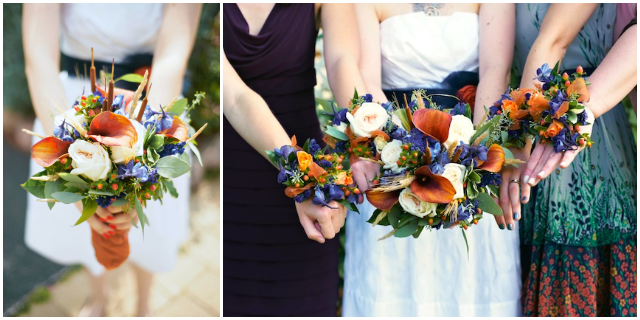
For our wedding, flowers were not a make or break discussion. I knew I wanted accents of orange and a predominantly mixed bouquet. I had also given leftover fabric I had from table cloths to the florist to wrap the bouquet. I felt like this held everything together nicely and it keep the flowers in perfect order for the whole event! The only thing I would do differently with my flowers is I would not use any pokey items–cannot tell you how many times I forgot not to smell my flowers and poked myself. Since we were throwing more of a party than a traditional wedding, I opted to get my closest girlfriends wrist corsages instead of nosegays–I had hoped this made them feel special and stand out, but it wasn’t like they had to tote obnoxious nosegays around all afternoon. My favorite items in the bouquet ended up being the big white roses and the hypericum berries–they all held up nicely throughout the day and they dried nicely.
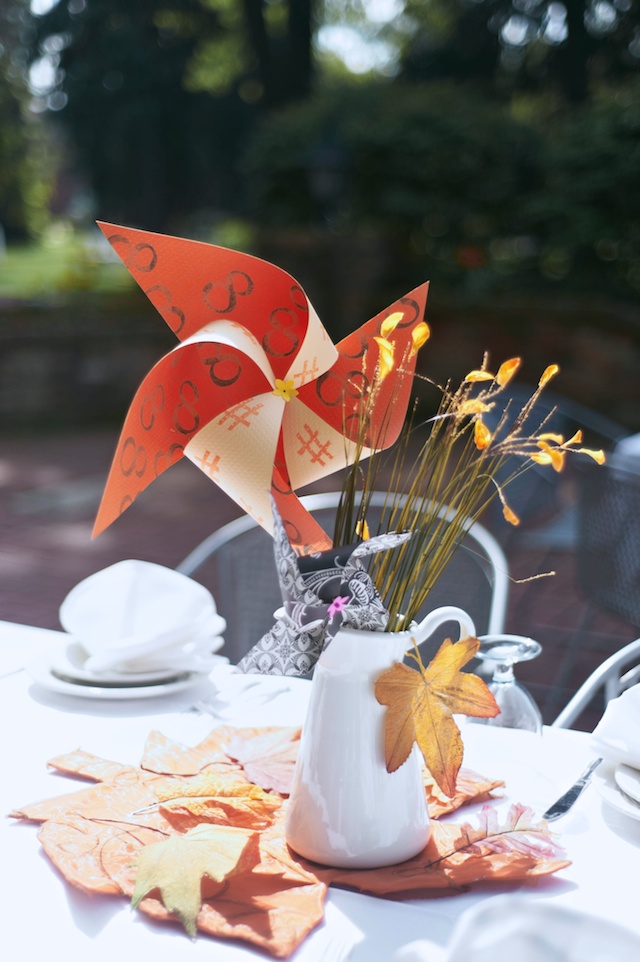
We had our celebration well before the leaves had changed that year–I remember how warm the summer was and the second week of September just wasn’t soon enough to enjoy some natural color. Instead, I did my best to create some color! My favorite DIY of the wedding was making large pinwheel centerpieces, and it saved us a ton of money because we didn’t have to purchase fresh cut flowers! I purchased patterned scrapbook sheets, stamped them, and followed a tutorial similar to this one to make both table marker pinwheels and smaller, more graphic pinwheels, which I used as seat finders for guests. I had some extras at the end of the craft so I added them to the pitchers to encourage people to add theirs to the centerpiece for the event. To this day I’m surprised at how well the smaller pinwheels held up–I still have a few of them in my potted plants at home.
To keep everything grounded in the vase (which I purchased at IKEA and gifted to friends and family afterward), I added river stones. I knew the pitchers were going to sit on white tablecloths so my mom and I came up with the idea of using leaf-shaped placemats to easily add a burst of color. We sewed on more of the same material we were using for the cake and gift tables to cover the placemats and pull everything together (it was opaque so it added nice texture and some neat stitching for the most part).
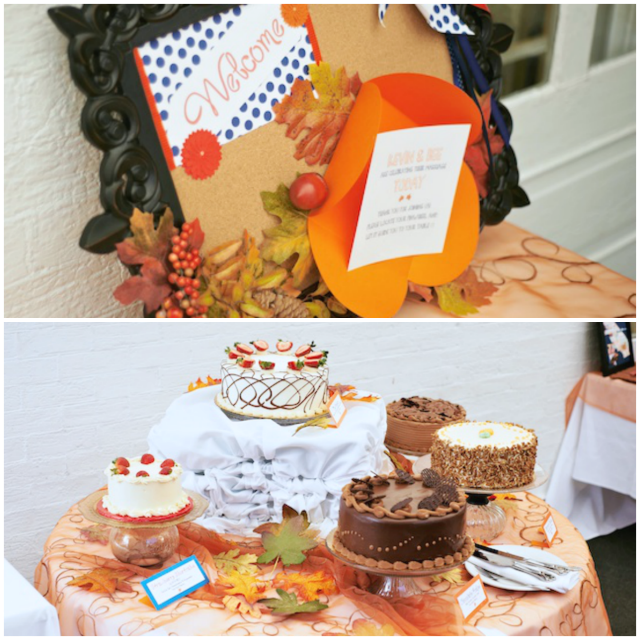
Another DIY I was really happy with the result of was a cake stand tutorial I found from none other than Jenni–before I even knew her or A Well Crafted Party! Creepy right? I found the tut on Pinterest for the stands she did for her sister’s wedding. My mom and I put a twist on it to make more of a rustic fall look. We used hot glue, which was actually easy to remove later so that we could use the items again and again.
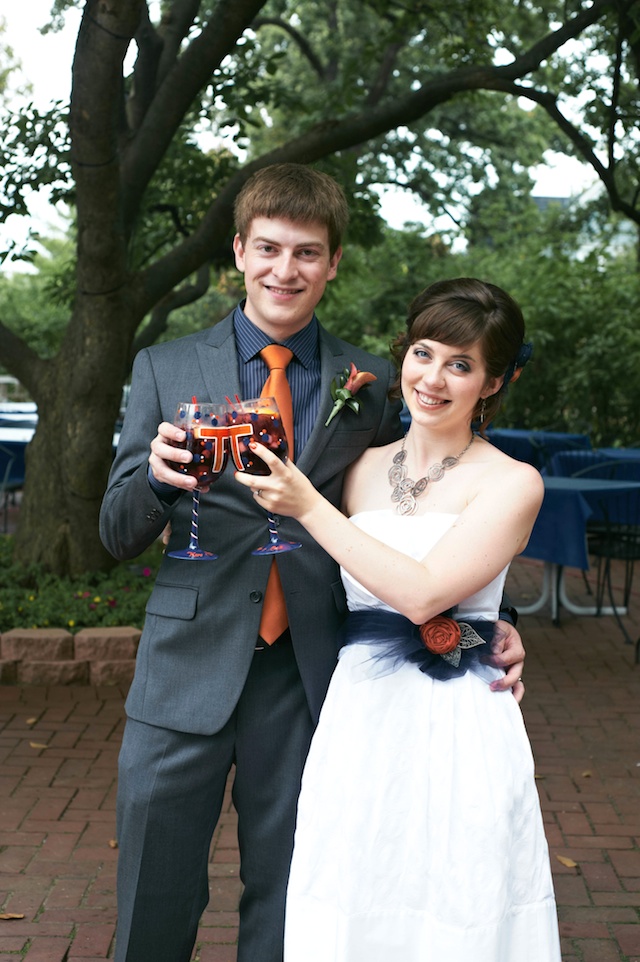
I have to throw a lot of credit to my mom for the little touches our celebration had. She collected a lot of rich looking silk flowers and purchased custom bows to tie everything together. She also gathered colorful mums to plant in the pots I had purchased (also from IKEA). As a gift to us, my mom had some very fun custom glassware made for us to use on the big day. They are my favorite keepsakes to date. It’s great to have someone you can trust to go to work and get some great fillers in to personalize the event.
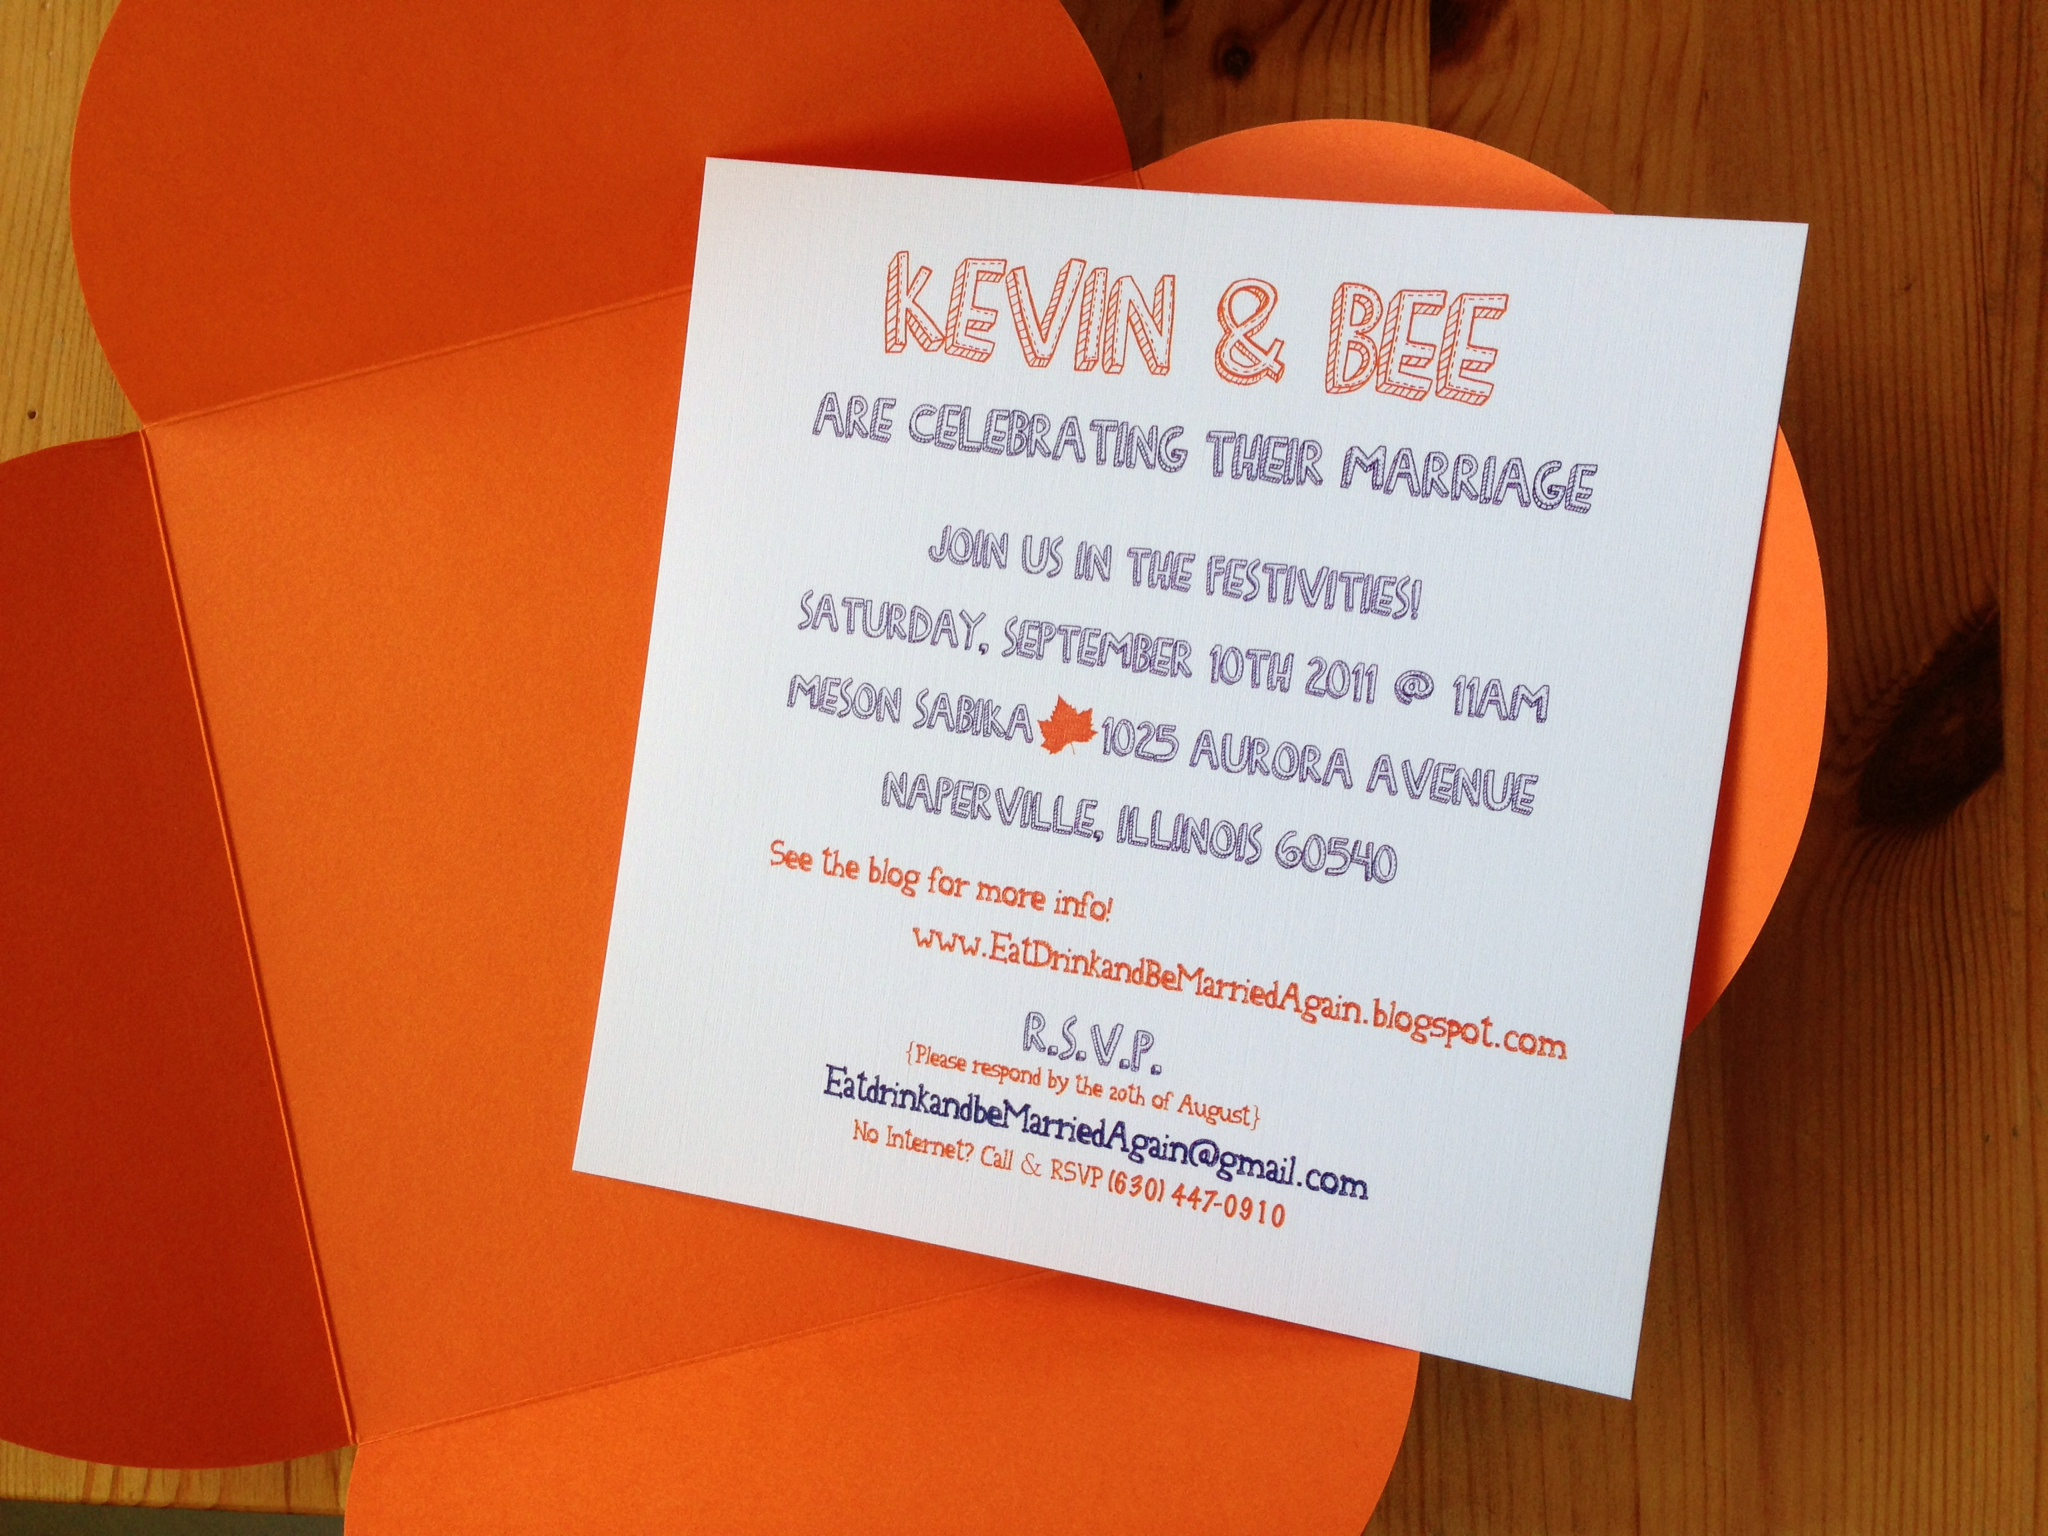
Additionally, I DIY’d our invites. Just to start, we saved money by putting out invites only–no save-the-dates–and I did my best to find the best quality and pricing for both the envelopes and cardstock. We also did all RSVPing online, so we saved additional money in printing and postage by creating a free blogger site and a google number for those who were technology challenged. I will forewarn that envelopes can change your shipping costs DRASTICALLY. I highly suggest taking your sample envelopes to the post office and have them measured and weighed with your cardstock before you go buying/printing in bulk. We ended up over-ordering on accident (remember to count couples not attendees!), and I made use of the excess invites by cutting them up and turning them into ornaments (check out this tutorial for the base of my idea). I purchased glass balls from a craft store, charms from Etsy, and curled the strips of paper around a small pencil, then placed them in the ball.
I think the biggest thing I learned in planning my own wedding was to let it go–no I will not break into a verse of Frozen, but I will say that you need to learn to let many of the little things go by the wayside or you’ll spend your whole day not enjoying the party! Was I upset that certain things didn’t come together how I’d hoped? Yes–but by the time I was putting my dress on for the day, I had decided that people were not there for the decor or even the (AMAZING) food! They were were to celebrate with Kevin and me. This is what refocused my energy to enjoy the day and make it a memorable affair.
What have you DIY’d for your big day that you’re really proud of? If you had the choice, would you DIY all over again?
A big thank you to Bee for sharing her beautiful wedding photos and Happy Anniversary! Please take a moment to hop on over to check out her awesome-sauce blog! She writes some pretty amazing recipes. Being someone who has actually tasted her cooking and have made her recipes I can give them my seal of approval!