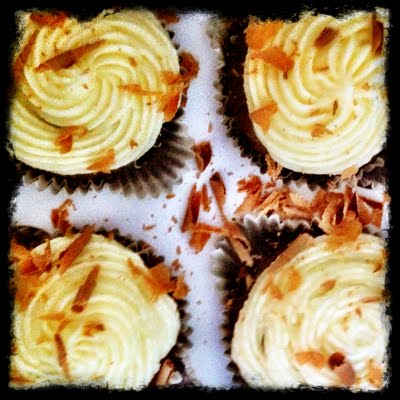
Category

Desserts

Category

When I make a pie, I focus a LOT on the crust of the pie. To me, the perfect pie crust is rich, flaky, buttery, and has a taste of saltiness. I’ve been “perfecting” my pie crust recipe for about a year now. I go into stages where I really want to get something done to my liking so I make them OVER and OVER again. This past year has been the year of pie crust in my home (maybe part of the reason for my expanding waist line…)

I love Fall. The leaves changing. The warm shades of colors. Tights. Boots.
Oh, and Pumpkin Spice everything!

Recently I was invited to a friend’s house for dinner and I wanted to bring a treat. So, I decided to make a cake. I love cake. And, sometimes I make my cakes completely from scratch. When pressed for time, however, I cheat a little and use a mix. I ALWAYS make my frosting though. I don’t think I could ever go back to store bought frosting now that I know how to make my own.

This cake was a bit of a cheat. I had seen somewhere, probably Pinterest, that someone had mixed a can of pumpkin into a box of spice cake. I thought it was brilliant. But, when making this cake I had no idea where I found that link and couldn’t remember what they added or didn’t add to make the cake come out right. I knew the pumpkin would change the moistness of the cake. So, I experimented. The cake came out wonderfully. So, I decided I must share how I did it.

Pumpkin Spice Cake with Maple Cream Cheese Frosting

The Cake:

Ingredients—
  • 1 Box of Spice Cake Mix
  • 2 Eggs
  • 1 Can of Pumpkin Puree (15 oz)
  • 1/3 cup oil
  • 2— nine inch round baking pans
Directions: 
  • Heat oven to 350 degrees F
  • Mix wet ingredients together, pour into dry mix, incorporate by mixing with hand mixer for 2 minutes
  • Pour into cake pans
  • Bake for 28-31 minutes or until tooth pick stuck into the middle of the cake comes out clean
  • Let cake cool on baking rack before frosting
Maple Cream Cheese Frosting
Ingredients:
  • 1/4 cup of maple syrup and extra for drizzling
  • 1 stick of butter at room temperature
  • 1 8 oz package of cream cheese at room temperature
  • 4 cups powdered sugar
  • 1 teaspoon vanilla
  • Dash of salt
  • milk to be used if needed for consistency ( I didn’t need it… but, some may!)
Directions:
  • Whip together butter and cream cheese using a hand or stand mixer
  • Slowly add in powdered sugar and continue to whip
  • Add in salt, syrup, and vanilla as you are adding in the sugar (makes the whipping process go easier)
  • Problem Solve. Is your frosting too thin? Add more sugar. Too sweet? More salt. Too thick? Add some milk. Too lumpy? Keep whipping. 
To frost cake: 
  • Trim tops of one of the two cake layers to make a flat surface. 
  • Top the trimmed cake with a large dollop of frosting, spread. 
  • Drizzle the frosting with maple syrup
  • Top the layer with the second layer of cake
  • Add a large dollop of frosting and spread across cake. 
I chose not to cover the sides of my cake. I also added some of Trader Joe’s amazing Trader Joe’s Cinnamon Sugar Grinder along the rim of the cake. Finally, I topped the cake with little flags made from fabric scraps and wooden dowels.

This was seriously one of the best cakes I’ve ever made. I’d love to know if you make this cake and how it was received!

This post has been linked up to Create and Share Linky Party over at Trendy Treehouse and Pincushion Creations Homemade By You.

*A link above is an affiliate link. I use and love the products I promote. But, if you happen to buy the product via an affiliate link then you help support the blogger that posted it. See here for my advertising policies. And, thanks for supporting me and my blog!

So, a few things before I share this recipe with everyone:

  1. I am not a nutritionist. I am not a doctor. I am a mom who likes to cook. That being said, I do know a little about things like calories, sodium, sugar intake etc. 
  2. I have no problem with sugar. I like sugar (a little too much). And, I don’t think it is a bad idea to introduce sugar to a child as long as it is managed. That being said, my son had not had sugar other than fruit (a whole different type of sugar) and exactly one bite of vanilla ice cream before he turned one. I didn’t want to load him up with sugar on his birthday. 
  3. I like cake. I love making cakes. I someday hope to share that love with my son. I wanted him to have a little smash cake on his birthday… so, I came up with a recipe that was tasty but didn’t load him up on a bunch of unnecessary fats & sugars.
  4. This is not gluten free. It is not dairy free. It is not vegan. It is not made with super awesome, healthy grains. This could be a whole bunch healthier. Personally, I probably wouldn’t eat it then. 

Now that bit is over with… this cake was TASTY. The cake was basically a normal easy cake recipe where I substituted banana for sugar and applesauce for oil/butter (another thing I wanted to cut back on in his first treat). The frosting was whipped cream cheese with a touch of vanilla and a touch of powdered sugar. The cake consistency was close to muffin rather than cake. But, it was a small price to pay when cutting out butter/oil!

(The smash cake did have a food coloring spray to make it yellow. I opted out of putting it on the cupcakes that all the other kids were eating.)
Funny thing about this cake… everything on the sweets table was melting in the sun at my little man’s party. Everything but this cake. They looked and tasted perfect the entire time! Thanks to Motormouth Studio for the pics!

Kid-Friendly Banana Cupcakes
Estimated Time: 28-25 minutes, Approximately 24 standard sized cupcakes

Ingredients
  • 1 cup smashed and strained banana
  • 1/2 cup applesauce
  • 2 cups cake flour
  • 3 large eggs
  • 2 teaspoons baking powder
  • 2 teaspoons vanilla
  • 1/2 teaspoon salt
  • 3/4 cup milk
Directions
  • Preheat oven to 350 degrees F
  • Prep cupcake tin with liners
  • Sift (I like to throw my dry ingredients in a food processor instead of sifting) flour, baking powder, and salt together in one bowl.
  • In another bowl, mix together the apple sauce, banana, eggs, milk, and vanilla. Whisk just a little bit so that they are fluffy. 
  • Slowly incorporate the flour mixture into the apple sauce mixture.
  • Spoon batter into cupcake liners (a hefty amount, but not too full… about 3/4 the liner works great)
  • Bake for approximately 18 to 25 minutes. The bake time varies with different ovens. If a toothpick is put in the center of the cake and comes out clean then the cupcake is done!
  • Let cool and top with frosting. Right before serving add a slice of banana to the top.

Now, I couldn’t go and make a healthier cupcake and then top it with sugary frosting. But, come on.. a cupcake just ain’t a cupcake without frosting. So, I opted to put a dollop of whipped cream cheese frosting on top. I made WAY too much frosting. So, if using this recipe plan on either putting on more frosting per cupcake, attacking frosting with a spoon, or saving it to go on a batch of cinnamon rolls!

Whipped Cream Cheese Frosting:

Ingredients:
  • 1 Large bowl, 1 kitchen mixer (hand held or standing work… you could do it by hand and not powered, but you have to have more muscles and time than I have!)
  • 2 packs of cream cheese (pretty sure that is 16 oz) at room temperature (very important)
  • 1 teaspoon vanilla
  • 1 tablespoon powdered sugar (this is significantly less than regular icing)
Directions:
  • Whip cream cheese in large bowl until fluffy.
  • Mix in vanilla and powdered sugar until incorporated.
  • Put in piping bag and pipe a dollop onto each cupcake
If you end up making these cupcakes (or a variation) I’d love to hear about how they turned out!