Category

Appetizers

Category

Growing up I was one of the children on the free lunch program at school. I often ate peanut butter and sugar sandwiches or hamburger helper because that is all we had available in our home. While we never starved—due to great programs available to us and parents and grandparents that worked very hard to make sure we were okay—we never did really get to try new things or enjoy different kinds of vegetables. A lot of what we ate was frozen, in a can or fast food.

The times that I did get to experience great foods, often at my grandmother’s home where she would spend hours over the stove making home made spaghetti and meatballs or fresh strawberry topped pancakes, introduced me to a world with which I would someday fall in love. As I grew up and began to earn my own money and buy my own meals, I discovered my deep love for food— fresh, different, amazing food. My first year of marriage I think my husband and I spent $800 a month on groceries for just the two of us. YIKES! (Although, it sure is nice to have a partner that values good food as much as I do!)

We can’t spend that much on food nowadays with more bills and a kid (and one on the way). Though, even when we struggle with money, our food budget is one area that I work hard to maintain enough budgeted money so that we can enjoy fresh fruit, vegetables and quality proteins daily. I meal plan weekly to make sure that we are spending our food budget wisely and getting to try new things. Trying new things, enjoying great food, and sharing that experience with others is pretty much what my life is about. Which brings me to this post… I just had to try artichokes because I had never really had any success with them before!

Parmesan & Garlic Stuffed Grilled Artichokes

These crazy looking vegetables have always alluded me. I love them in an artichoke spinach dip, but the one time I tried making them myself I had no clue how to even approach eating them, much less cooking them! Recently I was craving a really amazing Italian meal. At this point in my pregnancy I just knew I had to give into the craving before it drove me really mad, so I planned an Italian themed dinner party with friends. I knew that this was the perfect opportunity for me to give artichokes another try. After googling how to eat the suckers, I researched several different recipes to get the knack of how to cook them, and then tackled the project for the party.

Note: Seasoned home entertainers will tell you to never make your guests your guinea pigs for meals. Thankfully, my guests never seem to mind… even the one time my husband burned the spaghetti! It is a good thing our friends love us because I like to experiment often and I often make my guests my guinea pigs.


After discovering just how easy artichokes can be, I’ve now made them a few times and love them more and more! Below are some tips for cooking (and eating) artichokes plus my recipe for Parmesan and Garlic Stuffed Grilled Artichokes.


Parmesan & Garlic Stuffed Grilled Artichokes


Tips for cooking an artichoke:


The first time I tried cooking an artichoke I tried trimming, cutting and de-choke before cooking the artichoke. This led to a lot of pricks on my fingers, a bunch of furry bits all over my kitchen and most of the heart of the artichoke in my waste bin. It was an utter disaster and made me not want to try again. Thankfully, I found that doing just a tiny bit of prep and then steaming the artichoke makes the whole thing go much smoother.

  1. Trim your artichoke. Trim your artichoke by first cutting off the first inch or so of the tip of the artichoke. This one swift action will take care of much of the prickly parts! Then taking a pair of kitchen shears and cut the tips of all of the outer leaves. Trim the stem to about an inch or less.
  2. Steam your artichoke. Drop into a steamer basket with the stem side down. Steam for approximately 15 to 20 minutes. The bigger an artichoke is, the longer it will take to cook. I put a knife in mine to test doneness. Once the knife easily slipped into the artichoke I called it good!
  3. De-choke your artichoke. You can then eat the artichoke as described below, taking out the choke once you get to it. Or, you can cut in half, remove the choke (the furry looking bit right above the heart of the artichoke) with a spoon and then eat the artichoke.
  4. Make it even tastier! For an extra tasty artichoke check out my recipe below!


Tips for serving artichokes:


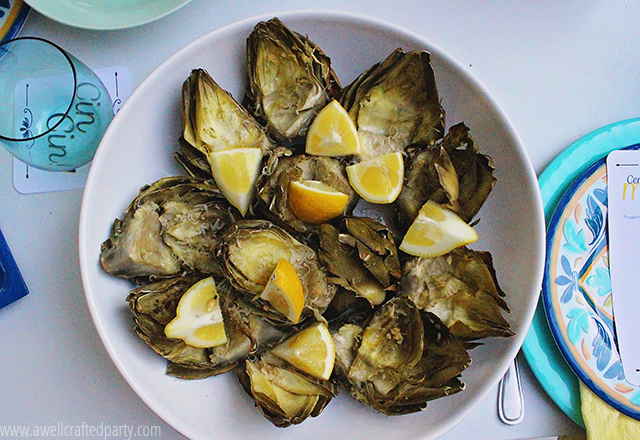
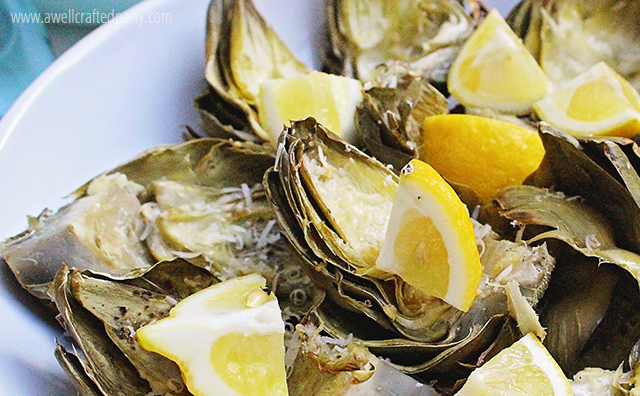
  1. Serve with dip, lemons or olive oil drizzled across them. Artichokes have a great flavor, but really can be amazing with a little something extra.
  2. Serve with a discard bowl. There are parts of an artichoke you just don’t want to eat… give yourself and your guests a bowl or plate to toss their leaves so that the inedible bits don’t end up back on the dinner plate.

How to eat an artichoke:


  1. Go from the outside of the artichoke to the inside. Take the outer leaves of the (prepped and cooked) artichoke and pull from the stem. They should come off easily. The only edible part of the artichoke is actually the part that was attached the the stem. It will be lighter in color and look meatier than the rest of the leaf.
  2. Dip (or not) into your favorite condiment and place the edible end in your mouth. Scrape the meaty bit into your mouth and discard the rest of the leaf. Note: As you get further into the artichoke you’ll find that more of the leaves are edible and you’ll get to enjoy more and more of the artichoke meat.
  3. Get that heart! Once you get down to the heart of the artichoke (basically what is left of a prepped and cooked artichoke after all the leaves and choke have been removed) eat the heart whole! YUM.
  4. What about the stem? The stem of the artichoke is also edible if trimmed and cooked, but can be stringy and woody.
[amd-yrecipe-recipe:4]

Great posts on artichokes with instructional photos:


  • — “Life lessons, artichokes, and hearts” from The Spicy Bee — Great photos showing how to cut the tips of an artichoke and a really sweet story that actually made me want to try artichokes again. Hers is so different from mine because she had been enjoying artichokes since she was a child. I hope my son looks back on food with the same fond memories!
  • — “How to cook and eat an artichoke” from Simply Recipes— Step by step directions for cooking and eating an artichoke. I loved the pictures for how to eat an artichoke. I would never have ordered an artichoke out before due to fear of having no clue how to eat them! This post can keep you from looking like a fool at the dinner table.
  • — “Prickly Treat” from Illustrated Bites— I love this illustration of how to cook and eat an artichoke SO much.


What was your first experience with artichokes like? Comment below!

Buffalo Chex Mix Recipe - A Well Crafted Party

The Summer holidays are coming around quick (Memorial Day is this upcoming Monday!) and with that comes the opportunity to spend time with the people in your life celebrating, remembering, and just enjoying each others company. It likely will also bring together a lot of hungry people! Enter Chex Party Mix… Chex Party Mix is super versatile and can feed a crowd. I came up with a couple easy recipes for an “All-American Chex Mix” flavors in honor of Memorial Day and Fourth of July. Though, they’d also work for any get together or even as a great camping snack.

I chose Buffalo flavor as one of my “All-American” flavors just because it reminds me of Summers back home in Oklahoma. I’m a huge fan of Buffalo Chicken Wings—especially during grilling season! Check out my first “All-American” Chex Party Mix recipe below and don’t forget to enter to win a $50 Visa Gift Card from Chex!

Buffalo Chex Mix Recipe - A Well Crafted Party

Buffalo Chex Mix Recipe - A Well Crafted Party

[amd-yrecipe-recipe:2]


Chex.com has a great site full of even more delicious Chex Party Mix recipes along with a bunch of other recipes that can be made using Chex! I’m also not the first person to come up with a Buffalo Chex Mix recipe… there are a ton of great ones out there. Mine is a fairly mild version that only gives you a little taste of that yummy buffalo sauce. Don’t forget to check back again soon for my other “All-American” Chex Party Mix recipe!

The fine people at Chex are giving away a $50 American Express Gift Card so that one lucky reader can go buy as much Chex Mix ingredients as they could need for future snacking needs! Winner must be in the United States. Please read the giveaway terms and conditions for more information.

Enter to Win!

a Rafflecopter giveaway

Sources: The USA Marquee Sign and patriotic travel mixing bowls came to me compliments of the Kohl’s Summer Entertaining Mailer. Check out your local Kohl’s for your Summer entertaining needs!

This post and giveaway was in partnership with Chex. Recipe and opinions are my own. Thank you for reading and participating in posts that help support this blog! 

Thank you to Fromager d’ Affinois for sending me a variety of cheeses to try and photograph for this post. All ideas and opinions are my own.

Tips for Creating a Cheese Board - A Well Crafted Party

If you entertain often, then cheese platters are your friend.* Not only are they delicious, but they are filling and SO easy to put together! When pressed for time, or bring an appetizer to a potluck party, or even when I just have a lot going on, I reach for my cheese boards and hit the deli section of my local grocery store.

Tips for Creating a Cheese Board - A Well Crafted Party

Tips for Creating a Cheese Board - A Well Crafted Party

Tips for creating a successful cheese platter:

  1. Buy a few different cheeses, but cap it at five different cheeses. Choice is awesome, but being overwhelmed by choice is not so fun. Keep your platters simple by choosing three to five cheeses to feature. For this platter I used three different flavors of cheese from the same brand of cheese, Fromager d’AffinoisBy going with the same type of cheese, with different flavors, I am able to let my guests enjoy discovering the differences in one type of cheese. You can also go with selections from different types of cheese to give additional variety.
  2. Make sure the cheese is easy to serve. There is nothing more awkward then trying to get some cheese off of a cheese platter that is too difficult to cut or there isn’t a cheese knife around to help get the cheese from the platter to the cracker. To ease the cheese serving conundrum pre-slice hard cheeses, put out cheese knives that are sturdy enough to cut the cheeses available, and make sure you have something to spread soft cheeses onto crackers. This platter features there soft cheeses (which I LOVE for entertaining) that are really easy to cut through with a simple cheese knife and spread onto a cracker.
  3. Serve cheese at room temp. You certainly don’t want your cheeses sitting out for hours, but cheese straight from the fridge won’t have the depth of flavor or ease of serving as one that has gotten to room temperature.
  4. Label your cheeses. I don’t know if there is anything quite as alarming to the palette than to think you are about to enjoy a nice double creme brie to get a tangy goat cheese flavor in return. While I’d love both types of cheese, it sure does help to know what is coming my way! It becomes even more important when you have the option of tasty accompaniments or toppings.  Whether you simple write out cheese names on a piece of paper and lay it next to the cheese or get fancy and print out specific labels, your guests will appreciate you taking the time to label!
  5. Don’t forget the accompaniments! Crackers are great for serving up with a good cheese platter. They are easy to store in the pantry for use at a moments notice, they make it easy to serve the cheese from the plate to your belly, and generally, can go with almost any kind of cheese. If you want to have a little more fun with your cheese platter you might think about alternative food items that might serve as a good cheese-to-belly delivery tool. Some cracker-alternative options include sliced cured meats, vegetables, breads, and different types of fruit. Is there anything better than a slice of aged cheddar on a crisp, ripe apple slice?
  6. Toppings set your platter apart. You’ve got the cheese all to temp and labeled, and your accompaniments are at the ready… it is time to think about what might really set your platter apart and make your cheese choices sing! Toppings such as pepper jelly, fig jam, apricot spread or even honey all make for tasty additions to a cheese platter. Have some fun putting out toppings so guests can mix and match.

Tips for Creating a Cheese Board - A Well Crafted Party

Tips for Creating a Cheese Board - A Well Crafted Party

More ideas for your cheese platters:

About Fromager d’Affinois:

Fromager d’Affinois is the top-selling cheese for Fromagerie Guilloteau. It is a smooth double cream cheese expresses that has been delicately matured. In addition to the original Fromager d’Affinois, this cheese also comes in flavors of Garlic & Mixed Herbs, Olive, Truffle, and Pepper. I tried the original, mixed herbs bleu and pepper varieties— all of which were creamy and flavorful! The high fat-content of this cheese positions it halfway between a traditional Brie and a triple-cream cheese. I was able to find this cheese at my local Whole Foods Market.

*Cheese platters are your friend unless you do not eat dairy, or your guests do not eat dairy. In that case, you may want to make other entertaining friends.