Category

Party DIYs

Category

There are so many fun options for holiday party favors… ornaments, sugar cookies, chocolates, stocking stuffers, etc. I wanted to do something a tad different for this holiday party. For this party, I wanted to share a holiday survival gift as a party favor! But, then I was stumped… what should I put in a holiday survival kit!? 

This is the tenth post of my 12 Days of Christmas DIYs for 2018. Each day for the next twelve days I share DIY projects, recipes, entertainment, and more, that you can incorporate into your holiday season. 

Holiday Survival Kit Party Favors from A Well Crafted Party
Party Favors!

I had so much fun researching ideas for a holiday survival kit. Many friends were texted, my husband was quizzed, and Pinterest was searched! I didn’t want it to be stuff like a penny or a piece of tape though, I wanted it to be USEFUL, funny, and… most of all, I wanted it to make sense! 

The great thing about creating a holiday survival gift party favor is that you can create your own with any items that you feel would help get your guests through the holiday season. But, because it is helpful to have a guide… here is what I built my kit with:

Everyone needs tape at Christmas, right?

Holiday Survival Kit

(The below links are affiliate links. A small portion of the purchases made through an affiliate link goes to supporting this blog at no additional cost to the shopper. Thank you for supporting A Well Crafted Party!)

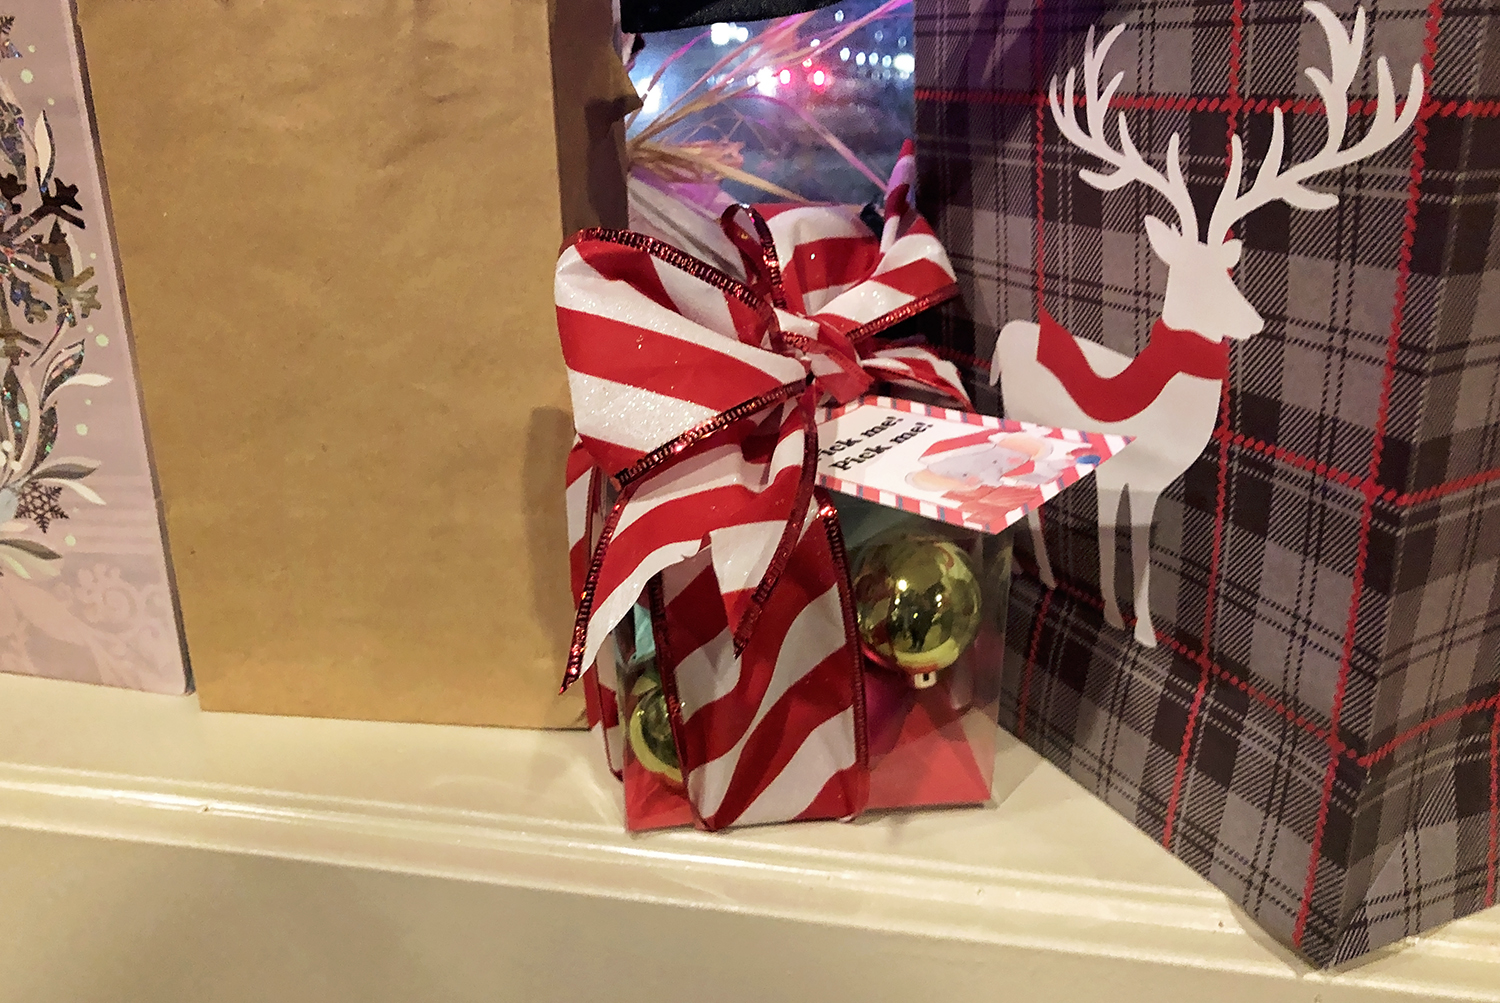
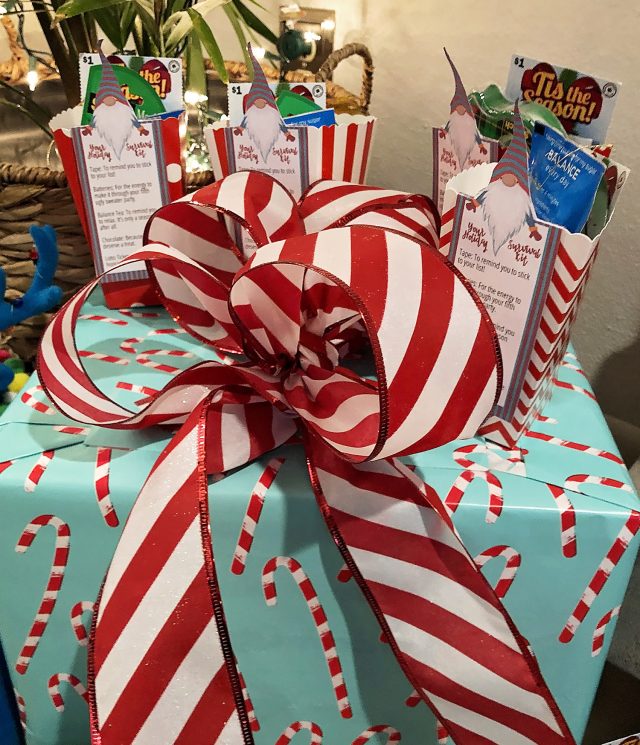
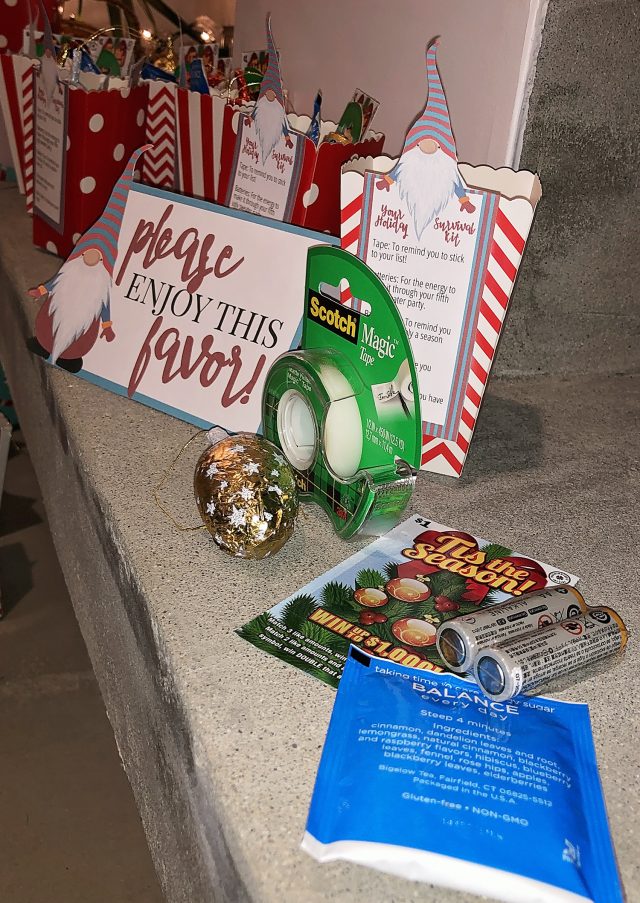
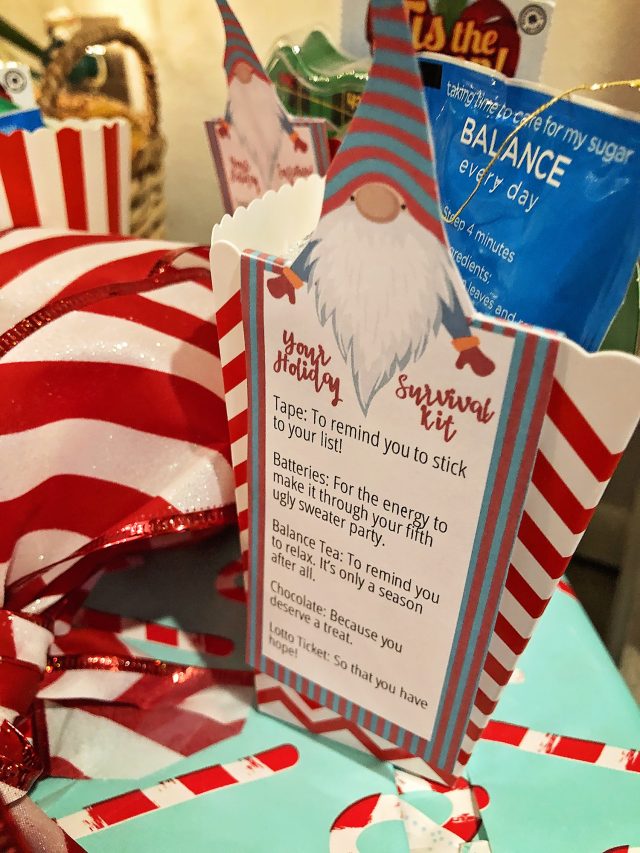
  • Popcorn box — I gave my favor in cute little popcorn boxes, but simple muslin or cellophane bags would have done the trick just as well!
  • Tape— “To remind you to stick to your list.” Also, just between you and me, I’m always running out of tape right before finishing my holiday wrapping! 
  • Batteries—”For the energy to get through your 5th ugly sweater party.” Also, because you ALWAYS need batteries over the holidays! 
  • Balance Tea— “To remind you to relax. It is only a season, after all.” Other tea bags that would be great for this is chamomile or a de-stress type tea
  • Chocolate— “Because you deserve a treat!” Also… chocolate. 
  • Lotto Ticket— “So that you have hope!”

Other survival kit ideas

Of course… AFTER I created these kits I got a few other fun ideas.

  • Small donations to a favorite charity to remind your guests the true meaning of the season. 
  • Ear plugs to protect your ears from all of the screaming kids. (Good screaming though, because… Santa!!!) 
  • Mini ice scraper because “sleet happens” (from a super creative friend of mine!)
  • Fillable gift certificate that can be used in case of emergency gift situations
  • Mini bottles of alcohol for some “holiday cheer”
Free Printable Tag for your Holiday Survival Kit from A Well Crafted Party

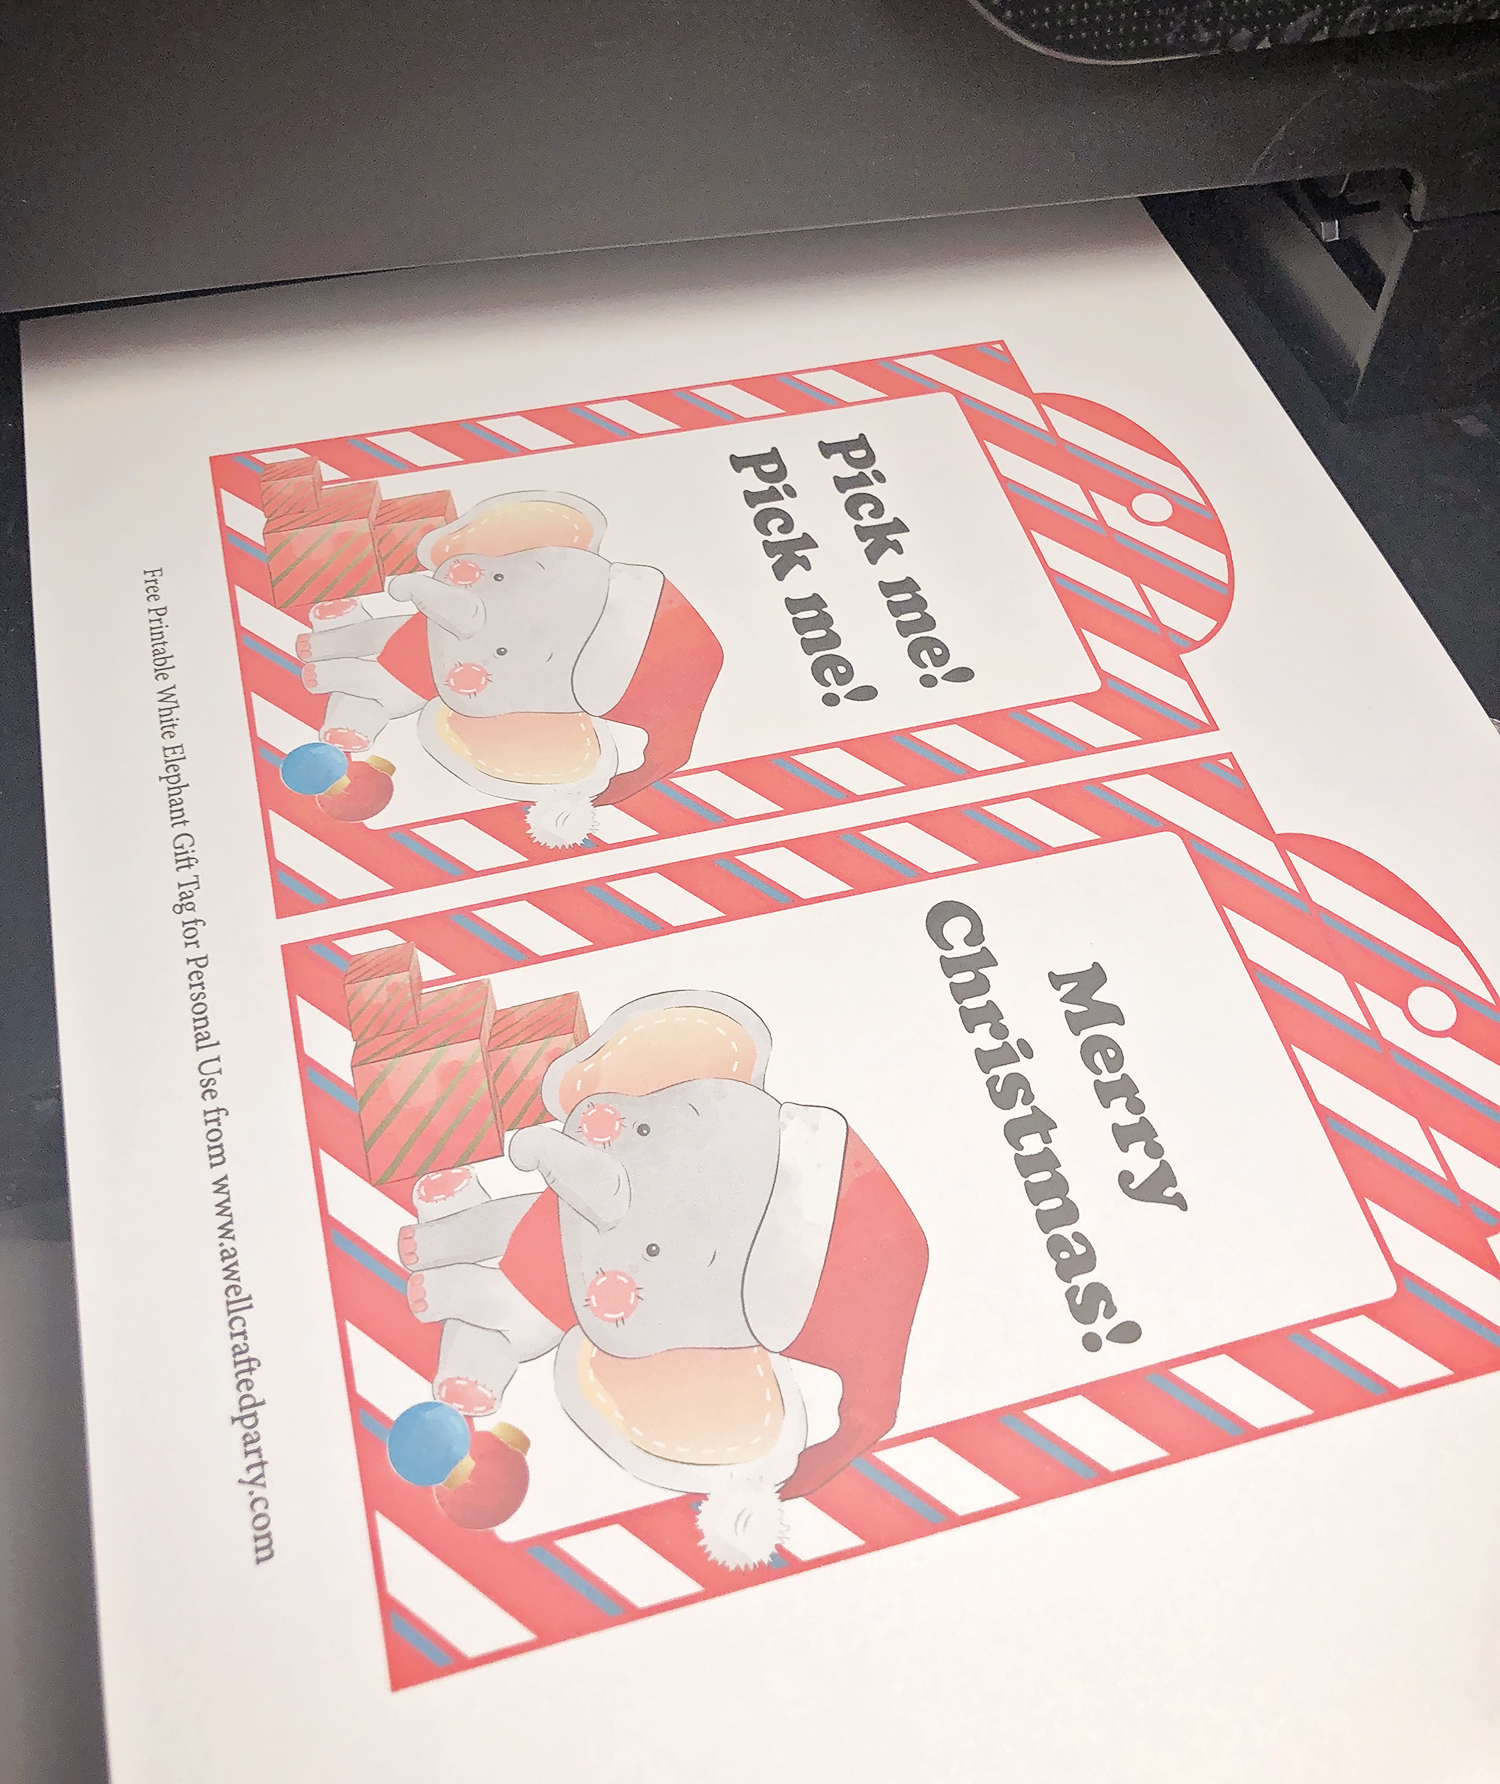
Holiday Survival Kit Free Printable

Because I’m me and I love a good printable I created a fun little tag to put onto my holiday survival kits. I’ve created a fillable PDF so that you can make your own as well! 

Directions: 

  • Download the free printable holiday survival kit tags and save to your computer. 
  • Fill in the tags using your favorite PDF software (Adobe Acrobat and Google work for this) using the items you are including in your gift. 
  • Print on white cardstock in full color. 
  • Cut out around the outer lines. Then cut into the white lines that are next to the elf’s arms. Fold on the line. Those two little tabs that are left can be taped or set onto your gift. Don’t need them? Cut them off and hole punch through the elf’s hat to make a tag you can use with a ribbon! 

I love beautiful floral arrangements as much as the next person. What I don’t love is spending an arm and a leg for them. I absolutely believe there are times where it is SO worth it. The pros are pros for a reason. However, when the budget is a concern and I have the time, I will put together a floral arrangement using budget blooms from my local grocery store or supermarket. Read on for tips on creating your own holiday centerpiece using supermarket flowers.

This is the ninth post of my 12 Days of Christmas DIYs for 2018. Each day for the next twelve days I share DIY projects, recipes, entertainment, and more, that you can incorporate in your holiday season. Most will be super simple!

DIY Holiday Floral Centerpiece | A Well Crafted Party

Tips for creating a beautiful holiday centerpiece with supermarket flowers

Supermarkets generally have really pretty flowers, but not necessarily beautiful arrangements. (I’m sure that some supermarkets will prove me wrong!) Below are some tips to help you create a great holiday centerpiece with supermarket flowers and below are the directions I followed to create my centerpiece!

  • Grab a few bunches of different flowers: While you can absolutely make a pretty arrangement with a single bloom, for this particular centerpiece I opted to give it a bit more dimension. When choosing your floral bunches consider getting the following: 1 bunch of large bloom, 1 bunch of medium-sized blooms, 1 bunch of filler blooms, and two bunches of greenery.
  • Incorporate non-floral holiday items to your centerpiece: I used holiday baubles for my arrangement. However, some other ideas include ribbon, favorite ornaments, or candy canes!
  • Think about structure: Using cellophane tape or floral wire can really go a long way in helping you build the shape you like for your centerpiece.

How to create a red, white, and green holiday centerpiece

This year I mostly used red and white (with pops of green, pink, and teal) in my holiday decor. So, when creating the holiday centerpiece I wanted to stick to a red/white/green color scheme. I used holiday baubles to give it a bit more interest as well. Below I use affiliate links. I receive a portion of a sale made from my affiliate link with no added cost to you my reader. Affiliate links help support this blog.

DIY Holiday Floral Centerpiece | A Well Crafted Party

Step One: Prepare your vase.

  • For this centerpiece, I chose to use a large round Libby glass bowl.
  • I filled the bowl with my holiday ornaments and then sat another bowl inside. The second bowl sat on top of the baubles.
  • I filled the second bowl with a water.
  • I then taped a grid onto the top of the bowl with clear tape. Floral tape would work okay here as well as long as it adhered to the bowl and didn’t show up too much.

DIY Holiday Floral Centerpiece | A Well Crafted Party

Step Two: Build the base of the floral arrangement.

  • Starting with the largest blooms (I used big white lilies), place throughout the grid on that you put on the second bowl. The grid will help keep a bit of the structure before you have other stems keeping things in place. I usually go with odd numbers here adding either three or five large blooms.
  • Add in your medium-sized blooms (I used red roses). Again using an odd number, put your medium-sized blooms throughout the arrangement.

DIY Holiday Floral Centerpiece | A Well Crafted Party

Step Three: Fill in the arrangement

  • Now, taking your filler blooms (I used some mums) fill in the arrangement making sure to separate any of the large and medium-sized blooms.
  • Taking your two greens (I used evergreen branches and berry branches) place the greens throughout the arrangement. This step actually helps solidify the structure of your arrangement. Cutting your greenery down to match the shape of the arrangement is really important here. There is no need to put an entire branch in the arrangement.

Leftovers…

I always have leftover blooms when creating a centerpiece. I usually use the leftovers to make smaller complimentary arrangements to use throughout the party space. If one bloom breaks too near the head of the bloom don’t throw it away! Float it in a clear vase filled with water for a simple, modern floral arrangement.

Happy floral arranging!


I love a good white elephant gift exchange. It gives people the opportunity to mingle and laugh and sends everyone home with a gift! This year I’m attending four different parties with white elephant gift exchanges! One of my goals each time is to create a package that really makes people want to open my gift… and then fill the package with something that is sure to be stolen a few times. I created these white elephant gift wrap printables with the adorable illustrations from Lorats from Freepik.

This is the sixth day of my 12 Days of Christmas DIYs for 2018. Each day for the next twelve days I share DIY projects, recipes, entertainment, and more, that you can incorporate in your holiday season. Most will be super simple!

White Elephant Gift Wrap Free Printables | A Well Crafted Party

So, how do you play White Elephant? I am pretty sure everytime someone has described the game it has sounded complicated, but in practice, it is really simple and a lot of fun. I’ll share the rules I have always played by, but always run with the host’s rules!

How to Play White Elephant

  • All players must have provided a wrapped give of a determined value and/or theme. Most of the times I’ve played the gifts were valued from $15-$25. However, I have totally played with a $10 limit before and had just as much fun. I added in theme here because I’ve been to some white elephant games that set not only a price range but also a theme for a party. One of my favorite traditions is attending a mug swap with friends and we all get different mugs and then play a game of white elephant for the mugs.
  • Write down a number for each of the gifts and put all the numbers in a bowl/hat/box/what-have-you.
  • Have every person draw a number.
  • The person that receives the number one is a very special player. They get the opportunity to go first, but then at the end of the game, they have the opportunity to steal a gift that hasn’t been locked (more on that later).
  • Person one picks a gift and opens it. They make sure to show the gift to everyone present.
  • Person two then has the option to either open a new gift or steal the gift from person number one. If they choose to steal the gift then person number one gets to open a new gift.
  • Each gift can be stolen only twice. Once it has been stolen a second time (so it has reached its third owner) it is locked and cannot be stolen again.
  • You can steal a gift back that was stolen from you only if it was not JUST stolen from you and is not locked.
  • At the end of the game the person with the number one gets the opportunity to either steal or end the game. If they steal then the person they steal from has the opportunity to steal, etc. In that case the game goes on until someone ends it by no longer stealing. The gifts that have been locked may not be stolen.

white elephant gift wrap ideas

Tips for Great White Elephant Games

  1. Pick a gift that you truly love or think that others will love. Sometimes White Elephant games are called “Dirty Santa” and are gag gifts. Even in that case, go for the funniest gift available rather than the dud gift. No one wants to go home with a dud!
  2. Wrap it up nice! Make the gift look so fun that someone wants to open it up right away. It is fun to see your gift opened up and stolen. Plus, people really enjoy opening gifts. On that note, don’t make the gift too complicated to open. Everyone will be watching and time may be limited.

white elephant gift wrap ideas and free printables Free Printables White Elephant Gift Wrap Ideas

Free White Elephant Wrapping Printables

Below are some free (for personal use) printable gift wrap items to help make your white elephant gift extra adorable. I mean… if I saw a gift with cute little elephants on it at a White Elephant Party, well, I’d for sure pick it!

  • Download the White Elephant Gift Tags 2UP: These are the larger tags. Print on cardstock, cut out along red outer lines, and hole punch the top circle. Attach to your gift with ribbon.
  • Download the White Elephant Gift Tags 4UP: These are slightly smaller tags. Print on cardstock, cut out along red outer lines, and hole punch the top circle. Attach to your gift with ribbon.
  • Download the 8.5X11 White Elephant Gift Wrap: Print this out on copy paper using a home printer or, for better quality, print at your local print shop. This size is perfect for small trinkets.
  • Download the 11X17 White Elephant Gift Wrap: Print this on copy weight paper at your local print shop.
  • Download the 18X24 White Elephant Gift Wrap: Print as a color engineering print from your local Staples or favorite print shop.

Have you ever been to a White Elephant party? If so, what was your favorite gift?