Category

Sides

Category

Growing up I was one of the children on the free lunch program at school. I often ate peanut butter and sugar sandwiches or hamburger helper because that is all we had available in our home. While we never starved—due to great programs available to us and parents and grandparents that worked very hard to make sure we were okay—we never did really get to try new things or enjoy different kinds of vegetables. A lot of what we ate was frozen, in a can or fast food.

The times that I did get to experience great foods, often at my grandmother’s home where she would spend hours over the stove making home made spaghetti and meatballs or fresh strawberry topped pancakes, introduced me to a world with which I would someday fall in love. As I grew up and began to earn my own money and buy my own meals, I discovered my deep love for food— fresh, different, amazing food. My first year of marriage I think my husband and I spent $800 a month on groceries for just the two of us. YIKES! (Although, it sure is nice to have a partner that values good food as much as I do!)

We can’t spend that much on food nowadays with more bills and a kid (and one on the way). Though, even when we struggle with money, our food budget is one area that I work hard to maintain enough budgeted money so that we can enjoy fresh fruit, vegetables and quality proteins daily. I meal plan weekly to make sure that we are spending our food budget wisely and getting to try new things. Trying new things, enjoying great food, and sharing that experience with others is pretty much what my life is about. Which brings me to this post… I just had to try artichokes because I had never really had any success with them before!

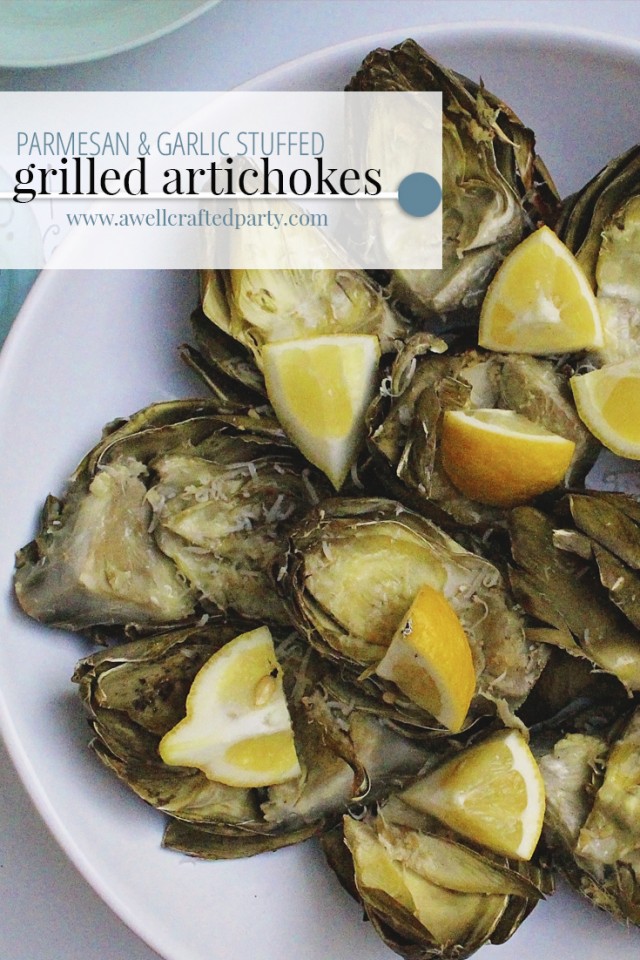
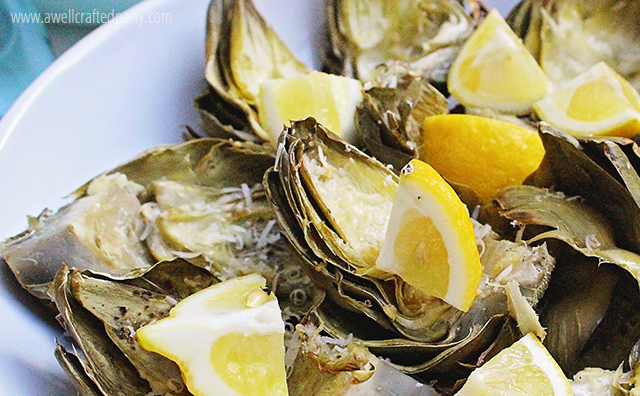
Parmesan & Garlic Stuffed Grilled Artichokes

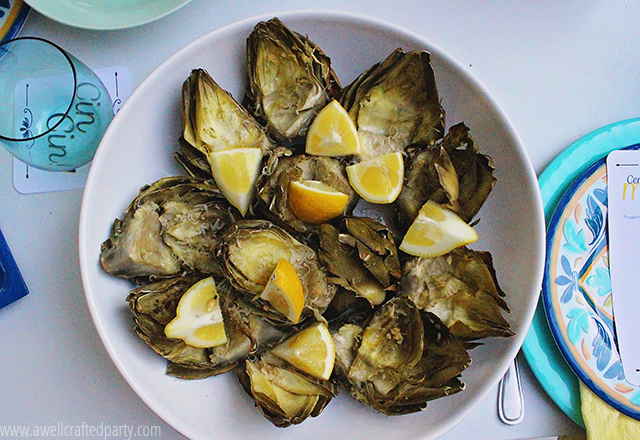
These crazy looking vegetables have always alluded me. I love them in an artichoke spinach dip, but the one time I tried making them myself I had no clue how to even approach eating them, much less cooking them! Recently I was craving a really amazing Italian meal. At this point in my pregnancy I just knew I had to give into the craving before it drove me really mad, so I planned an Italian themed dinner party with friends. I knew that this was the perfect opportunity for me to give artichokes another try. After googling how to eat the suckers, I researched several different recipes to get the knack of how to cook them, and then tackled the project for the party.

Note: Seasoned home entertainers will tell you to never make your guests your guinea pigs for meals. Thankfully, my guests never seem to mind… even the one time my husband burned the spaghetti! It is a good thing our friends love us because I like to experiment often and I often make my guests my guinea pigs.


After discovering just how easy artichokes can be, I’ve now made them a few times and love them more and more! Below are some tips for cooking (and eating) artichokes plus my recipe for Parmesan and Garlic Stuffed Grilled Artichokes.


Parmesan & Garlic Stuffed Grilled Artichokes


Tips for cooking an artichoke:


The first time I tried cooking an artichoke I tried trimming, cutting and de-choke before cooking the artichoke. This led to a lot of pricks on my fingers, a bunch of furry bits all over my kitchen and most of the heart of the artichoke in my waste bin. It was an utter disaster and made me not want to try again. Thankfully, I found that doing just a tiny bit of prep and then steaming the artichoke makes the whole thing go much smoother.

  1. Trim your artichoke. Trim your artichoke by first cutting off the first inch or so of the tip of the artichoke. This one swift action will take care of much of the prickly parts! Then taking a pair of kitchen shears and cut the tips of all of the outer leaves. Trim the stem to about an inch or less.
  2. Steam your artichoke. Drop into a steamer basket with the stem side down. Steam for approximately 15 to 20 minutes. The bigger an artichoke is, the longer it will take to cook. I put a knife in mine to test doneness. Once the knife easily slipped into the artichoke I called it good!
  3. De-choke your artichoke. You can then eat the artichoke as described below, taking out the choke once you get to it. Or, you can cut in half, remove the choke (the furry looking bit right above the heart of the artichoke) with a spoon and then eat the artichoke.
  4. Make it even tastier! For an extra tasty artichoke check out my recipe below!


Tips for serving artichokes:


  1. Serve with dip, lemons or olive oil drizzled across them. Artichokes have a great flavor, but really can be amazing with a little something extra.
  2. Serve with a discard bowl. There are parts of an artichoke you just don’t want to eat… give yourself and your guests a bowl or plate to toss their leaves so that the inedible bits don’t end up back on the dinner plate.

How to eat an artichoke:


  1. Go from the outside of the artichoke to the inside. Take the outer leaves of the (prepped and cooked) artichoke and pull from the stem. They should come off easily. The only edible part of the artichoke is actually the part that was attached the the stem. It will be lighter in color and look meatier than the rest of the leaf.
  2. Dip (or not) into your favorite condiment and place the edible end in your mouth. Scrape the meaty bit into your mouth and discard the rest of the leaf. Note: As you get further into the artichoke you’ll find that more of the leaves are edible and you’ll get to enjoy more and more of the artichoke meat.
  3. Get that heart! Once you get down to the heart of the artichoke (basically what is left of a prepped and cooked artichoke after all the leaves and choke have been removed) eat the heart whole! YUM.
  4. What about the stem? The stem of the artichoke is also edible if trimmed and cooked, but can be stringy and woody.
[amd-yrecipe-recipe:4]

Great posts on artichokes with instructional photos:


  • — “Life lessons, artichokes, and hearts” from The Spicy Bee — Great photos showing how to cut the tips of an artichoke and a really sweet story that actually made me want to try artichokes again. Hers is so different from mine because she had been enjoying artichokes since she was a child. I hope my son looks back on food with the same fond memories!
  • — “How to cook and eat an artichoke” from Simply Recipes— Step by step directions for cooking and eating an artichoke. I loved the pictures for how to eat an artichoke. I would never have ordered an artichoke out before due to fear of having no clue how to eat them! This post can keep you from looking like a fool at the dinner table.
  • — “Prickly Treat” from Illustrated Bites— I love this illustration of how to cook and eat an artichoke SO much.


What was your first experience with artichokes like? Comment below!

Simple decor for an outdoor meal - A Well Crafted Party

The warmer days of Spring are here and Summer is just around the corner. For me this means that it is time to bring dinner OUTDOORS! Spring and Summer holidays and special occasions (Mother’s Day is Sunday!) are the perfect opportunity to bring a meal outdoors. The change of scenery can help make any meal feel like a special meal. But, not every meal makes for a great outdoor meal. You’ll want a meal that can hold up to the weather, be easy to serve and not too complicated to pack up and bring to wherever you are having your outdoor meal. When Grocery Outlet asked if I wanted to work with them on a post I immediately thought of all the fun outdoor items that they get this time of year, and wanted to throw a little outdoor party in honor of Mother’s Day. Below are some of my tips for creating a great outdoor meal. Check in tomorrow for a few recipes that anyone can make that are great for an outdoor meal!

Quick, Easy Outdoor Meal Anyone Can Make - A Well Crafted Party

What makes a great outdoor meal?

I think that there are a few factors that make for an outdoor meal, including simplicity. Part of eating outdoors should be that the whole meal has a more relaxed feel to it. Even if you are going super fancy and formal, the meal itself can be made simple and easy to eat while still being elegant. Last year I went to a wonderful outdoor farm to table meal that completely hit all my favorite notes of an outdoor meal! Here are my tips for what makes a great outdoor meal:

1. Keep it Simple – The meal does not need to be complicated nor have a lot of steps. The perfect outdoor meal can either be cooked outdoors, or packed up and easy carried outdoors. When planning an outdoor meal you’ll want to keep your ingredient list down (at least the items that are going to the table, if you want to prep a complicated many ingredient meal at home that still carries nicely and is easy to serve then by all means, go for it!), keep the garnishes to a minimum and let the meal really be the centerpiece of the experience.

2. Make sure it holds up to the weather- Besides food safety, considering the weather is important for the overall meal experience. If the meal you are serving really tastes best piping hot then you’ll need to figure out a way to cook or at least reheat outdoors so that the wind doesn’t take down the temp. Or, you can choose a meal that can be served at room temperature or cooled. If it is really hot then you might need to think about whether your desserts or meal items are going to just melt while waiting to be served. Of course, don’t forget about food safety as no one likes food poisoning. Items that are sitting out need to be properly cooled or heated to keep the items out of the danger zone.

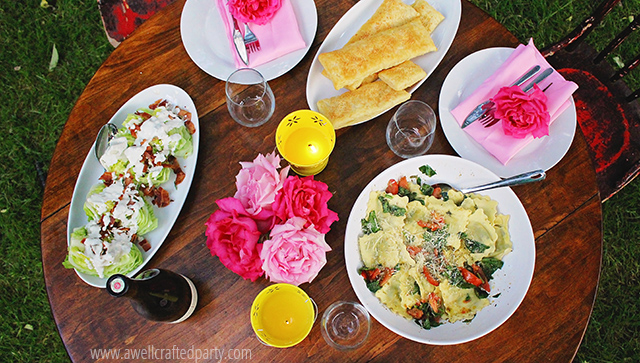
3. A pretty setting – Eating outdoors can be a wonderful experience that can make any meal feel like a special occasion. Of course, if that meal is served in a not-so-ideal space and handed out wrapped in plastic it can feel more like a fast food experience than a special occasion. Take a few moments to make the meal special by taking care on how it is served. Even dressing up your picnic items a bit can make an ordinary meal feel extraordinary. When throwing parties in my back yard I often opt to cut flowers from my yard and use my basic dishware from the house. I leave my really nice dishware inside, but the basics can still feel dressed up when surrounded by nature! When I picnic I try to make things nicer by wrapping them in parchment paper and twine rather than just plastic baggies, or serving items on bamboo plates or reusable outdoor plastic plates instead of opting for paper.There are also a lot of great brands of really beautiful paper plates out there that can be perfect for making an outdoor meal feel special.

4. Think about pests – Nothing can ruin a meal faster than a few pests. Supply bug spray, plant bug repellent plants around your yard, or use some citronella candles to ward off pesky mosquitoes and flies. I found these adorable yellow tins with citronella candles at Grocery Outlet for less than $2 and bought a whole bunch of them for my outdoor parties. Not only do they look cute on the table, but they help ward off unwanted bugs!

Don’t forget to check back tomorrow for some super easy recipes that ANYONE can make for a great outdoor meal!

Enter to win a giveaway to Grocery Outlet

Grocery Outlet wants to help you serve a great outdoor (or indoor) meal and are sharing a $25 Gift Card with one lucky reader. Grocery Outlet operates 210+ stores in California, Idaho, Nevada, Oregon, Pennsylvania, and Washington. Check out the Grocery Outlet website to find a store near you!

a Rafflecopter giveaway

This post was created in collaboration with Grocery Outlet. All opinions are my own. Thank you for reading and sharing posts that are created in partnership with brands that help support this blog. 

Disclaimer: I was offered compensation for my work on this post about Amaize Sweet Corn. The below idea for how to cook and eat Amaize is my own. All opinions are my own. Thank you for reading, sharing, commenting, and interacting with sponsored posts on my page. This helps support this blog and keeps original content coming your way!


Fire Roasted Corn from A Well Crafted Party

Little known fact about me… I went to high school in the middle of a corn field. My senior shirt had a caricature of my entire class (all 40 or so of us) in the middle of corn with the caption “Children of the Corn!” Besides being a little bit creepy… it was great growing up with farms all around us! I was raised on tasty corn on the cob, creamed corn, sweet corn, pop corn and the likes. While I don’t eat as much corn as I used to, I do like to dress up salads, garnish tacos, or just eat a perfectly cooked corn-on-the-cob in the hot summer months.

When I received a box of Amaize, a sweet corn, right before heading out camping I knew that I wanted to try roasting it over a fire. Pretty much everything tastes better over a fire while camping. But, I gotta say, cooking over a fire isn’t always the easiest! The heat is constantly changing, you have to make sure your food doesn’t catch on fire, and you have to sometimes deal with smoke. These corn on the cobs were SO worth it though!

How to Make Fire Roasted Corn

Ingredients:

  • Corn with husks (I used the Amaize Sweet Corn)
  • Contained fire with grill grates positioned above it. (Tip: Make sure the fire is burning completely and fairly consistently. I usually wait until some of my wood looks more like charcoal before throwing down some food on the grill.)
  • Tongs
  • Sharp Knife & Cutting Board
  • Butter & Seasonings of Choice (I used salt, pepper, and an italian seasoning blend)

Fire Roasted Corn a How To from A Well Crafted Party

amaize-fire-roasted-corn-cutcorn

Fire Roasted Corn from A Well Crafted Party

Directions:

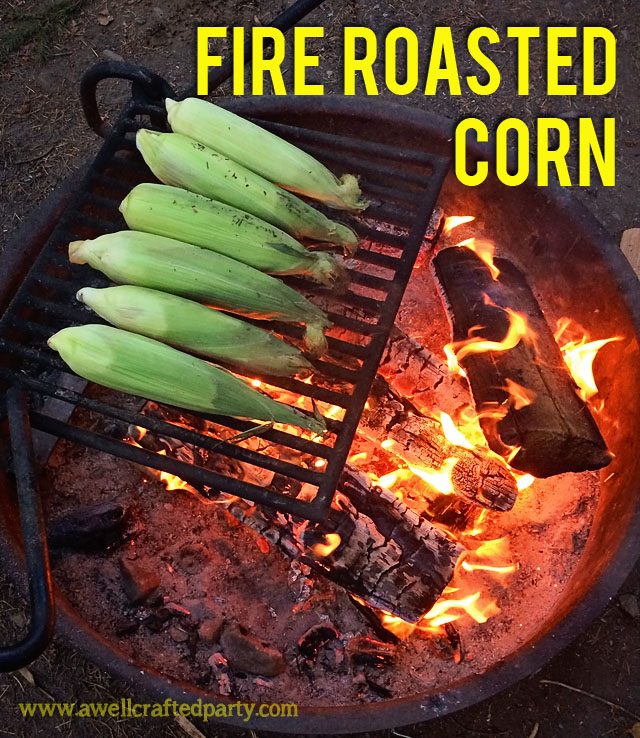
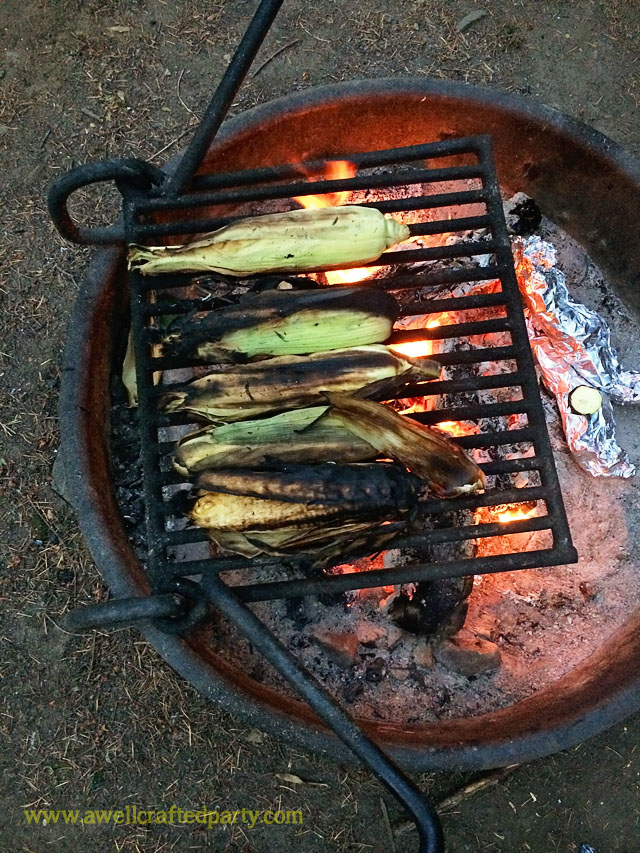
  1. After your fire is burning fairly consistently (not huge flames!) put down the corn husk and all on a grill grate above the flames. That is right… you don’t need to peel back the husks, don’t need to de-silk the corn, and you don’t need to wrap it in anything. Bonus, if you accidentally drop an ear in the dust it won’t matter because it is protected by a husk! Don’t worry if your husks are getting a little singed. Your corn will still be great unless the husks begin to come off completely.
  2. Roast for approximately 1 hour— rotating your corn every 10 to 15 minutes. This is absolutely not precise! Fire burns at different temps depending on a lot of different factors. Test the corn by squeezing with your tongs or sticking a fork in them. If it feels like there is some give or juice comes out then it is a safe bet that they are done. When I feel like the corn is done I typically pull one out and cut it up to test. If it isn’t quite done then you can always wrap the corn in foil and cook it a little longer.
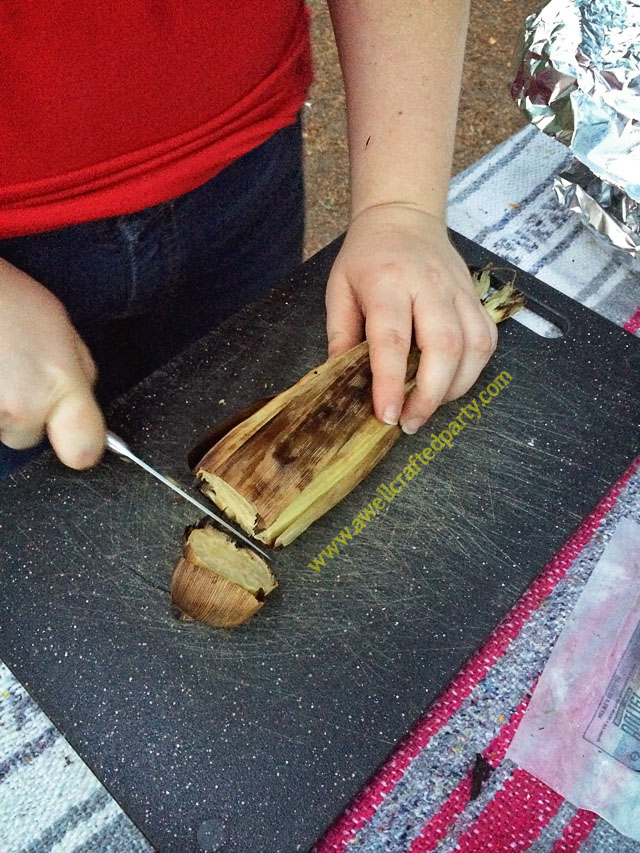
  3. Using tongs, put a corn on the cob on your cutting board. Slice off the back end of your corn.
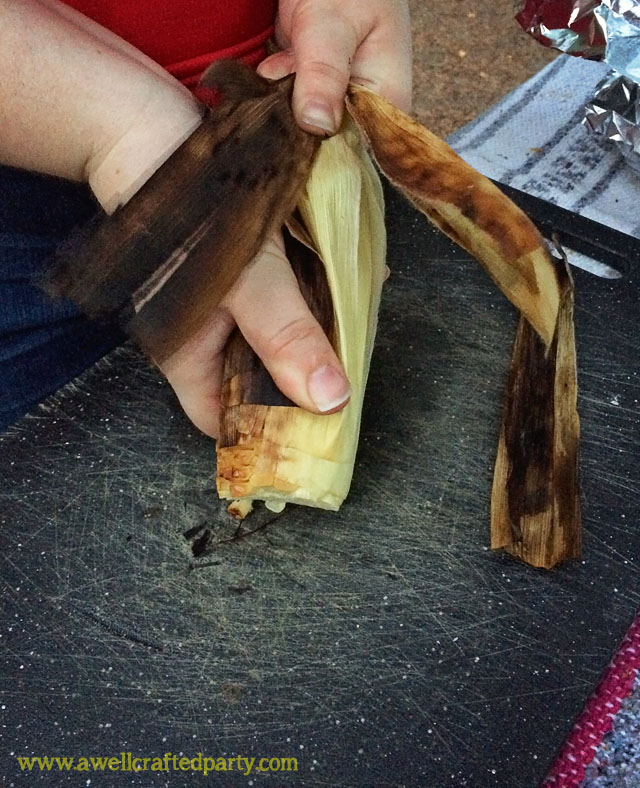
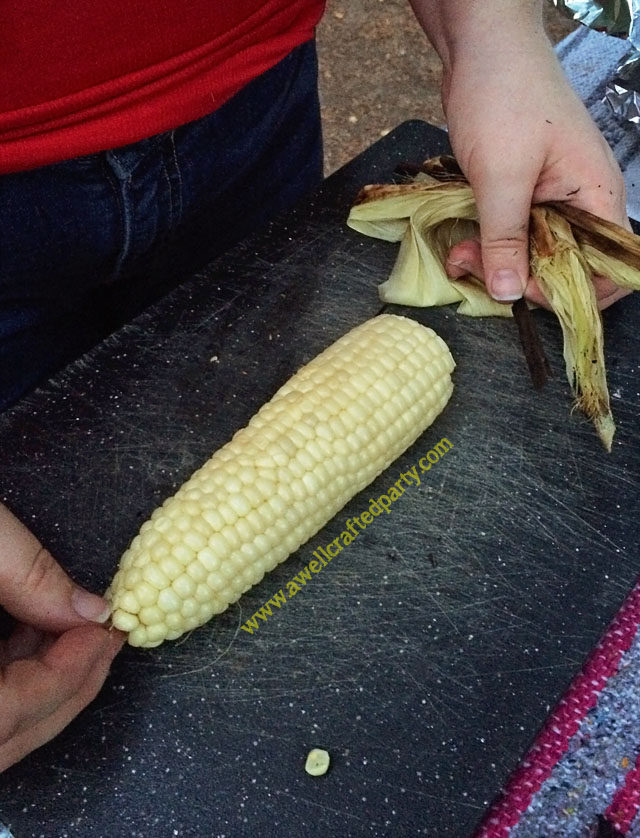
  4. Then, holding the corn husk firmly at the top of the corn, squeeze the corn out of the husk. (Saw this little corn trick via Instructables using microwaved corn. It totally works on roasted corn as well! Changed my life.)
  5. Doctor your corn with butter and seasonings… enjoy!

Fire Roasted Corn from A Well Crafted Party


More About Amaize Sweet Corn:

  • Amaize Sweet Corn was created using traditional, natural breeding methods through hybridization meaning this corn is never genetically modified. (Non-GMO)
  • The corn is sweet and crunchy… it didn’t get gross and mushy after cooking!
  • The corn had a 22 year development period. Seriously, so cool to think about how many different variations and flavors were created to get to this sweet and crunchy corn.
  • Amaize is available from June to September and is currently being sold for a limited time exclusively in Portland at New Seasons Market.
  • Follow along on their Facebook page to learn more!

PS. Please be careful of fires this time of year and pay attention to your local burning laws!

What do you like cooking over a camp fire?