Category

Tutorials

Category

I love when I go into a party and I see fresh flowers. But, I also know that fresh flowers can be expensive! Lately, I’ve been really into creating floating floral centerpieces because they are more cost effective and just plain gorgeous.

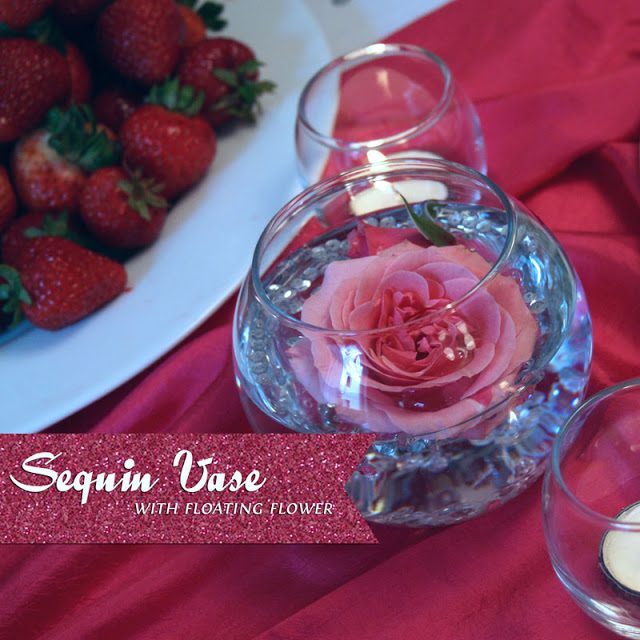
Yesterday I shared a few photos of my friend Suzannah’s Pink and glamorous 25th birthday party. One of my favorite DIY decor elements was the sequin vases filled with floating flowers.

This simple DIY only cost me around $2 per centerpiece! Using only some round vases from the Dollar Tree, a little glue, a bag of sequins from the local craft store, and a small bunch of roses I was able to create several of these little beauties.

How to create your own sequin vases with floating flowers:

  1. Gather your supplies: 1 vase, glue, paint brush, sequins, water, flower, and scissors. I used Elmer’s glue. Mod Podge would also do well. I also prefer roses for this type of centerpiece, but many other flowers would look just as gorgeous. I just happen to love how the rose looks all opened up and floating in water.
  2. Using a paintbrush, paint a thin layer of glue on the bottoms and sides of the vase.
  3. Pour sequins in vase and shake until covered. Let dry.
  4. Prep flowers by cutting the flowers at an angle at the place that the head of the flower meets the stem.
  5. Pour water into the dried vase. Some of the sequins will come loose and float to about an inch or two from the top of the vase. I like this and left it that way for the party.
  6. Drop the flower head into the water with the petals facing upwards. If you are using a rose and it hasn’t opened up just yet, lightly fluff the petals with your fingers or open the bud with running water. Be careful not to open the bud too quickly, as it may fall apart. 
Have fun creating these fun, inexpensive, and beautiful floral arrangements! I’d love to see a photo if you do this at one of your future events! 
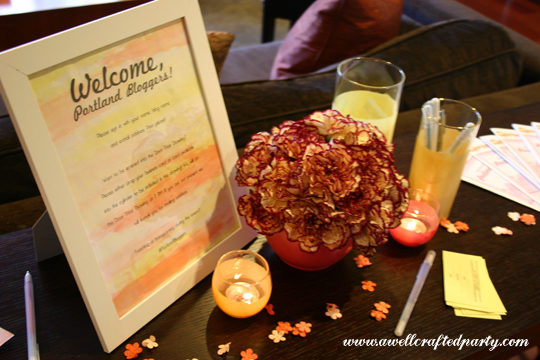
One of my favorite parts of the recent Portland Blogger meet-up was creating some of the pretty spring decorations for the event. I wanted to bring in some of my favorite spring/summer hues without breaking the bank. So, a few cans of spray paint later and I had fun decor items that could serve multiple purposes. You can customize the look to fit ANY party by just changing the color! 
 Supplies:
Glass vases and/or candle holders
Alcohol to remove stickers
Painter’s tape
Primer Spray Paint
Spray Paint in your choice of color
Spray Sealant
 
Step One: Take off the stickers (if there are any) from your vessel.
 I took of the stickers by rubbing them with rubbing alcohol. 
After the alcohol sat on the sticker for a few moments the sticker pulled right off.
Remember to clean the and dry the vessel after using the alcohol.
Step Two: I really wanted the top of the vases and candle holders to be left unpainted. So, I ran painters tape along the tops of the vessels. I varied the width of the tape for my project.
Step Three: In a well-ventilated and protected area spray the vessels with a primer coat. Let dry for time specified on the back of the spray paint can.
Step Four: Spray the vessels with a coat of color. Let dry for time specified on the back of the spray paint can. Give the vessels a second coat if needed.


Step Five: Spray the vessels with a coat of sealant to keep the paint from scratching.
Step Six: Remove tape! 

photo via Vintage Pretty
The vessels made great vases for the fresh flower arrangements. They also held pens and forks throughout the party. And, best of all, they made beautiful candle holders. 
They really gave a beautiful glow! 
I’d love to know if you attempt this DIY and would really love to see photos of the finished product!
 
Today’s {Mommy Monday} posts is a guest post from the lovely Becky from Pierce’d Photography.
~*~
As the youngest sister in my family, I have received many hand-me-down items from the nieces and nephews that have gone before.  We have furnished our kids’ bedrooms and filled their closets with all sorts of previously-used family merchandise. So when my daughter came along, we were simply going to reuse the crib bedding from her big brother; even though in its array of pastels, no feminine color could be found.  Until, that is, my oldest sister passed along a green and pink bedding set that perfectly matched the paint in her room.My daughter is now a toddler and, even though she still sleeps in her crib, having a just-my-size pillow and sheet to cover with became her latest need.  With the risk of SIDS passed, we obliged but did not want to splurge on new toddler sheets that would only last a year at most before she moves into a twin sized bed.

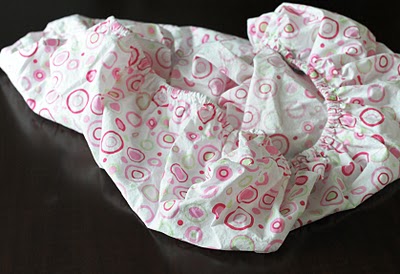
Luckily for us, two of those matching fitted crib sheets were actually too snug for our mattress and were sitting quietly in the drawer, awaiting a new purpose. For the cost of an afternoon and thread, we were able to re-fashion those fitted sheets into perfectly sized flat sheets for our two-year-old.  This is a great project for garage sale finds as well.

Supplies needed: Seam ripper, sharp scissors, straight pins, matching thread, sewing machine.

Step one: Take out elastic and seams using a seam ripper.  Please note: this is the most tedious part of the process. Also, save both the elastic and any scrap material. These may come in handy for future projects.

Step 2: Iron edges of sheet so they will be flat.  May need to use starch or wrinkle releaser while ironing.


Step 3: Decide which sides you will keep and prepare to cut off remaining sides.  Pictured are two sheets.  The bottom one is the one I am using for this tutorial and the top sheet is one I already did.  For the top sheet, I cut off the two longer sides, which resulted in a long, thin flat sheet – we thought it was too thin.  So for this one, I am cutting off the two shorter sides so it will be a bit shorter and wider.

Step 4: Cut off two parallel sides so even with remaining edges.  Using another flat sheet as a guide, straight pin in a hem on each side.  My top panel was about 2.5 – 3 inches wide, and the other sides were about 1/4 of an inch wide. Hint: Once the top panel is pinned, match the edges by folding in half.  If you hold it up to light, you will be able to tell if your panel is even all the way across.

Step 5: Sew.

Step 6: Enjoy – just in time for bed!

For a coordinating pillow, use your scrap material plus another matching fabric to make a pillowcase.  Toddler sized pillows are easily found at most fabric or craft supply stores.

~*~
Thank you Becky! 
If you liked this post check out her other {Mommy Monday} post:
Go To Baby Shower Gift
and Becky’s photography blog: