Tag

porch

Browsing

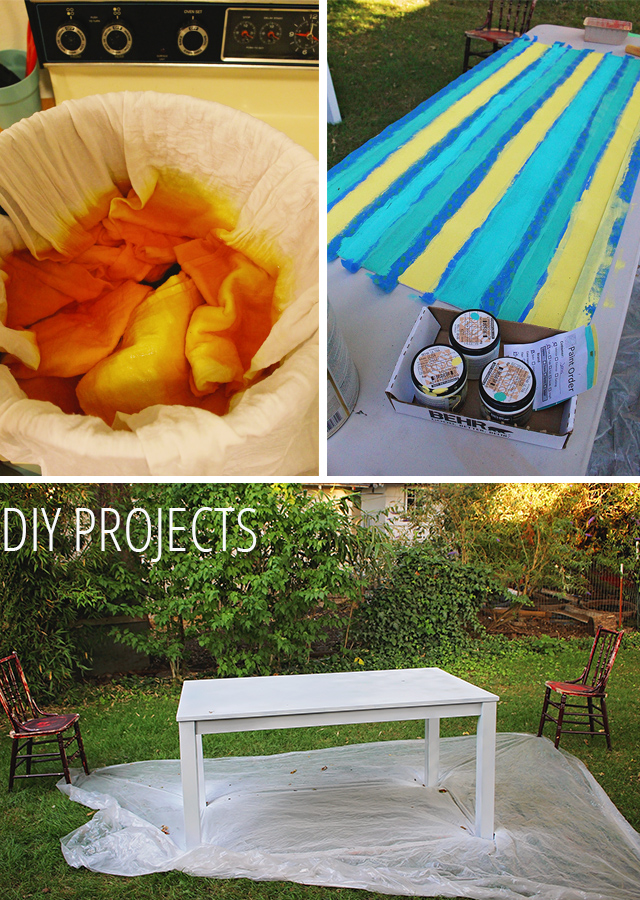
I don’t know if there is any DIY I love more than dying fabric. I have used the technique on a variety of projects including party backdrops, napkins, curtains and clothing up-cycles. It is a quick, inexpensive and super easy way to make an impact.

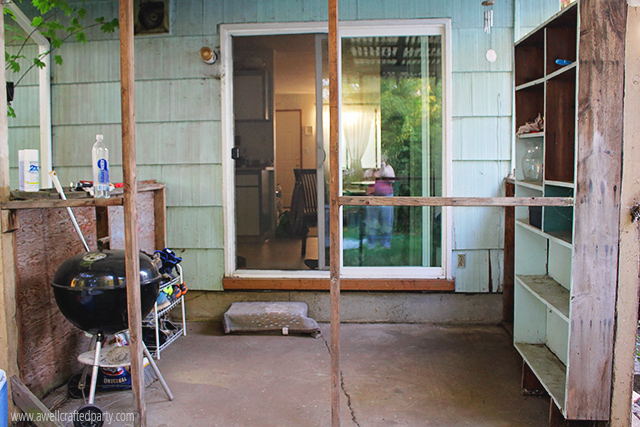
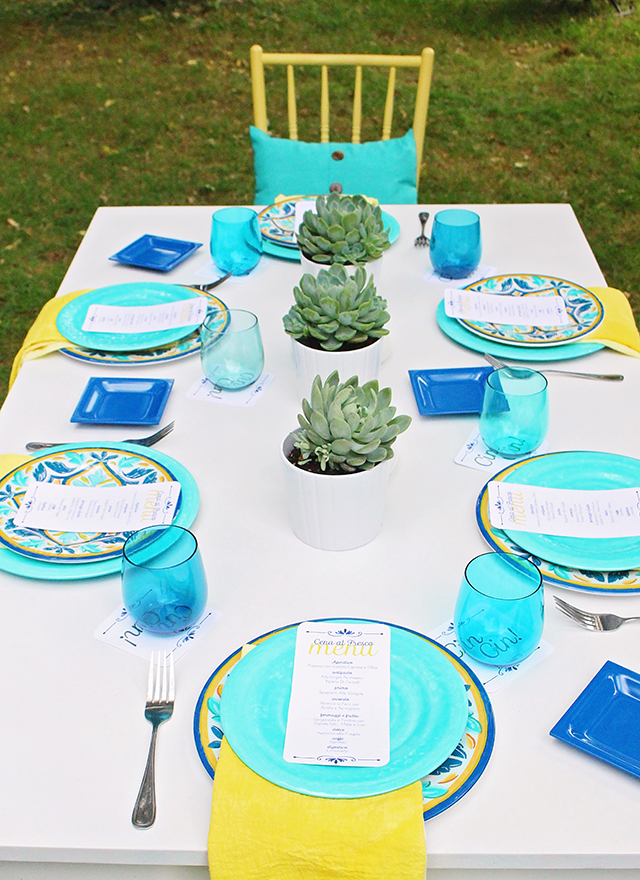
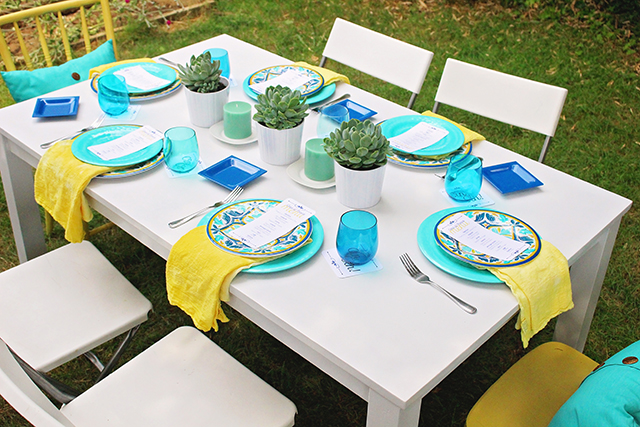
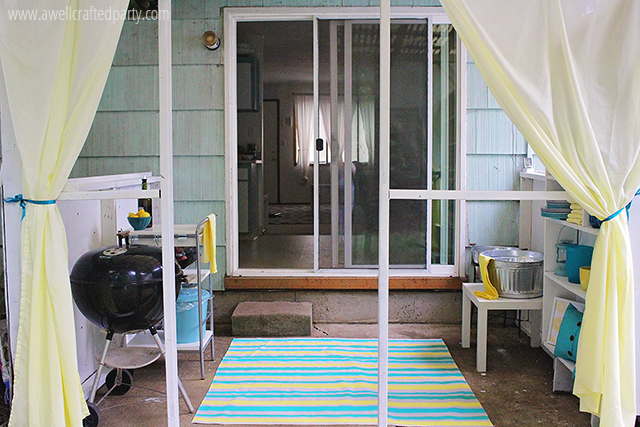
For my Summer porch makeover I knew that I would want to have cloth napkins for the many parties that I would be having in my new space. They already had a space on the bookshelf that houses all my entertaining supplies, but I didn’t have exactly what I wanted on hand. I wanted a fairly durable but inexpensive cloth napkin, ideally in a bright yellow or ombre yellow. People get messy in the back yard and BBQ meals don’t really lend themselves to the really nice cloth napkins due to staining. I needed something that could get messy and wash up easily, but wouldn’t be terrible to move into my cleaning cloth pile if stained. After searching unsuccessfully at all my favorite stores I landed on DIYing the napkins out of flour sack towels.

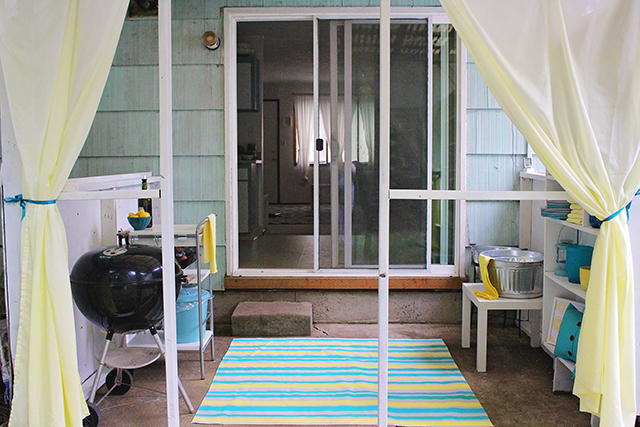
At the very last minute I also decided that we needed curtains for our porch area. One trip to Ikea and I came home with inexpensive white curtains that I was able to dip dye to coordinate with the napkins. The curtains are seriously my favorite part of the whole space and I hadn’t even planned on doing them!

dip dyed napkins and curtains via A Well Crafted Party

DIY Dip Dyed Linens

I used the same process on both my DIY Dip Dyed Napkins and my DIY Dip Dyed Curtains. The curtains were a slightly different material than the napkins so the dye didn’t soak in quite as well and get the bright yellow look, but I loved the paler ombre look nonetheless. That is the joy of dying cloth… you never quite know what you are going to get!

(Some of the below links are affiliate links. Affiliate links help support this blog with no cost to you the reader.)

Supplies:

  • Linens of choice in WHITE! For the napkins I purchased 12 Flour Sack Towels via Amazon for just about $22. The curtains I got at Ikea for $10!
  • — Rit Dye of Choice. Personally I have used the powder and liquid Rit Dyes for dying linens and have had good results both times. The biggest thing to remember when using the powdered dye is that you really need to mix in the powder well because if it isn’t mixed in well you will get speckled results on your final product. Follow the directions on the Rit bottle. They are there for a reason and they really do help! I used the Golden Yellow liquid dye and one 8oz bottle was enough for all 12 napkins and two curtains with some to spare.
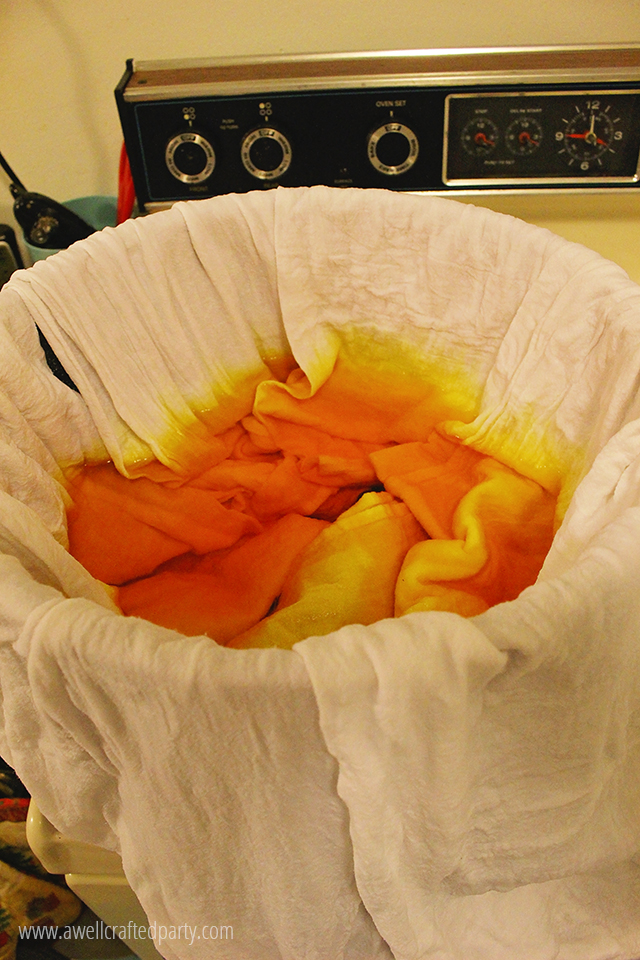
  • — Large pot for stove or bucket for dying fabrics. I used my canning pot for this project because it is huge and I can put it on my stove top to make sure the water stays hot enough. The package directions also gives options for large buckets or the washing machine, but the stove top has always been my choice of dying method.

Dip Dyed Napkins via A Well Crafted Party

After our Summer Porch Makeover - A Well Crafted Party

How to Dip Dye Linens:

  1. Prep your dye according to package instructions. My dye required super hot water and some salt because I was dying cotton items. It only took a few minutes to really get this all set up, the heating of the water taking the most time! As the water was heating I prepped my linens.
  2. Prep linens by wetting them and ringing out. I’ve dyed things from dry before and just do not like the results as much as I like the results of dying from wet. I wet all of my linens and rung them out prior to dying.
  3. Slowly dip linens into prepared dye. I am not one to take a lot of time in DIY projects. I just don’t have the patience. So, instead of dip dying these one at a time I chose to do them all at once. I put each of the napkins in with about an inch of the fabric in the dye water. I let sit for about 5 minutes and then lowered each one more into the water. I continued this process until the first dipped ends were in for about 30 minutes. You can choose to not dye the very ends at all if you’d like the ombre look to go into a full-on white, or dip the ends in the dye for just a moment. I chose to have the entire napkin be covered in the dye with the top ends being slightly lighter.  The ombre on my napkins is very subtle. The ombre on my curtains is much more pronounced because of the difference in fabric. The fabric was a polyester blend and didn’t soak in the dye quite as much as the cotton flour sacks.
  4. Rinse and dry as directed on dye package directions. After rinsing out the dye in the sink a bit I threw in the washer for a good rinse cycle. I then dried the linens in the dryer.

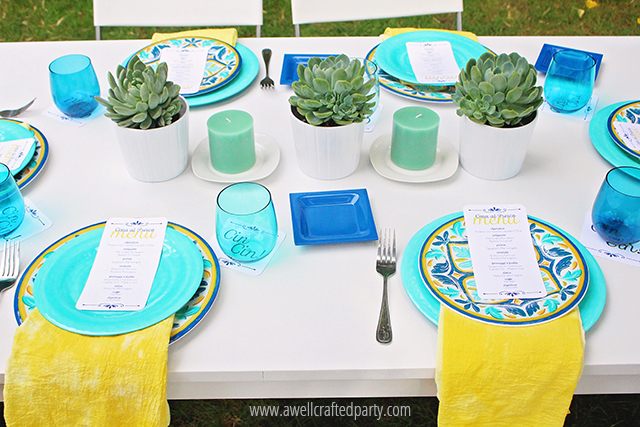
I love how these came out and with the napkins costing around $2 each I could not have gotten the same results for the same price any where else. I was able to do the entire process in one evening as well, so that is my kind of DIY!

Summer Porch DIY Projects - A Well Crafted Party

Check out my other Summer Porch DIYs:

Other great Linen DIYs from around the web:

Have you ever dyed fabric for a project? Comment below telling me all about the project! Links welcome.


When working on my porch makeover for our rental home I knew that I wanted to cover up as much as the back porch’s cracked and ugly surface as I could, but had to do so affordably. If you’ve ever looked up the cost of large outdoor rugs then you’d know that I was looking to spend a large portion of the very little money I had to do my porch makeover. I wasn’t really willing to give up the cash, even when I found some really cool rugs. A quick reminder of what my poor porch area looked before the redo…

Before our Summer Porch Makeover - A Well Crafted Party

I had seen DIYs in the past where people had painted inexpensive outdoor rugs, painted drop cloths to make curtains, or even created their own rugs using thing like t-shirts! I knew I wanted to try out doing it myself, but I wasn’t entirely sure what I was going to do until a trip to Home Depot really lucked out.

While getting my porch paint I decided to check out the drop cloths and see if any of them would work for a thin, inexpensive, and washable outdoor rug. I lucked out and found a 5X5 canvas drop cloth with finished hems and a leak proof backing for just $8! The drop cloth is reusable, which is great because all the shoes across it from our back yard have made it super dirty. We’ve been able to sweep it off easily and hose it off for bigger messes. I chose to paint the rug in multiple sized stripes in three colors that coordinated with the other items going in my back yard decor. The sample sizes were just right for this size of rug, but they only came in interior paint. I decided to go ahead and use the interior flat paint from Behr and then chose to spray it with a few layers of sealant after it dried.

The most exciting part of this project for me was the fact that it was so easy and inexpensive that I’ll be making another one as the Fall season approaches to go with my outdoor Fall decor. Heck, we may even make a different one for the holidays!

DIY Outdoor Rug In Progress from A Well Crafted Party


DIY Outdoor Rug from a Drop Cloth & Paint

This entire rug cost me about $14 which I felt was a great price for a 5X5 rug! The DIY process was super easy and fast… even the drying process wasn’t bad! I taped by rug up on a table and did in sections because I can’t bend over easily now days, but you could easily put this on the floor on top of another drop cloth or paper (in case of paint accidents) to paint it all in one session.

Supplies:

(Below links may be affiliate links. Affiliate links help support this blog with no cost to you the reader.)

  • — 1 lined canvas drop cloth in the size of your choice (5X5 drop cloth via Amazon or grab at your local Home Depot)
  • — Painters tape (I used two different sizes of painters tape to add variety to my rug stripes, though you only really need one. Both were Scotch Blue painters tapes.)
  • — Paint ( I used Behr paint samples in Island Aqua, Upbeat, and Water Park)
  • — Paint brush (a roller would also work depending on size)
  • — Sealant ( I used a spray sealant.)
  • — Ruler if you want to be precise… I didn’t care, so I didn’t use one!

How to make a drop cloth into an outdoor rug:

  1. Pull out your reusable drop cloth and adhere to a hard surface. Don’t forget to protect your surface with a plastic drop cloth, paper or another drop cloth that you use for your painting projects. You don’t want to accidentally get paint on a surface you don’t want paint on! Tape down your rug using the painters tape so that it does not move while you are working.
  2. Tape out your design on the rug. I went with imprecise stripes that were a variety of sizes. I basically just taped out the stripes trying to make sure my tape was straight. If you are a little bit more inclined to like things precise then I’d highly suggest taking a yard stick or ruler and marking out your stripes with a light pencil line before adding your tape.
  3. Paint! The canvas soaks in the paint pretty well so this can take some time. But, it will also dry very fast.
  4. Let dry then remove tape. I let my rug dry for just a couple of hours and it was ready to go. I tested the paint with my finger tips a bit before taking off the tape. The tape comes off easily!
  5. Spray with sealant. Spray the rug with the sealant according to the directions on the sealant you purchased. Let dry overnight and your rug is ready for feet!

DIY Outdoor Rug out of a Drop Cloth & Paint - A Well Crafted Party

Note: These rugs do not help with cushioning the area or taking off mud at the door. If your needs require that then you’ll want to look for an outdoor rug with more heft. (Check out the links below that show some other outdoor rug projects that you can do if you want a different look/feel to your DIY rug.)

Summer Porch DIY Projects - A Well Crafted Party

Check out my other Summer Porch DIYs:

Check out these great porch DIYs from around the web:


Where could you use a rug like this in your home?

I DIY a lot of items around my house. I DIY in part to save money, but also because I generally love the process of seeing an idea turn out. Now, I say generally because there are a few DIY projects that I start and hate the entire time I’m doing… like painting.

DIY Painted Table & Chairs

I always think that I will enjoy painting something because it is so much more inexpensive than buying new and it always yields a big transformation. I just have no patience for painting. Event though I’m not a huge fan, paint was a big part of my DIY makeover for my summer porch.


DIY Outdoor Painting Projects - A Well Crafted Party


For our outdoor dining area we decided to paint an old kitchen table that we owned and a couple of thrift store chairs. I am not a painting expert… mostly because I dislike the time it takes to do painting projects. I’m an afternoon DIY girl—when it takes days or weeks to complete I put it off as long as possible.

Take this table… I bought the sanding tools, paint, sealer and drop cloth 3 years ago to make our old kitchen table work for an outdoor table. I have finally gotten around to painting the sucker! (And, to be totally honest, I still haven’t sealed it. That has to happen before the next big rain!)

The chairs came with I think six coasts of paint on them prior to me wanting to paint them. I got them for a steal at $5/ chair, but the sanding work took forever and they still weren’t perfect before painting. I did know that I wanted the chairs to have a worn look, so I am not disappointed with how they came out. They too will get a couple coats of sealant before the next big rain.

Looking to paint your own wood items for outdoors? Check out these sources I used for tips:

DIY Process

I actually ended up lightly sanding the table and heavily sanding the chairs (though, as you can tell from the above photo… probably not enough for a nice professional looking paint job. I went with Rust-Oleum spray paint for both projects. The chairs got several coats of the Gloss Warm Yellow Paint and the table got a flat white spray. I am using a roll on polycrylic protective finish on both projects. I will not be keeping the items out during super inclement weather, but wanted to still protect them for the occasional shower.

After DIY Outdoor Table - A Well Crafted Party

DIY Outdoor Table - A Well Crafted Party


I can’t deny that paint makes a huge difference. I love my outdoor table and chairs enough that I will likely go through the pain and agony of painting many more times in my life. Seeing it in my yard makes me happy each and every day!

What do you think about DIY Painting projects? Love them or hate them? Have one you are proud of?? Link below! I’d love to see!


Updating Post to say that I’m linking up to the following Link Parties:

  • Skip to my Lou Made By You Mondays