Tag

party backdrop

Browsing

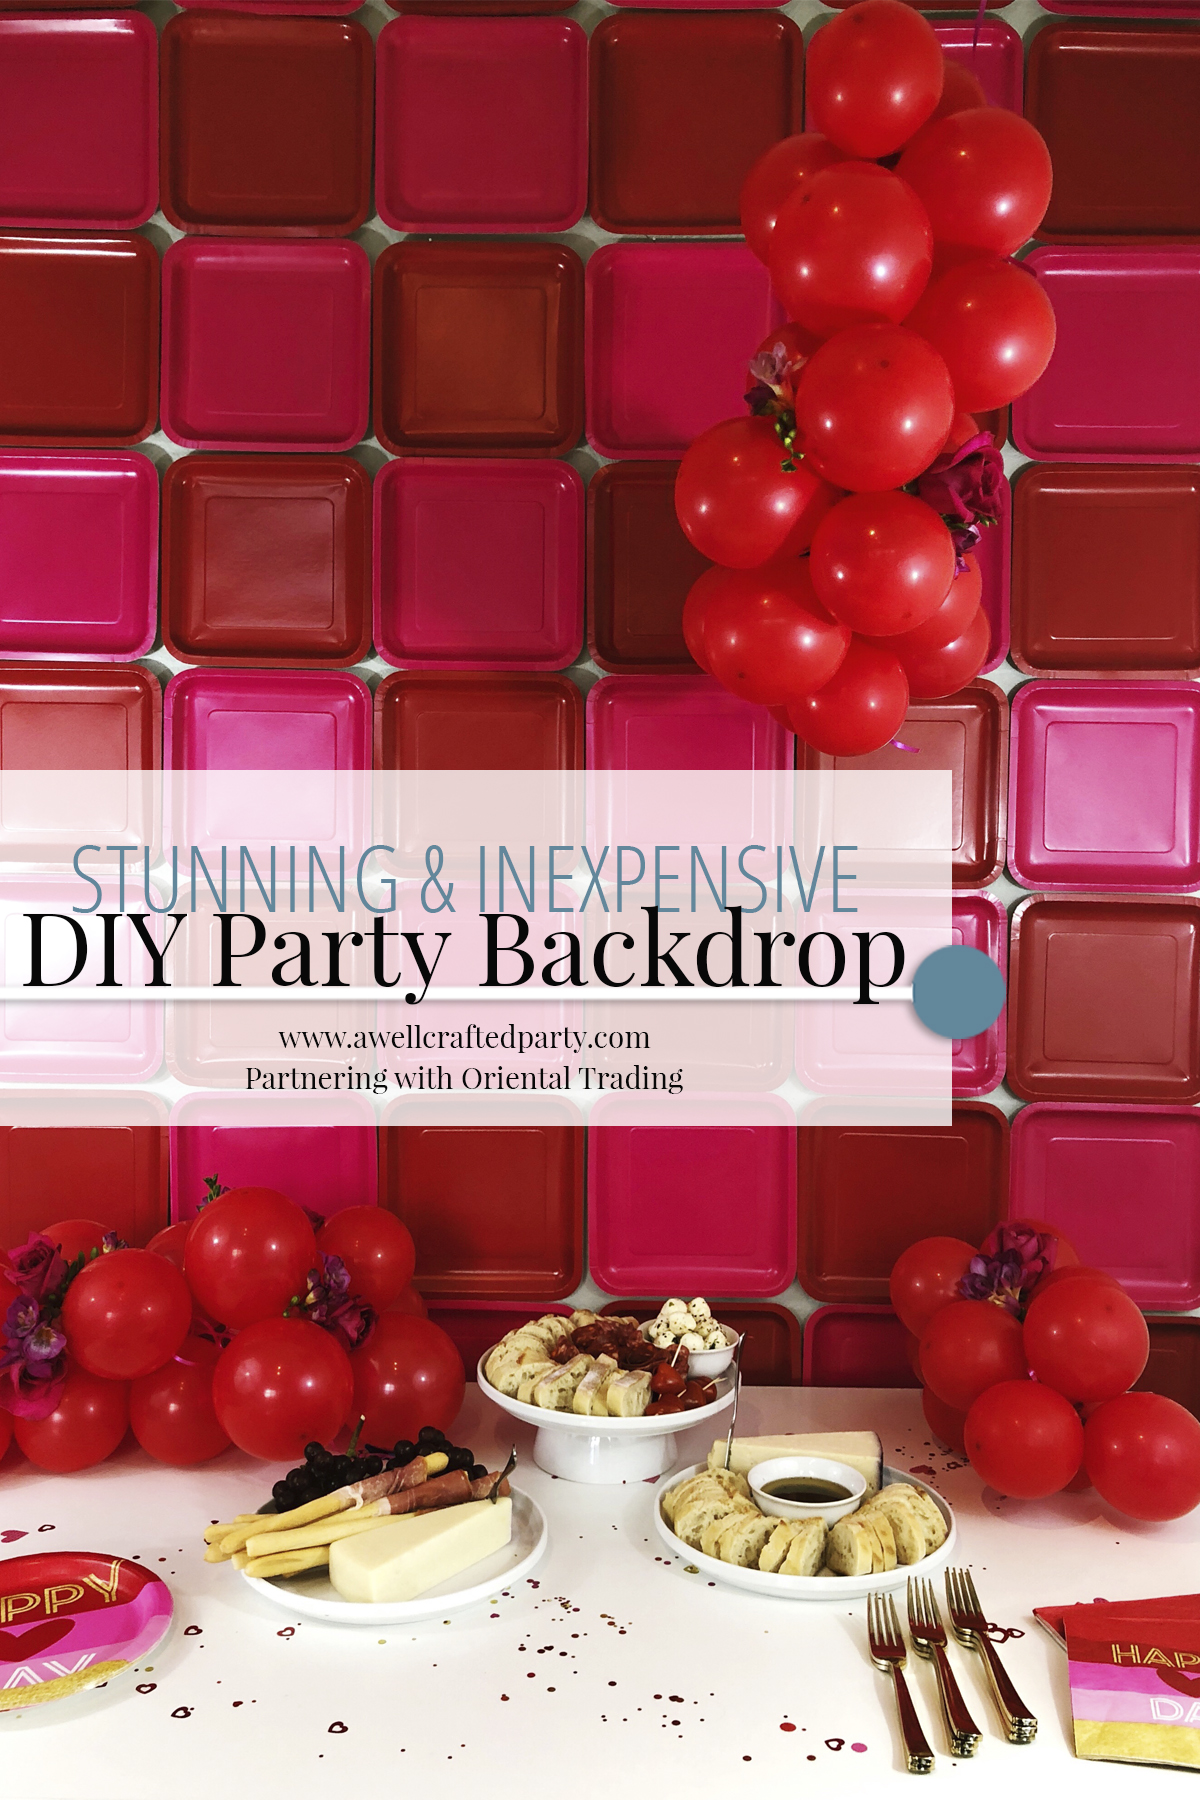
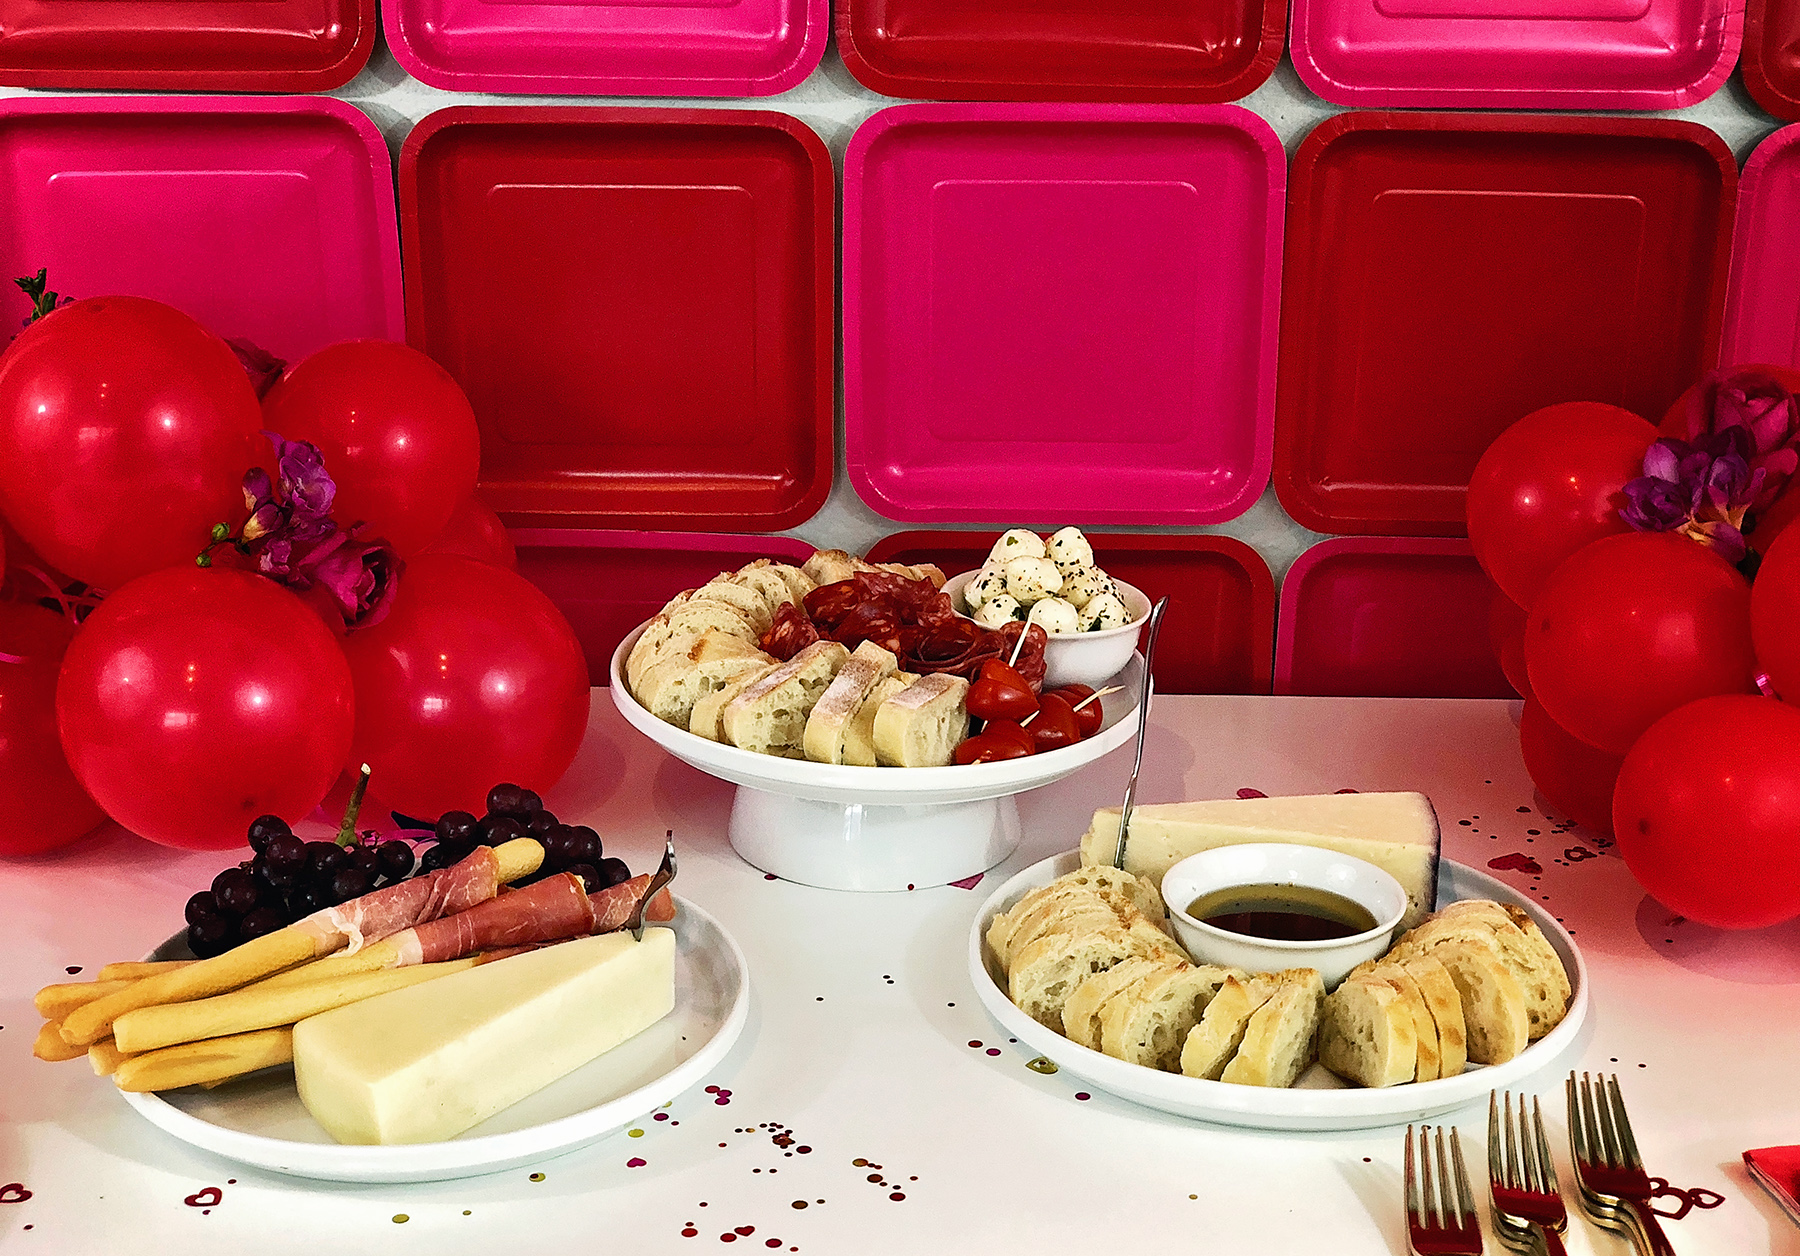
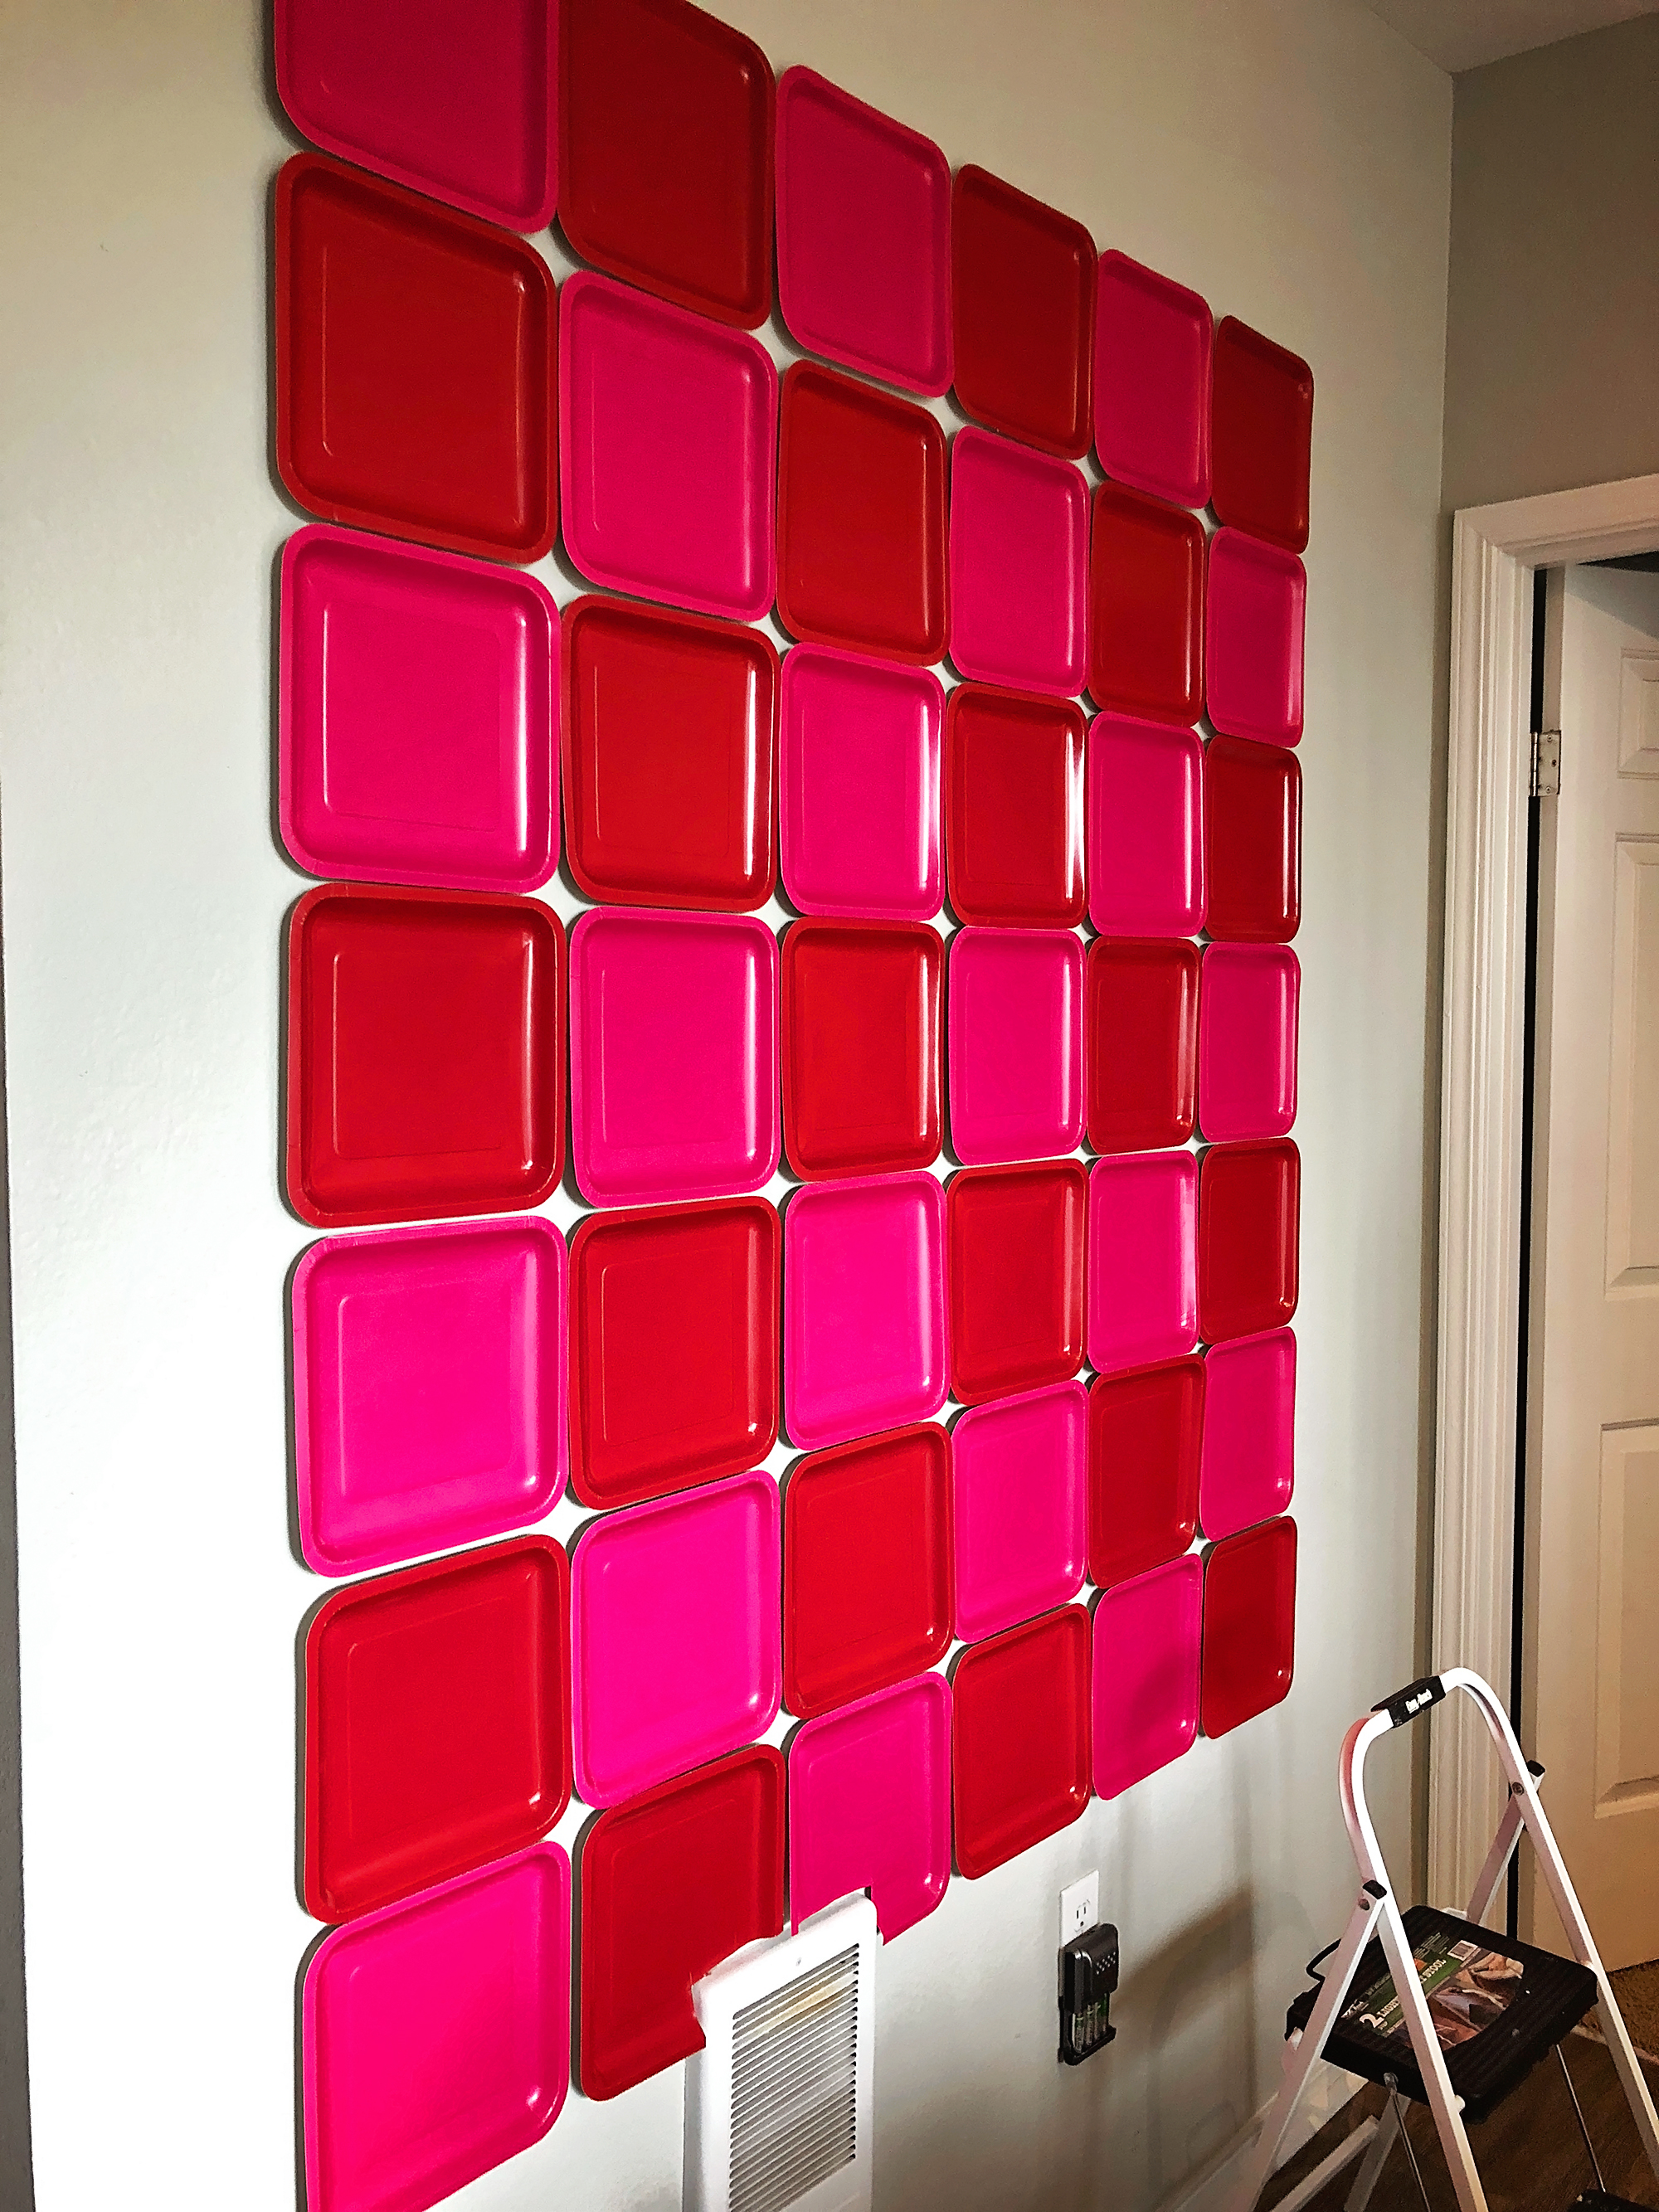
A stunning party backdrop does not have to be complicated to make nor expensive. One of my favorite party secrets is using simple square paper plates taped directly on the wall to create an easy party backdrop for a food table or perhaps a photo booth backdrop.

This post is created in partnership with Oriental Trading. All opinions are my own. I’ve been a customer of Oriental Trading for years! It is one of my go-to resources for party goods. The party color scheme was inspired by Oriental Trading plates. Scroll below for links to each of the products that I used within this party, or gather even more inspiration from Oriental Trading’s Galentine’s Day Party Supplies. This post contains affiliate links (marked at each link) which help provide income for this blog with each purchase at no cost to my readers. 

Appetizers for a Valentine's Day Party | A Well Crafted Party

Easy & Inexpensive DIY Backdrop

Creating this backdrop only requires a couple of inexpensive supplies and less than 10 minutes (depending on its size). This particular backdrop was approximately 5 feet wide and 5.5 feet tall.

DIY Backdrop Supplies | A Well Crafted Party

DIY Backdrop Supplies

The amount of plates that you need will vary depending on how large of a wall you are making. The easiest way to estimate how many plates you will need is to measure your wall and measure your plates. A standard dinner size square plate measures 9.25 inches. For an approximately six foot wide and six foot tall backdrop you’ll need about 64 plates. My project, which was a bit smaller, took 42 plates.
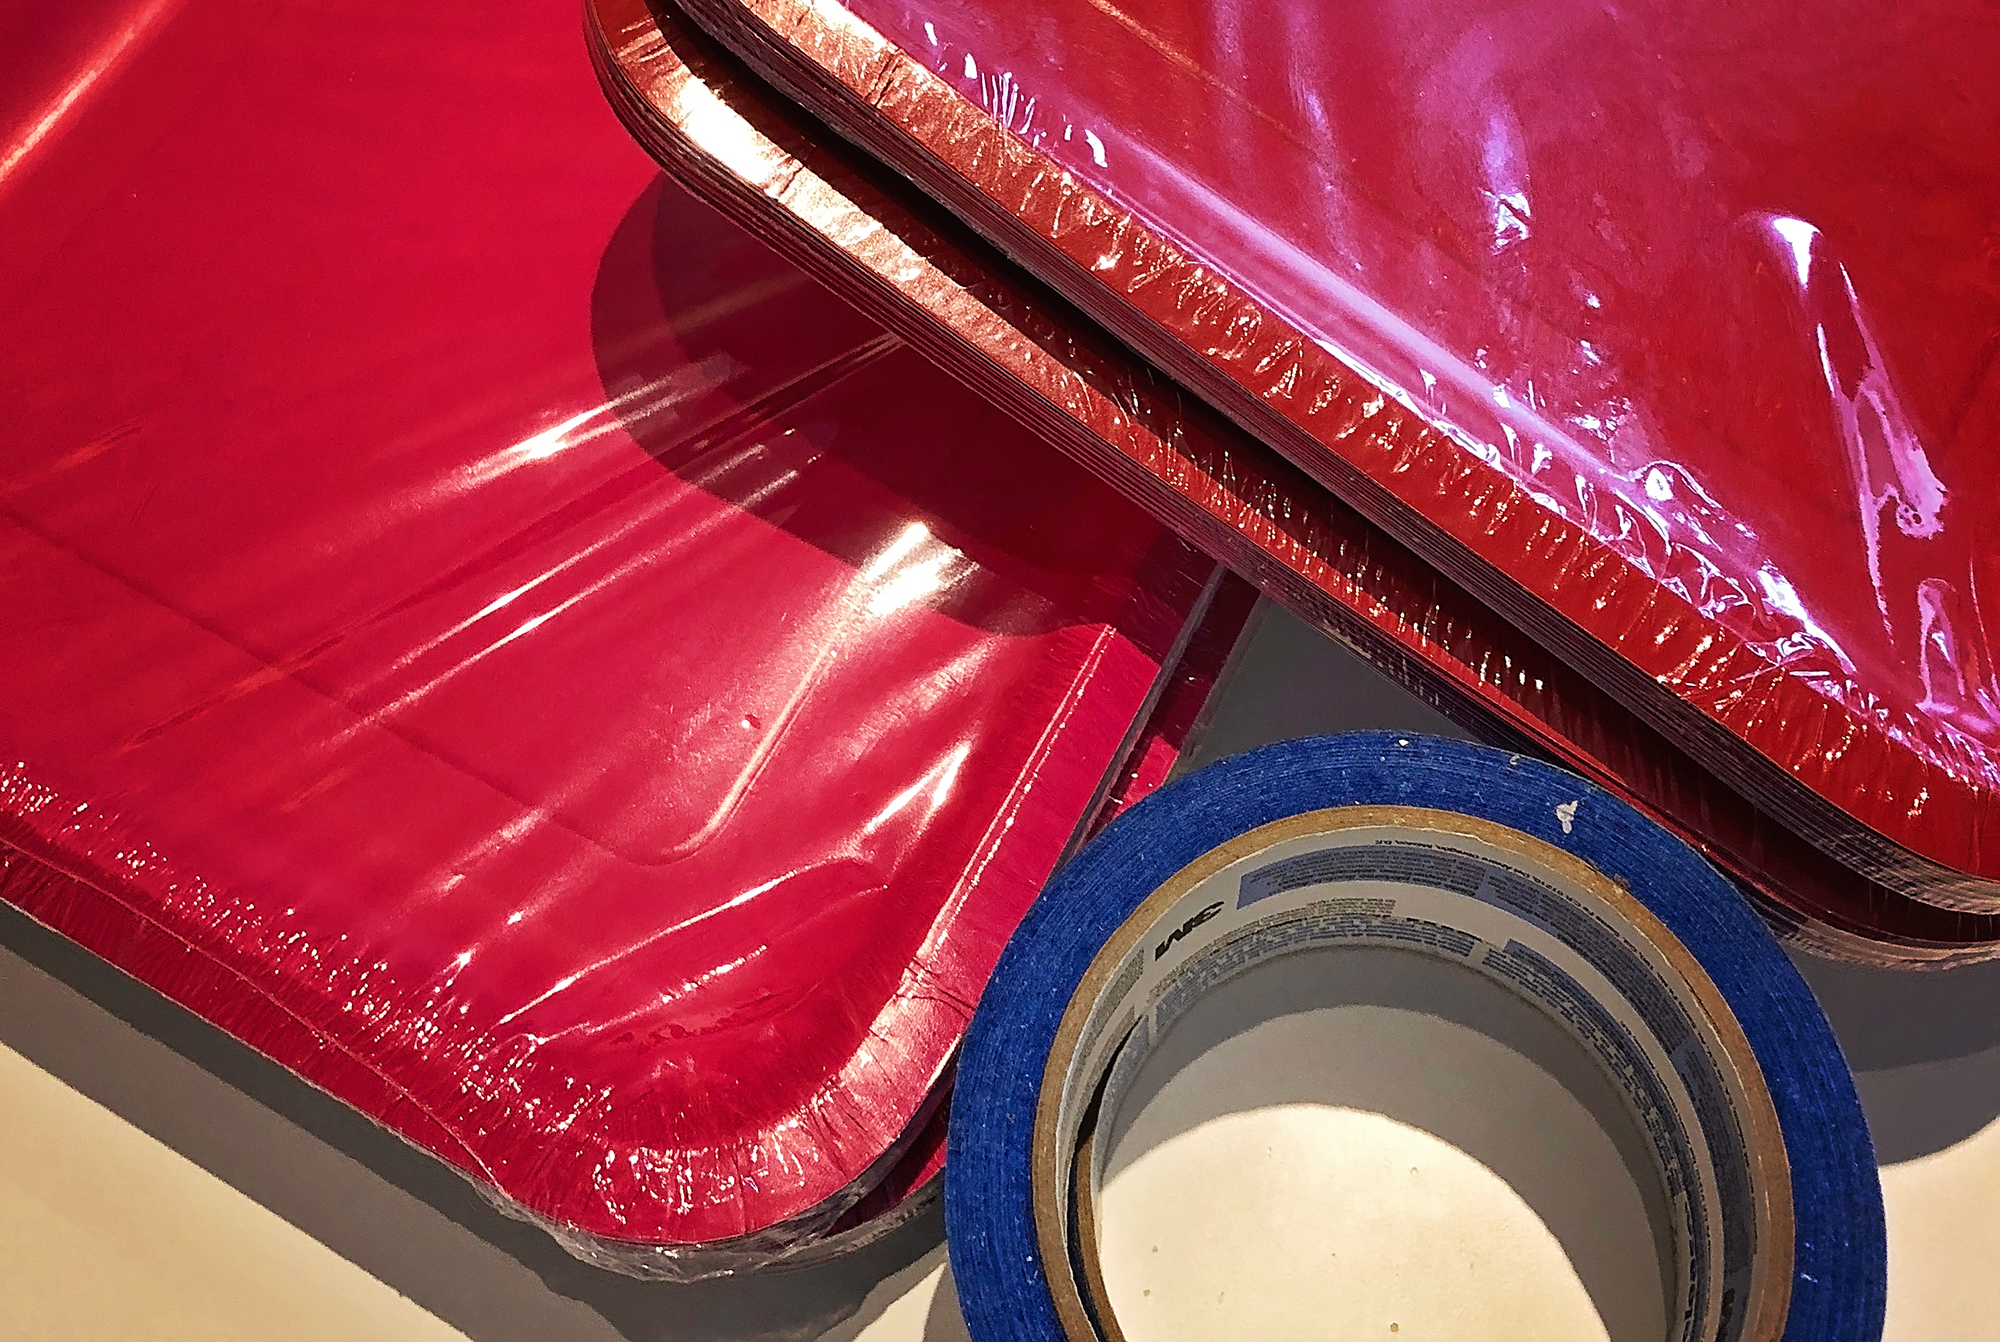
DIY Backdrop Directions | A Well Crafted Party

DIY Backdrop | A Well Crafted Party

DIY Backdrop Directions

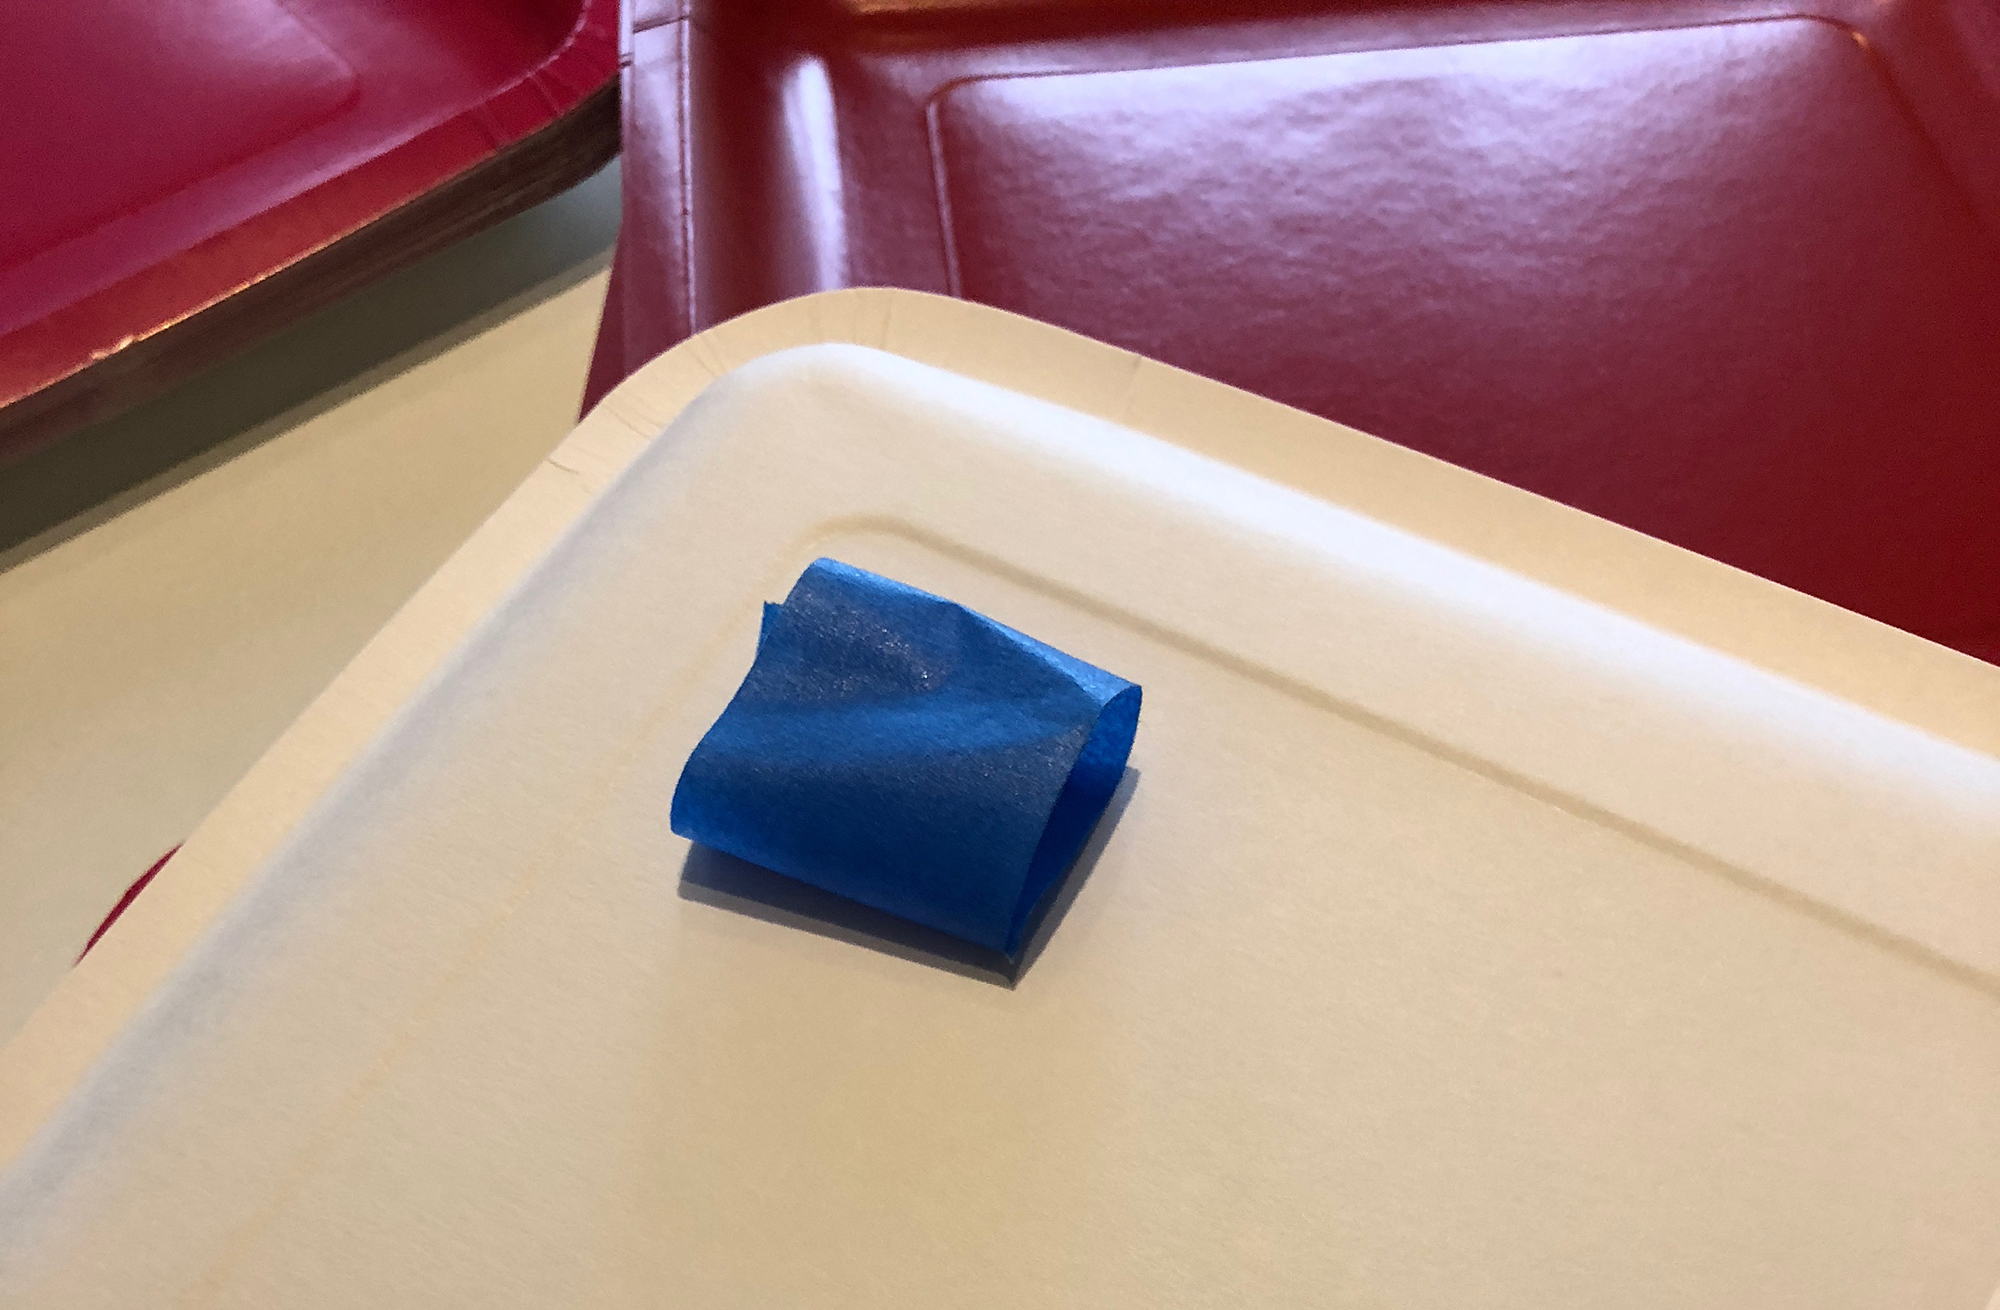
There are only two steps to putting this backdrop together. You simply have to double up your painters tape, attach to plate, and then attach the plate to the wall! I used four pieces of tape per plate to keep the plate up. The best part of using this as a decoration is that after the party you can simply take down the plates, remove the tape, and use them again for future parties as either a decoration or as a plate!

Easy DIY Backdrop | A Well Crafted Party

What is you party secret? Let me know in the comments below!

Photo booths are all the rage right now for a very good reason… they get people up and interacting, they provide great memories from the event, and well, they are just plain fun. I wanted to incorporate a photo booth in our 10th Anniversary Party and I also wanted to somehow include photos of our friends and family from over the past ten years. I contemplated a variety of different ways to do those items seperately before realizing that I should just combine the two which is how this photo memory black and white photo booth backdrop was born. Getting it put together was quite a feat and there are things that I didn’t like about the finished project which I’ll add in my tips below to avoid those issues. Overall, the photo memory backdrop and photo booth ended up being one of my favorite projects from the day. A big shoutout to Mary Boyden Photography for all of the event images.

DIY Photo Memory Black and White Photo Booth Backdrop

When designing this backdrop I knew that I would want to have a few things right off the bat:

  1. An impressive sized backdrop featuring images from over the past 10 years.
  2. Black and white images that would end up being a fun photo backdrop.

I debated a couple of different ways to create this backdrop.  My first thought was to use a few photos blown up and printed as engineering prints for a big bold backdrop. I decided against this option because I wanted to use photos of our guests and us and there were just too many to narrow it down to just a few larger images. My second thought was to use a ton of images printed as 4X6 images in black and white. Because it was going to be photographed I wanted it to not have a big shine factor so I knew I wanted matte prints. I guess I could have gotten 5X7 images or 8X10 images but the cost of that seemed to be a lot more than the 4X6 prints. Finally, I decided to put a white border around each of the prints so that there was some uniformity and white space in the backdrop.

DIY Black and White Photo Backdrop

DIY Black and White Photo Backdrop


Putting the backdrop together took some time, patience, and a big open space on the floor. The backdrop was approximately 10 feet across and 7 feet tall. I did the math and found that I needed approximately 420 4X6 images to create my backdrop. I purchased the images using Shutterfly. I saved a ton of money using coupons and ended up spending approximately $35 on the whole thing. If you paid full prize at Shutterfly it would only cost around $63 (before shipping) which is amazing for a project this large. (Note: This post is not sponsored in any way… just sharing the company I used for this project.)