Category

Tutorials

Category

I tend to get bored with decor pretty easily and like switching things up from year to year. I am not made of money however so I try my best to come up with fun cost-effective solutions that reuse some of my decor, but still give it a fun twist. Last year I went way off the reservation and leaned on my love of balloon garland to create a really exciting Christmas tree! This balloon garland Christmas tree decor was inexpensive, long-lasting, and a big hit with my kiddos.

This is the fourth day of my 12 Days of Christmas DIYs for 2018. Each day for the next twelve days I share DIY projects, recipes, entertainment, and more, that you can incorporate in your holiday season. Most will be super simple!

Balloon Christmas Tree Decor | A Well Crafted Party

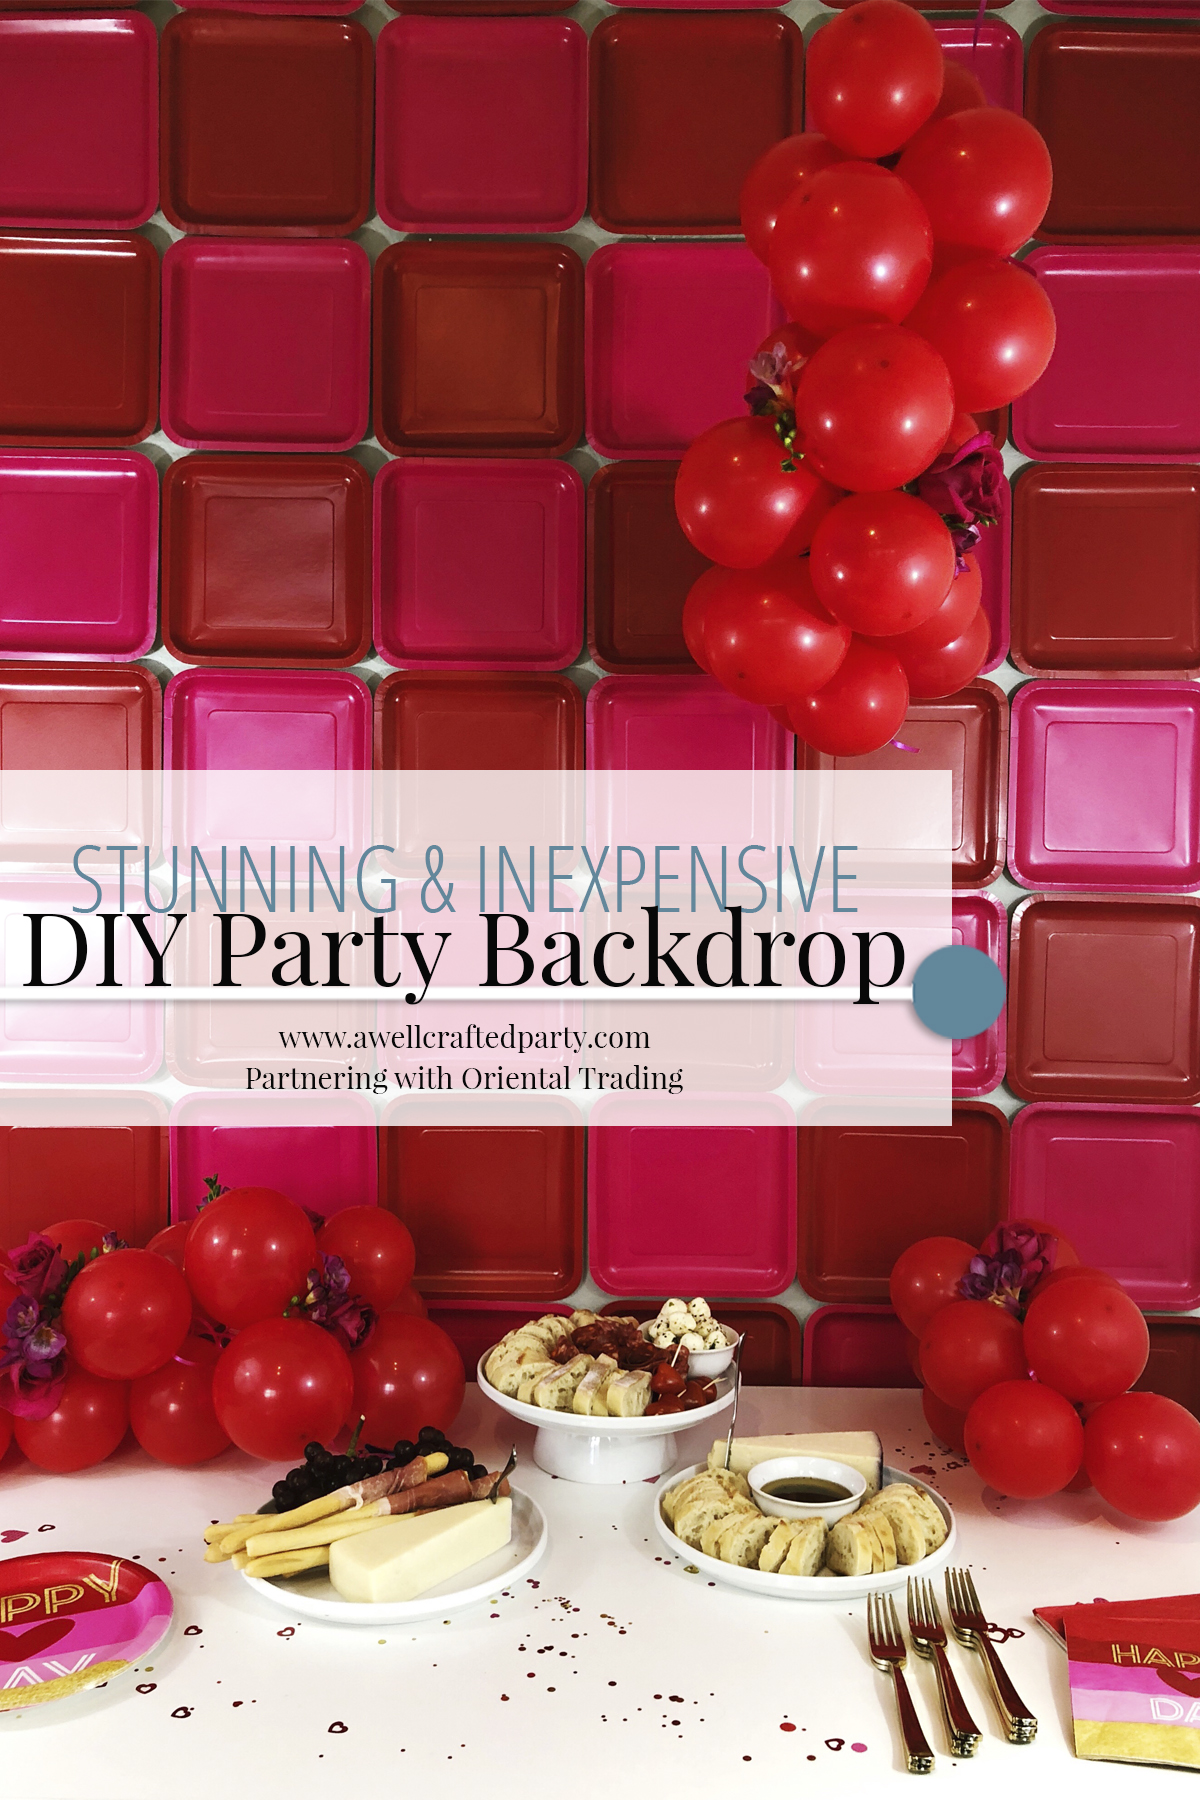
Creating this GIANT garland was no small feat. However, though it was time-consuming, it was super easy to create. I’ll walk you through my process and share a few other wonderful tutorials below. I’ll also share some of my favorite supplies so you can recreate this for your Christmas tree or for your next party.

I’ve tried several different ways of creating balloon garland in the past. I’ve tried a method that includes hot glue guns, chicken wire, and fishing line. I loved the look, but swore a LOT and popped a lot of balloons. I’ve tried hot glue and string to great success… yes, hot glue works on balloons! But, my favorite way of creating the garland is actually just with some bakers twine and different sized balloons.

Balloon Christmas Tree Decor | A Well Crafted Party

Balloon Garland Christmas Tree Decor

(The below links are affiliate links. I receive a small portion of sales of these items with no extra cost to the buyer. These purchases help support the content that I create on this blog. Thank you for supporting this blog!)

Suggested Supplies:

Balloon Christmas Tree Decor | A Well Crafted Party

Directions:

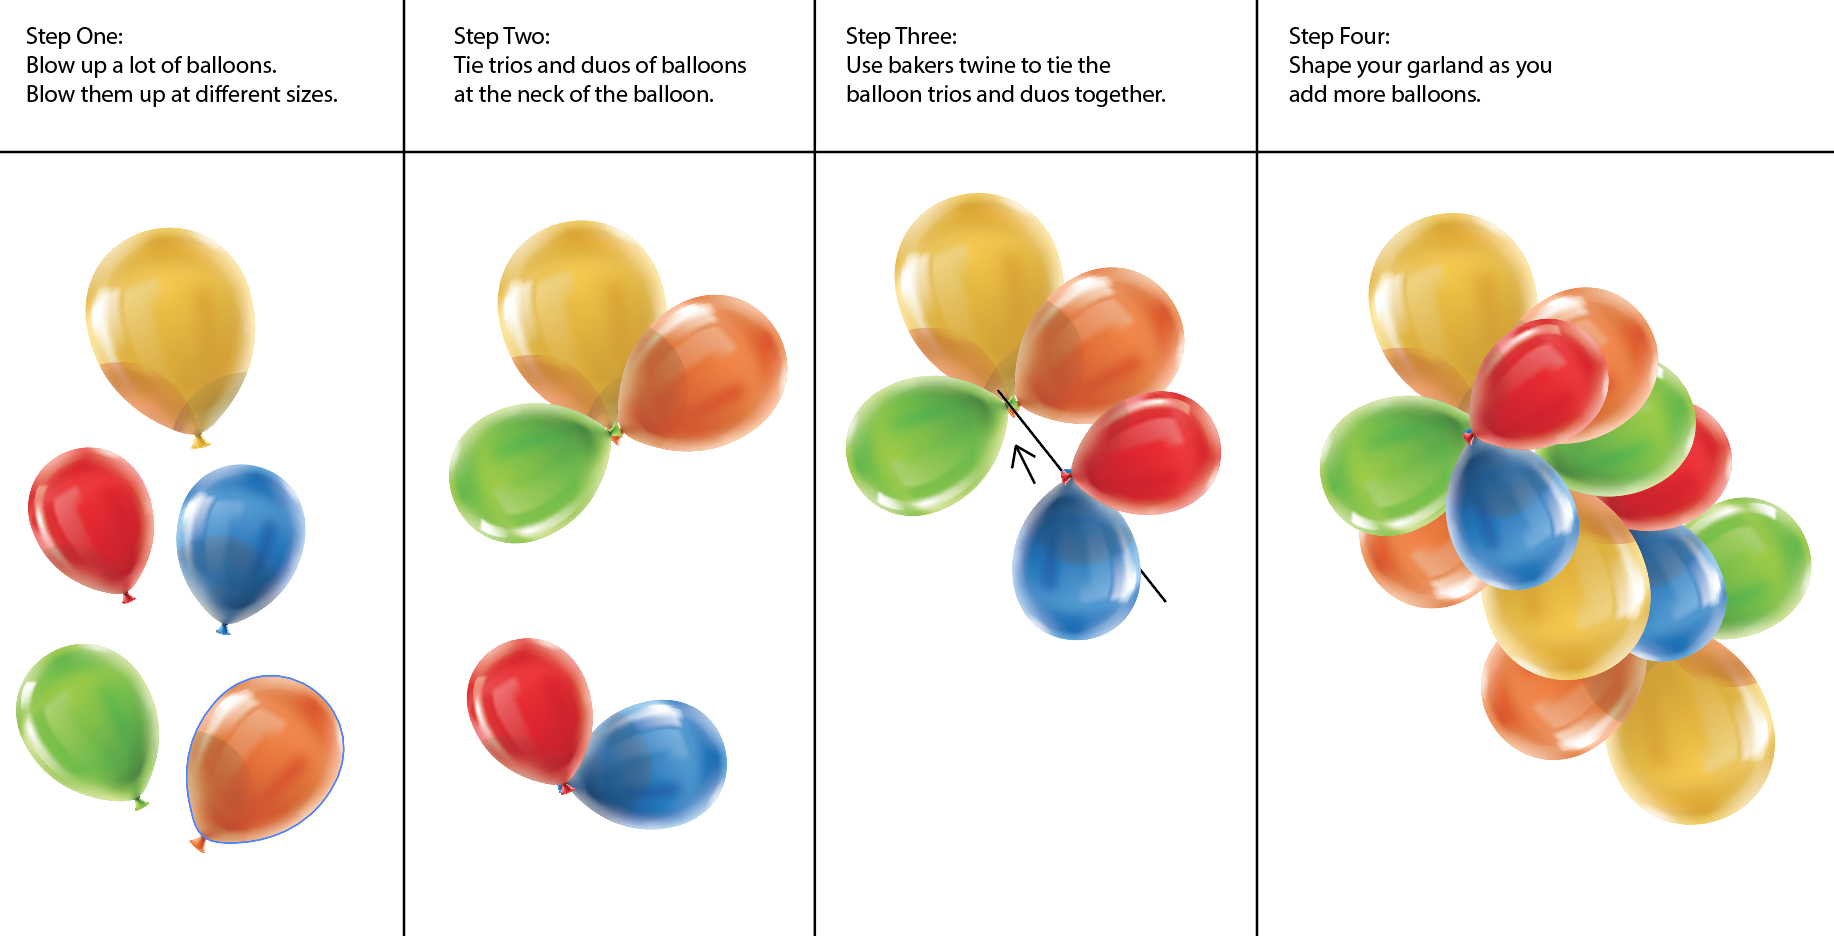
  1. Have a good mix of sizes of balloons. For this project, I knew I wanted mostly white balloons with some colorful ones inserted throughout. Blow up as many as you can in one go without being bored. It’ll make the whole process go more quickly. Blow them up without extending it too much. Feel free to blow them up at different sizes, it will give you some good dimension to your garland. You’ll need quite a bit of tie left on the balloon.
  2. Once you have several balloons blown up, select three of different sizes and tie them together at the balloon tops. Create several of these mixes. Then do similar with two balloons. When creating a tree garland you’ll want to start with the smallest sizes and move to larger.
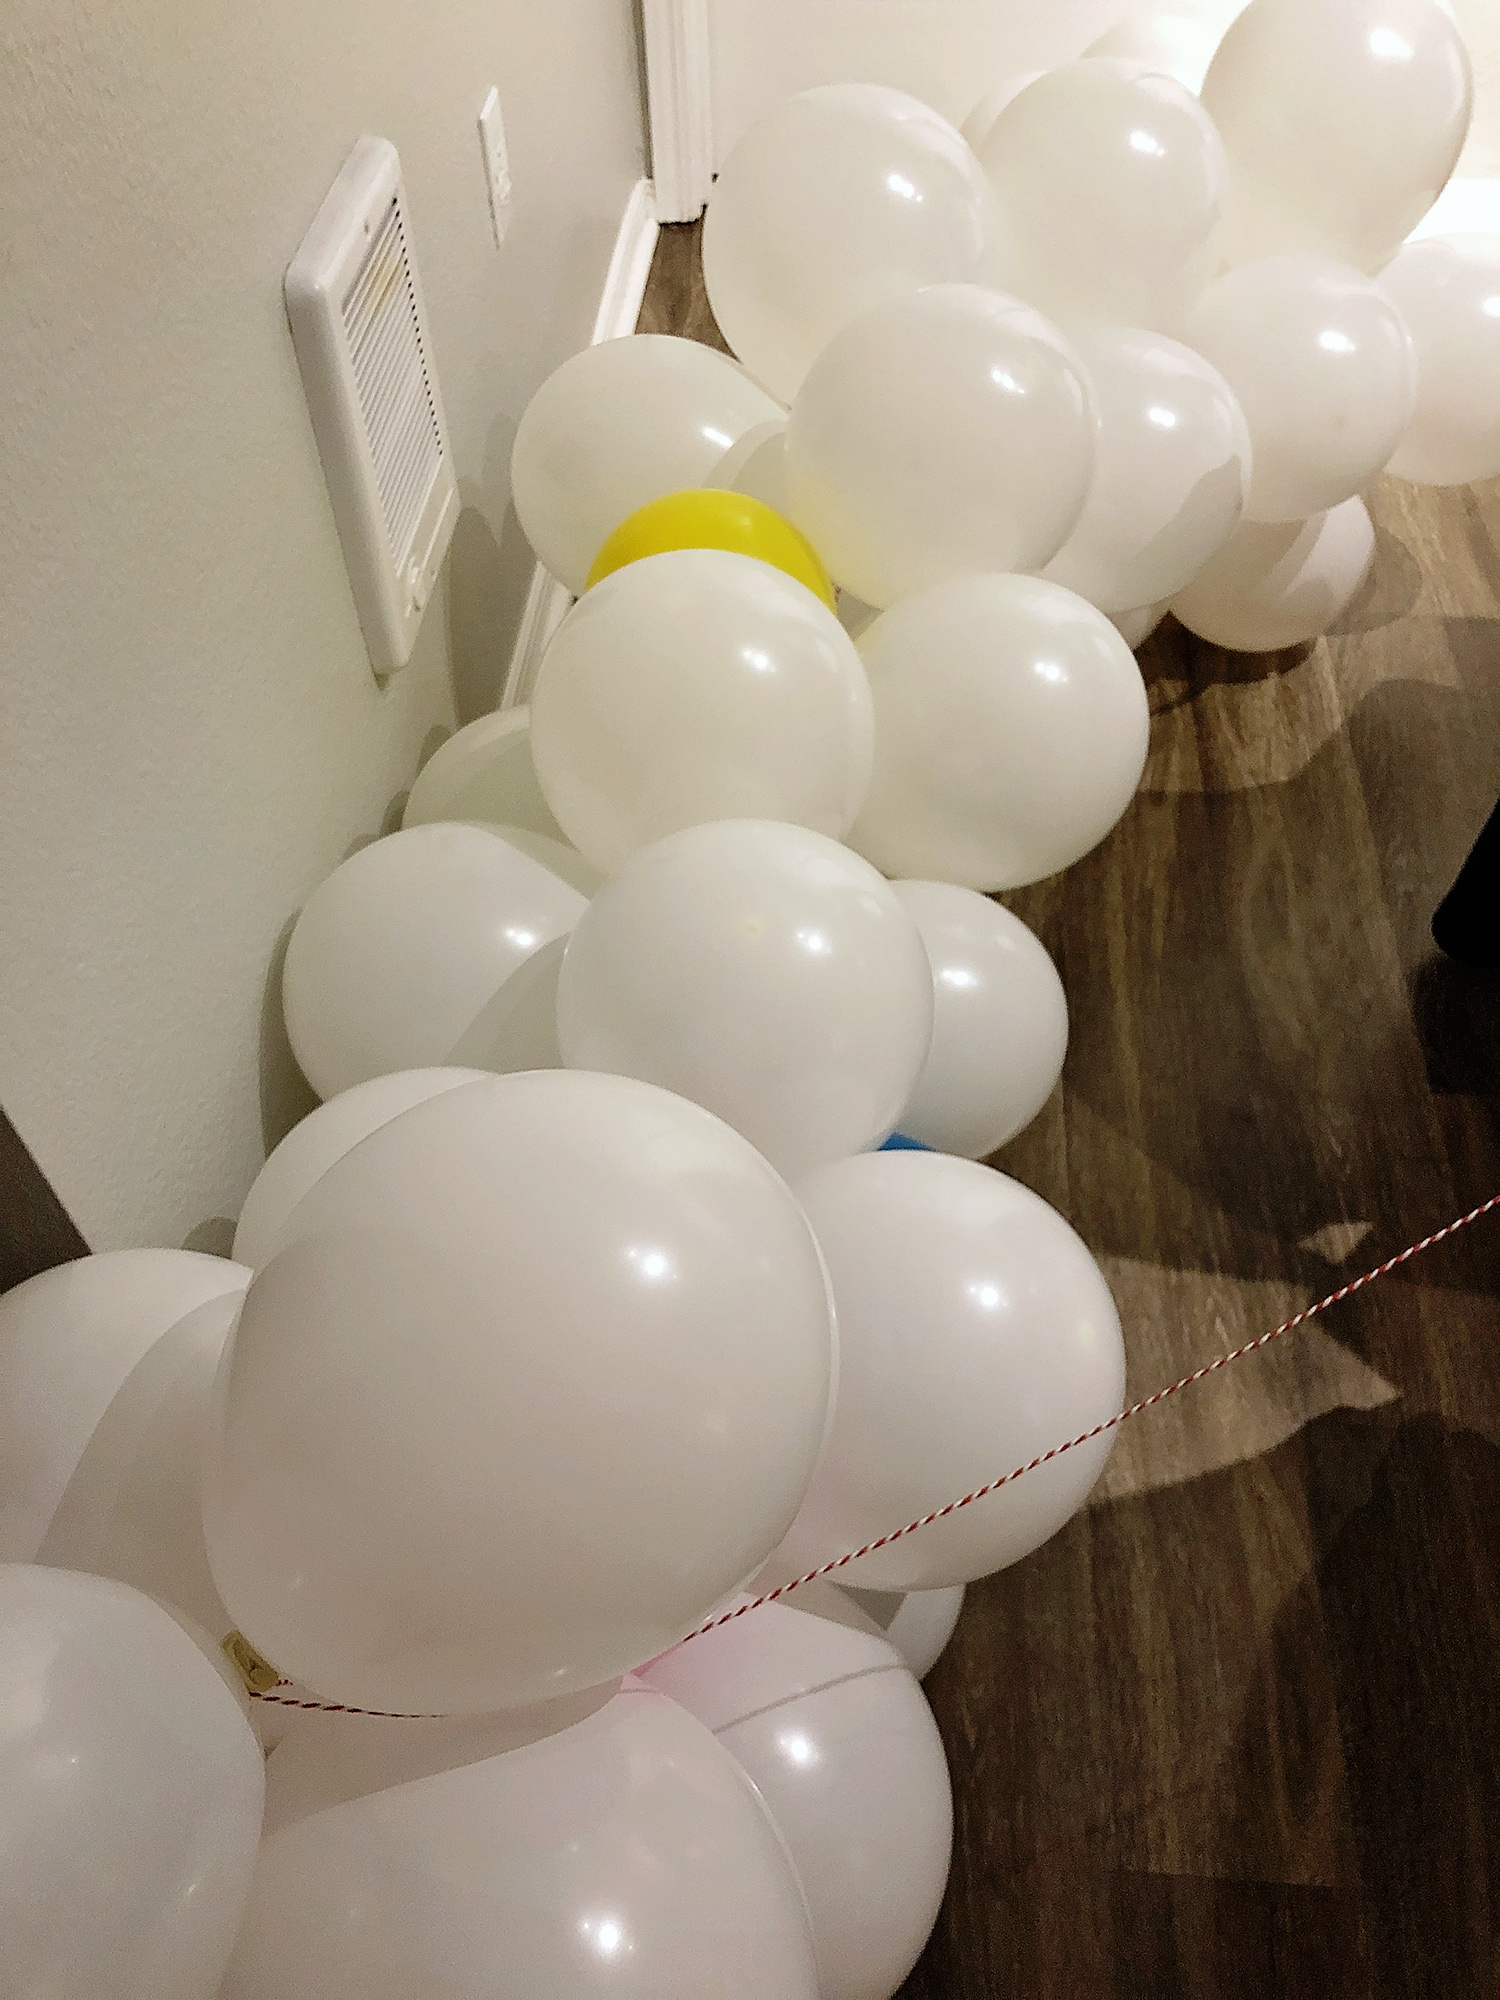
  3. Once you have several of the trios and doubles of balloons pull out the bakers’ twine! Cut off some twine about a foot longer than what you want your total garland to extend. Tie off the bottom on one of the duos of balloons, then string on a triplet and tie it off, continue this process. Move the balloons around as you are putting the garland together to shape your garland.

Other great balloon garland tutorials:

  • Poppies for Grace Balloon Garland Tutorial — I actually just discovered this tutorial when working on this post and it is exactly the way I make my balloon garlands except using duo balloon clusters and fishing line. The same basic idea, however. Really easy to follow video too!
  • Oriental Trading’s Balloon Garland Tutorial — This one is similar to mine as well, but they help tie the balloons to a string using more string. It sounds confusing, but the video makes a ton of sense!
  • Classy Clutter’s Balloon Garland Tutorial— They use more supplies to create their balloon garland including a needle and hot glue gun. I think this method would be really great if you need a bit more structure to your garland.
  • The House that Lars Built Balloon Garland Tutorial— This tutorial is perfect if you need a LOT of structure to your garland. It will help you shape your garland exactly how you want it.


Balloon Christmas Tree Decor | A Well Crafted Party

A stunning party backdrop does not have to be complicated to make nor expensive. One of my favorite party secrets is using simple square paper plates taped directly on the wall to create an easy party backdrop for a food table or perhaps a photo booth backdrop.

This post is created in partnership with Oriental Trading. All opinions are my own. I’ve been a customer of Oriental Trading for years! It is one of my go-to resources for party goods. The party color scheme was inspired by Oriental Trading plates. Scroll below for links to each of the products that I used within this party, or gather even more inspiration from Oriental Trading’s Galentine’s Day Party Supplies. This post contains affiliate links (marked at each link) which help provide income for this blog with each purchase at no cost to my readers. 

Appetizers for a Valentine's Day Party | A Well Crafted Party

Easy & Inexpensive DIY Backdrop

Creating this backdrop only requires a couple of inexpensive supplies and less than 10 minutes (depending on its size). This particular backdrop was approximately 5 feet wide and 5.5 feet tall.

DIY Backdrop Supplies | A Well Crafted Party

DIY Backdrop Supplies

The amount of plates that you need will vary depending on how large of a wall you are making. The easiest way to estimate how many plates you will need is to measure your wall and measure your plates. A standard dinner size square plate measures 9.25 inches. For an approximately six foot wide and six foot tall backdrop you’ll need about 64 plates. My project, which was a bit smaller, took 42 plates.

DIY Backdrop Directions | A Well Crafted Party

DIY Backdrop | A Well Crafted Party

DIY Backdrop Directions

There are only two steps to putting this backdrop together. You simply have to double up your painters tape, attach to plate, and then attach the plate to the wall! I used four pieces of tape per plate to keep the plate up. The best part of using this as a decoration is that after the party you can simply take down the plates, remove the tape, and use them again for future parties as either a decoration or as a plate!

Easy DIY Backdrop | A Well Crafted Party

What is you party secret? Let me know in the comments below!

DIY Ryan Gosling Tea Towels // A Well Crafted Party

When I got to thinking of the whole “Hey Girl” Meme for the Ryan Gosling themed party the ideas sort of over-took my brain. I wanted to do SO much. But, as I advise every bride/diy event planner … I started out with lots of ideas and then began to narrow them down. The favor idea was one of my FAVORITE ideas, so I spent some time figuring out the best way to go about it. I loved the idea of giving guests tea towels (who doesn’t need more of those!?) that were a simple black and white that had a “Hey Girl” message of “Hey girl, let me dry those dishes for you.”

My first attempt at making these tea towels did NOT go well. I was determined to screen press the tea towels. I borrowed my friend Suzannah’s Ryonet home screen printing press and tried following her tutorial and the Ryonet YouTube tutorial. The whole process is very, very involved. The kit included everything I needed and the instructions were great! But, I didn’t give myself near enough time or room for error. It was one of those DIY fails that just really sucks. After I dried my tears of frustration, I scrapped the screen printing idea and went with the iron on transfer method.

DIY Ryan Gosling Tea Towels // A Well Crafted Party


I typically don’t enjoy the way the iron on transfer looks on fabrics. There is usually a line around the image that is slightly more glossy than I want. When the paper gets too hot it can yellow. Also, I never know how long it will last. I was pretty thrilled with the way these tea towels turned out though and would recommend the iron-on transfer as an easy way to make these. Follow the instructions on the iron on transfer paper.

Tips for best results when using the iron-on transfer method:

  • Prep your fabric. Wash, dry and iron your fabric before you apply the transfer. Will the transfer take if you skip this step? Yep. But, I think it benefits the entire project to take those other steps. I feel like the transfer goes on better and that it lasts longer.
  • Transfer the RIGHT image. Most transfer papers require you to print a mirror image of your image. Transfer paper, while not super expensive, isn’t cheap either. Losing an entire sheet due to a printing mistake would be a bummer.
  • Stick to single colors. I have found that when I use multiple colors I don’t like the look as much as I do when there is only one color in the image. This is totally a preference though!
  • Don’t use an ironing board. The instructions for my package of transfer paper said not to use an ironing board. This was the first time I’ve ever done it this way and I was thrilled with the results. Instead of an ironing board you want to find a sturdy surface that is about waist-high with an ironed pillowcase placed on top. It really makes the difference to have the leverage to apply even force while ironing.

DIY Ryan Gosling Tea Towels // A Well Crafted Party


Want to make your own Ryan Gosling tea towels?

Download my Hey Girl Tea Towel print and get started! Image of Ryan Gosling was licensed under CC 2.0 — sourced via Raffi Asdourian . I then modified the image. Tutorial coming!

Ryan Gosling Free Printable // A Well Crafted Party

Supplies (Affiliate Links):

  • Tea Towels—I ordered my tea towels by the dozen on Amazon.
  • Transfer Paper—You can also purchase your transfer paper through Amazon as well!
  • Home Printer — I used an Epson WF-3540
  • Iron
  • Pillowcase
  • Free printable—Click here to download your free transfer printable! I created it two where there are two per 8.5X11 inch page.

And, just because I thought this would also make for a cute framed print above a drying rack in the kitchen I also made an 8×10 printable. Click here to download you own free Ryan Gosling themed printable!

Love the idea but just don’t wanna make your own tea towels? These sketched tea towels by Dear Colleen are AMAZING and would make for a fantastic gift! They’d be a better quality and have THREE images of Ryan Gosling… so, there is that too!

(PS. I will give screen printing a shot again sometime soon.)

(PPS. Ryan, if you’re reading this… first, EEEEE! Second, we share because we love your work and enjoy the meme. Will take down with a note from you! )