Category

Gifts

Category

When AwesomeBox approached me telling me that they had the most awesome gift idea for those touching holidays and life-happenings such as Mother’s Day, Father’s Day, Graduations, milestone birthdays, wedding showers, anniversaries…well, you get the idea, I wasn’t completely sold. I wasn’t even sold after using the service complimentary, until I heard EVERYONE exclaim about just how AWESOME this gift was when I recently gave it to a friend for her graduation and 30th birthday. I received an AwesomeBox and shipping in exchange for sharing my experience with you, my readers. All opinions are my own. Please check out my policies for more information on A Well Crafted Party’s sponsored content. Note: Personal images/ last names have been blurred/removed. Print quality is crystal clear and beautifully done! 

“Wow, it’s really awesome,” said my husband after looking through the gift that myself and 9 other people worked together to create for a dear friend and family member’s 30th birthday and graduation party.

It wasn’t the first time that day that I heard those words strung together and I couldn’t help but think that they certainly named the “Awesome Box” well. Recently I had the opportunity to set up and order an AwesomeBox for a friend.

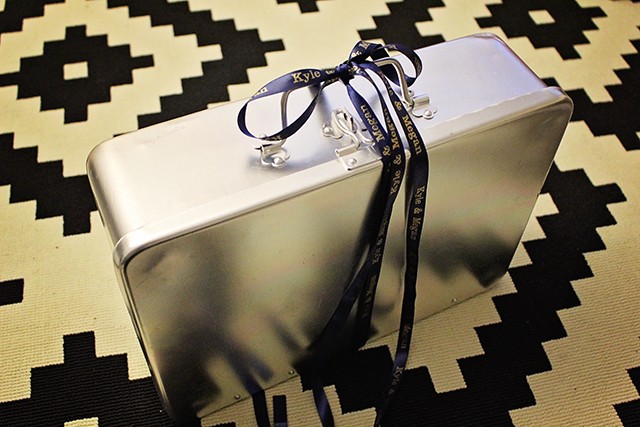
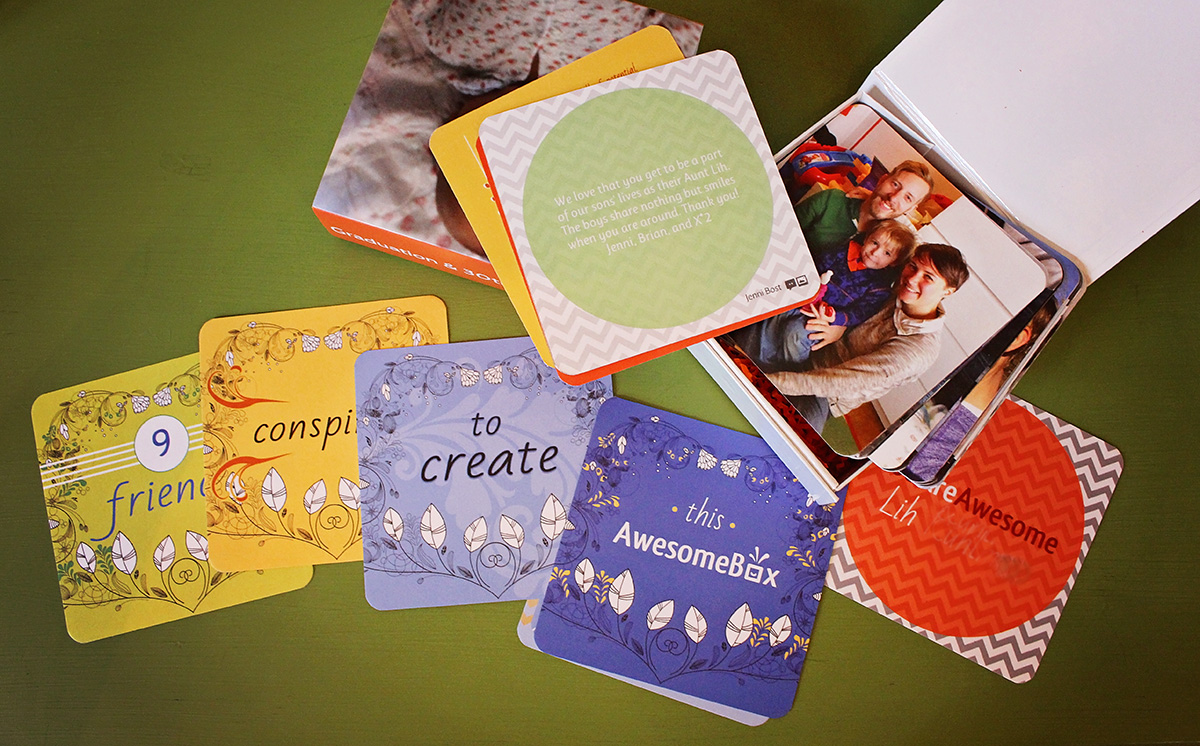
What’s an AwesomeBox? Well, it really is a box full of awesome. Okay, I’ll try to refrain from using that word for the rest of the post. This neat little gift is a collaborative box of images and quotes put together in a well-designed package. The cards are 5 1/4 inches square with rounded corners. There are cards describing how many people contributed and then cards with images on one side and quotes on the other. Collaborators each upload images and quotes to build the box.

Sponsored Post: Setting up your AwesomeBox - featured on A Well Crafted Party
Choose to make the AwesomeBox by yourself or invite friends to join in on the creation. The real beauty of this gift is the opportunity to have many people pitch in to truly make the gift special.

How to create an AwesomeBox

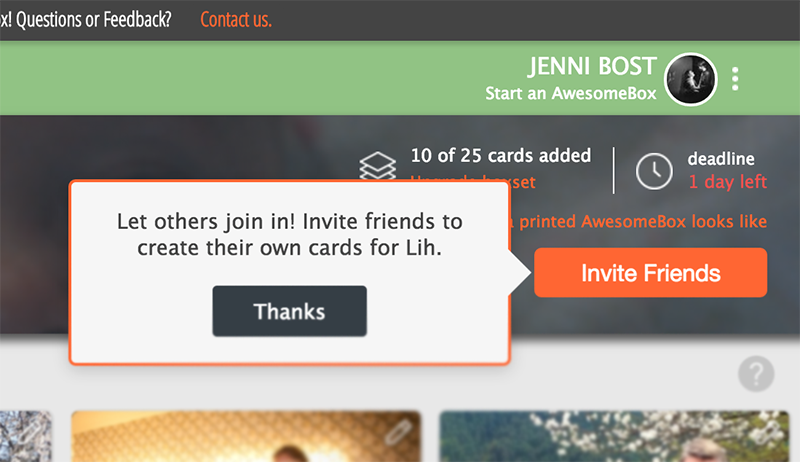
Creating this easy, sentimental and fun gift is super easy. You simply visit www.AwesomeBox.com, create an account and select “Start a Box.” You can then upload images and quotes for the AwsomeBox. You will also have the opportunity to invite collaborators to upload images and quotes.

Sponsored Post: AwesomeBox Editing Options
The options for editing the AwesomeBox include photos, messages, and signature.

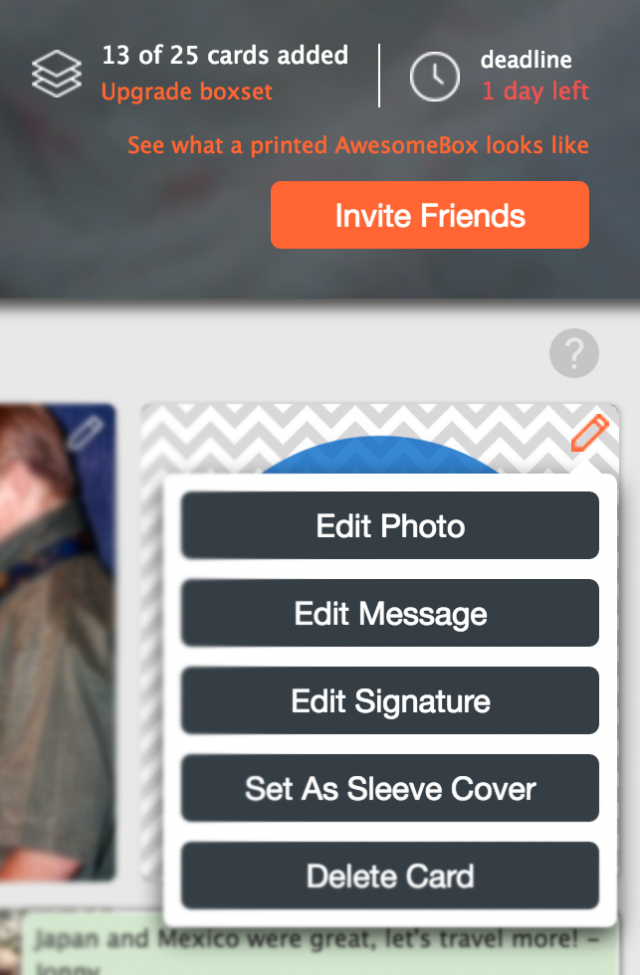
The one draw back to the AwesomeBox in my opinion was that I didn’t get to choose the background images that were used with the photos. I like the extra control of designing an item to look a certain way. However, to be honest, I might have never finished if I chose all the extra items. This made the whole process straightforward. And, when it arrived, I was so pleased with how the box came together and looked as a whole package that I didn’t even care that I didn’t select the backgrounds.

Reasons to Like an AwesomeBox


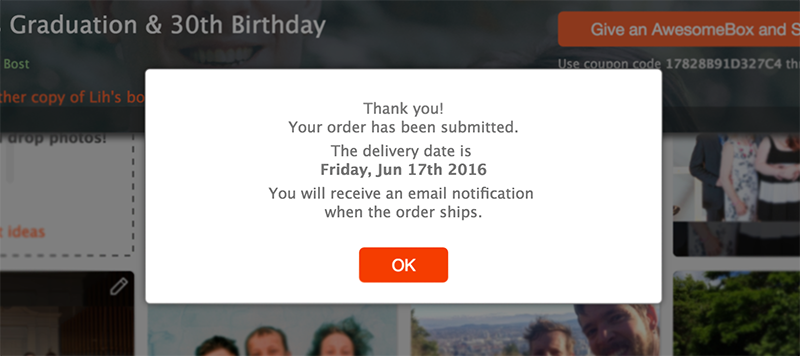
I liked working with AwesomeBox’s website as it was easy to understand, emailed reminders out so that the box would be delivered on time and it made it fun to collaborate with others. Once it was printed and delivered I liked it even more as the quality was really top-notch and there were added cards in the box that explained what the box was and how many people came together to create the gift.


Sponsored Post: Reminders and updates on your AwesomeBox ensure you get your gift on time! Feature of an awesome gift idea on A Well Crafted Party
The AwesomeBox system will remind you when it is time to complete your AwesomeBox so that there is time to ship your gift.

Awesome Gift Idea!


I really feel like the uses for this gift idea are sort of endless. Here are some ideas I came up with:

  • Proposal Idea: How cool would this be as a proposal idea? Have friends and family upload photos and stories about your significant other into the AwesomeBox’s system. Then as the final image upload a photo of the ring or of you both as a couple and put a “Will you marry me?” message on that last card!
  • Graduation Gift: Upload photos from throughout the years with messages about what the recipient wanted to be when they grew up or perhaps stories of things achieved over the years.
  • Family Recipe Box: Have family members upload images and recipes that they love and have a beautifully curated box of family recipes printed.
  • Anniversary Box: Upload one photo for every year with a favorite memory or short paragraph of what happened that year.
  • Family Flashcards: Have a big extended family that live far away? Create family flash cards with an image of your family member of the front and some facts about the person on the back. Use the cards to help kids get to know distant family members– or hey, quiz your spouse!
  • Birthday- There are so many ideas for how to use these for birthdays. I like the idea of uploading one image for each year with a quote about what happened that year or favorite things from when the recipient was that age.
Sponsored Post: The completed AwesomeBox is beautifully packaged and thoughtfully put together.
The completed box comes with all the messages and images uploaded by those invited to the gift. It also comes with a great message explaining what the AwesomeBox is and how many people pulled together to celebrate the recipient.

What would you use your AwesomeBox for?

Thank you to AwesomeBox for letting me experience your services. Thanks to readers for supporting the companies that help make this blog happen!


Mother’s Day is around the corner! Writing about all of these amazing working mothers has certainly got me thinking about Mother’s Day a little more than I normally would. It has made me want to tell my mother and mother-in-law just how much I appreciate them. Makes me want to snuggle up with the two boys who made me a momma. These DIY Mother’s Day Flower Arrangement tips make giving flowers easy and inexpensive.

Flowers are such a beautiful way to say that you are thinking about someone. But, with prices starting at $50 for a nice small Mother’s Day flower arrangement it is fairly cost prohibitive to many. I typically love giving flowers in addition to a small item that will last for some time or be a sweet treat for that person. Often spending $50 or more on flowers is just out of my budget. Thankfully, I know a few tricks to make a DIY Mother’s Day flower arrangement look like a million bucks.

Tips for DIY Mother’s Day Flowers:

Simple Flower Arrangement

Keep it simple!

Use one flower (or one color scheme) in a low vase to make a simple, but beautiful, flower arrangement. It doesn’t take much time to  make an incredibly easy flower arrangement. Your mom will love it, I promise!


Floating Flowers make great impact in an easy DIY flower arrangement - A Well Crafted Party
Photo by Katherine McLoskey Photography

Float your flowers for high impact and low cost.

Floating one or two stems or buds of flowers in water is a cost effective way to make a statement. These don’t last as long as some flower arrangements, but they are beautiful! The photo above shows a beautiful black lily floating with the bud of a white rose and some lily grass. If you would like some sparkle, try putting some sequins in your vase as well!


Use Unexpected Vessels in Creating Fun DIY Floral Centerpieces - A Well Crafted Party
Photo by West Impressions


Use unexpected vessels for your DIY flower arrangement instead of vases.


I love using unexpected vessels for flowers. Use bottles, cans, baskets, or boxes to house your arrangement. (You may need to put a small vase or jar in to hold the flowers with water, but the outer vessel can be anything really!) Get a beautiful serving bowl for a gift and put the flowers in it! Two gifts in one. We used picnic boxes for flowers on the tables at my sister’s cheery Summer Wedding. Guests received their lunches in the same boxes so it was a lot of fun seeing them all together.


Sprinkle your tea table with flower buds - A Well Crafted Party


Sprinkle your table with flower buds!


Last year we had a little Mother’s Day tea on the coffee tables in our living room. I simply sprinkled the tables with the buds from a few flowers that I picked up at the store and snipped out of my yard. The table looked festive throughout the entire tea party. The buds do get a bit wilted over a long period of time. But, this was a short tea party so I was able to make a small, low arrangement in a jam jar after the party that I was able to enjoy for a few more days.


Want to make some flowers that will last a little longer? Check out the posts below:


DIY Cherry Blossom Branches - A Well Crafted Party
Photo by Aubrie Legault – First featured on Hostess with the Mostess

DIY Cherry Blossom Branches

These DIY Cherry Blossom Branches will last for years and are so pretty to look at! A large vase with these sticking out would be a stunning gift.

Mix up your Mother's Day Flower Arrangement by adding in some paper flowers and leaves with real, inexpensive blooms. - A Well Crafted Party

Use Paper Leaves and Flowers to Fill in Real Blooms

I love real flowers. Sometimes when wanting to create a fun, whimsical look and to save money I’ll combine paper flowers and leaves along with inexpensive real blooms.

Make Mom a Tissue Paper Flower Arrangement - A Well Crafted Party


Make a Tissue Paper Flower Arrangement for Mom


Tissue paper flowers are easy to make, inexpensive and a lot of fun. Plus, they don’t die!


What do you like giving mom for Mother’s Day?


Epson Ribbon Printer featured on A Well Crafted Party

A while back the good people at Epson sent me this fun little Epson LabelWorks Printable Ribbon Kit  to try out. I’m a big label maker fan and finding out that Epson made ribbon cartridges so that the label making didn’t have to be restricted to label paper alone, well, it made my day. It has also happened to make nearly all of my gifts just a little bit more special!

Ideas for Customizing your Gifts with the Epson Ribbon Printer featured on A Well Crafted Party

Five Ideas for How to Personalize Your Gifts with Custom Ribbons

  1. Make a simple package stand out by using your recipients names on the ribbon. The image above is a photo of a recent gift I put together for two friends getting married. I found a fun suitcase style metal box and filled it with lots of goodies. I didn’t want to wrap the box because it was so unique… so, topping it off with a personalized ribbon made it look festive while not taking away from the fun package. Bonus– the ribbon can now be used by the recipients in their home or as a tag on a gift that they give!
  2. Forget tags! Use a custom ribbon instead of traditional tags and cards. You can put a cute message on it or simply your “to” and “from.”
  3. Make your own fortunes. Create custom fortunes or messages of love and print onto the ribbons. Use the ribbons in homemade fortune cookies or as a surprise book mark in a gifted book. As I was perusing the Epson site I ran across this awesome idea sharing another way to utilize the ribbon cartridges with the Epson label maker to share messages— Surprise Poppers with Ribbon Messages.
  4. Wrap a message around a bundle of flowers. Spring is here and flowers make for wonderful gifts. Go down to your local market and pick up a bundle of tulips or daffodils, write a sweet message using the label maker and print a ribbon that can be wrapped around the stems of the flowers. Your recipient will end up surprised and delighted with the flowers, and then again when they read your sweet message!
  5. Use them to share a gift that can not be easily wrapped! I love the idea of surprising a loved one with a special gift such as a trip or special outing by printing the gift message on the ribbons, tying around balloons, and delivering to your loved one. I can just imaging someone’s eyes lighting up as they see the balloons and begin to read the message. Wouldn’t that be such a fun way to propose too? Maybe even put the ring INSIDE the balloon!

You can be sure to see some custom ribbons in future posts on this blog. They are so versatile, inexpensive and fun!

What would you use a label maker with ribbon cartridges for?

Thank you to Epson for sending me a label maker with ribbon cartridges to try out for this blog. All opinions and ideas are my own.