Category

Home DIY

Category

My obsession with displaying photos began in high school. It started off as a small section of my wall that I taped up photos of my friends and family. That small section grew to include notes, drawings, and many more photos until I had an entire ten feet by fifteen feet wall completely covered. Every time I walked into my room I was inundated by all the faces of people I loved. It was perfect. Granted when I had to take it down before moving out of the house at the end of high school it was a bit of a complicated mess. I’d suggest that if you’d like to tape up photos to your wall that you use painters tape rather than Scotch tape!

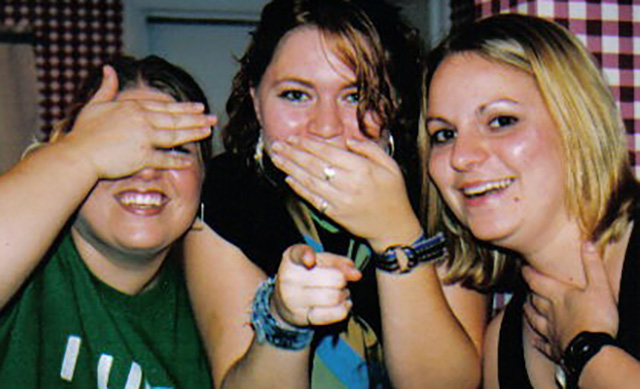
As I got older the desire to take/be in/ display photos of myself and my loved ones never really disappeared. In college I insisted my roommates do a photoshoot with me so that we could have photos for our home. One of those photos eventually got displayed on the underside of a toilet seat as a funny gag when people went to our restroom. Said photo:

Displaying Photos in your Home

Now-a-days I typically opt to display photos in frames around the house rather than on the bottoms of toilet seats… but, I still enjoy the unexpected at times! I used to be totally against displaying huge photos of me and my husband around my house. But, that has changed since having kiddos. I still like to make sure that there are some photos in addition to my family images, but I live in my house and goodness knows I LOVE seeing photos of my family.

Tips for Displaying Family Photos:


I always choose matte prints for the photos I hang in my home. Check out other family photo display tips on www.awellcraftedparty.com
Matte prints from a photo session with Moments By Macey

Family Photo Display Tip: Order your prints in matte. 

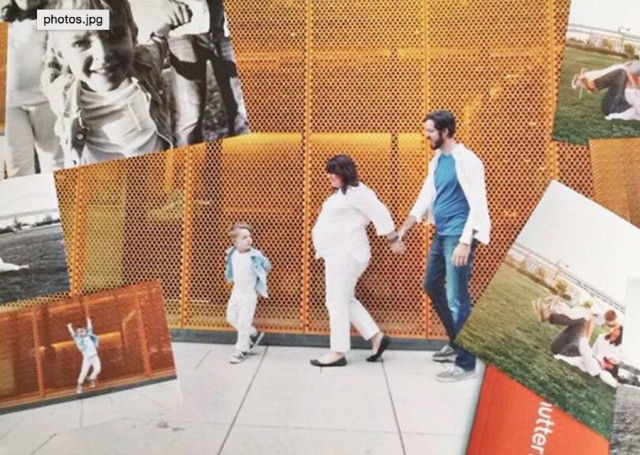
This is absolutely a personal preference, but lemme tell you WHY I prefer matte over glossy: no shine and no fingerprints. I can’t stand it when fingerprints end up on pictures before the frame goes on or when there is a glare off of a photo in a frame! Matte looks so neat and clean. If you are going to a store to get instant prints then likely matte is not an option. Though, if it is, always select matte! I typically order my photos via Shutterfly or Mpix and both offer matte prints.


Family Photo Display Tip: Sprinkle family (and friend) photos around you home.

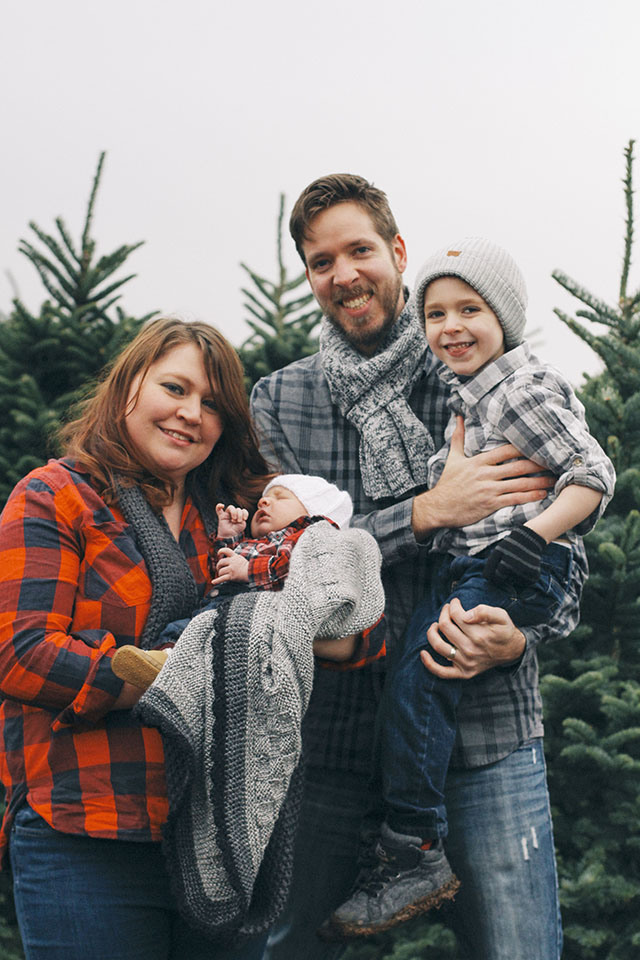
I’m a firm believer that my family is much bigger than just the few people that live in my home. My friends and distant family members are very much a part of my family too. I try to sprinkle photos of moments we share together throughout my home. Sometimes I simply keep a bunch of images in one frame and switch them out from time to time. Sometimes I put up a fun gallery wall and include a variety of photos with similar color schemes.


Tips for Displaying Family Photos via A Well Crafted Party
Photo of my Moments by Macey print by www.mommabearmag.com


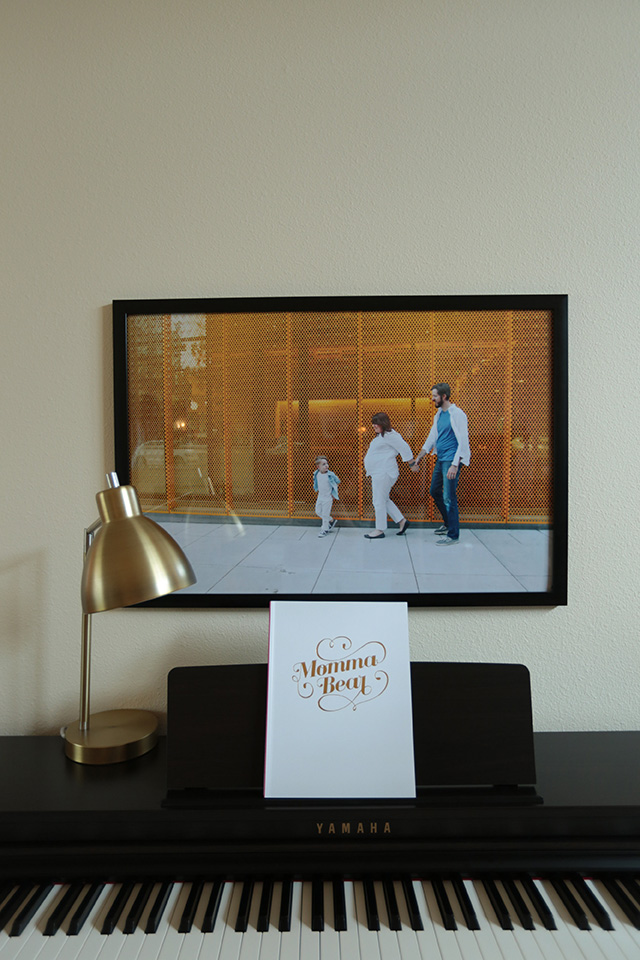
Family Photo Display Tip: Go BIG!

I can’t recommend this enough. Sure, get smaller images to go around the house. But, I highly believe that one favorite image BIG can make a huge impact. And, there is nothing that makes me smile more than walking into a room and seeing the big photo of my family in the room. I usually shy from big photos of just one person, but decided to throw it out the window this past year and instead framed three big photos of myself, my husband and our son. They are silly and always get compliments. Perhaps a tad egotistic? Naw. 😉


Display Ideas for family photos from A Well Crafted Party
Photo by Moments by Macey

Use an illustration of a favorite family photo to add variety - Family Photo Display Tips via A Well Crafted Party


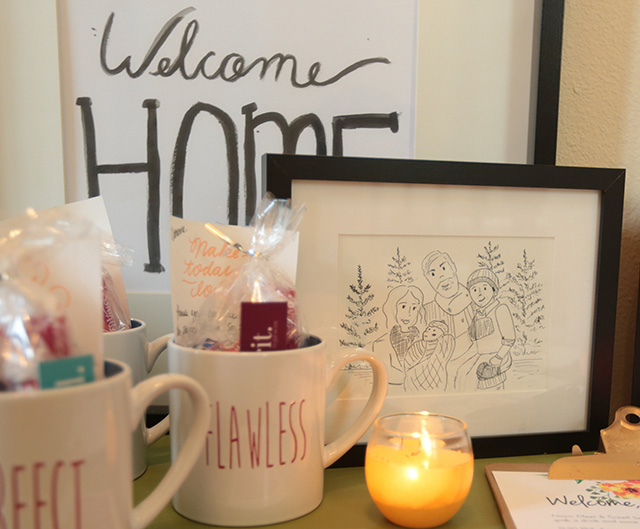
Family Photo Display Tip: Use Family Photos in Unexpected Ways


I did a small illustration of my family based off of one of my favorite photos from a photoshoot with Moments by Macey. The illustration, though not a perfect rendition of the photo, is one of my favorite pieces in my house because it is unexpected. Photos of holding hands or your child’s favorite toy may be unexpected ways to incorporate family photos into your decor.


Incorporate your family photos where you work! Family Photo Display Tips via A Well Crafted Party


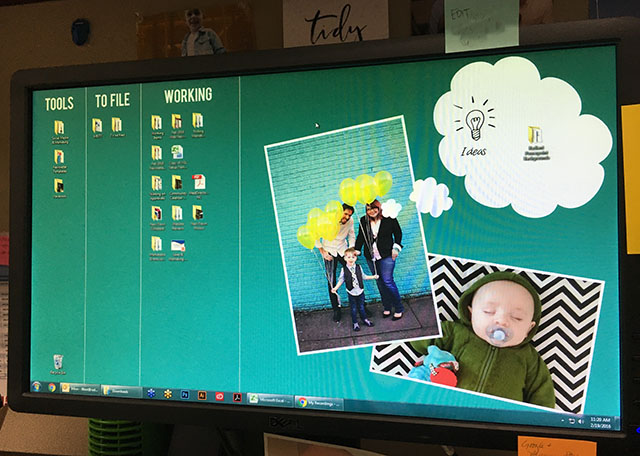
Family Photo Display Tip: Display family photos where you work!

I spend a LOT of time at my computer at work. I surround myself with the photos of my family to remind me why I do the work that I do. Also, those little guys are just so cute!


Additional family photo tip:

Get fun photos of you and your family whether it be by hiring a professional (of whom you pay what they are worth) or by snapping images with your cell phone. Try unexpected poses and stolen moments. You’ll be happy you did!


How do you like to display your family photos?

I don’t know if there is any DIY I love more than dying fabric. I have used the technique on a variety of projects including party backdrops, napkins, curtains and clothing up-cycles. It is a quick, inexpensive and super easy way to make an impact.

For my Summer porch makeover I knew that I would want to have cloth napkins for the many parties that I would be having in my new space. They already had a space on the bookshelf that houses all my entertaining supplies, but I didn’t have exactly what I wanted on hand. I wanted a fairly durable but inexpensive cloth napkin, ideally in a bright yellow or ombre yellow. People get messy in the back yard and BBQ meals don’t really lend themselves to the really nice cloth napkins due to staining. I needed something that could get messy and wash up easily, but wouldn’t be terrible to move into my cleaning cloth pile if stained. After searching unsuccessfully at all my favorite stores I landed on DIYing the napkins out of flour sack towels.

At the very last minute I also decided that we needed curtains for our porch area. One trip to Ikea and I came home with inexpensive white curtains that I was able to dip dye to coordinate with the napkins. The curtains are seriously my favorite part of the whole space and I hadn’t even planned on doing them!

dip dyed napkins and curtains via A Well Crafted Party

DIY Dip Dyed Linens

I used the same process on both my DIY Dip Dyed Napkins and my DIY Dip Dyed Curtains. The curtains were a slightly different material than the napkins so the dye didn’t soak in quite as well and get the bright yellow look, but I loved the paler ombre look nonetheless. That is the joy of dying cloth… you never quite know what you are going to get!

(Some of the below links are affiliate links. Affiliate links help support this blog with no cost to you the reader.)

Supplies:

  • Linens of choice in WHITE! For the napkins I purchased 12 Flour Sack Towels via Amazon for just about $22. The curtains I got at Ikea for $10!
  • — Rit Dye of Choice. Personally I have used the powder and liquid Rit Dyes for dying linens and have had good results both times. The biggest thing to remember when using the powdered dye is that you really need to mix in the powder well because if it isn’t mixed in well you will get speckled results on your final product. Follow the directions on the Rit bottle. They are there for a reason and they really do help! I used the Golden Yellow liquid dye and one 8oz bottle was enough for all 12 napkins and two curtains with some to spare.
  • — Large pot for stove or bucket for dying fabrics. I used my canning pot for this project because it is huge and I can put it on my stove top to make sure the water stays hot enough. The package directions also gives options for large buckets or the washing machine, but the stove top has always been my choice of dying method.

Dip Dyed Napkins via A Well Crafted Party

After our Summer Porch Makeover - A Well Crafted Party

How to Dip Dye Linens:

  1. Prep your dye according to package instructions. My dye required super hot water and some salt because I was dying cotton items. It only took a few minutes to really get this all set up, the heating of the water taking the most time! As the water was heating I prepped my linens.
  2. Prep linens by wetting them and ringing out. I’ve dyed things from dry before and just do not like the results as much as I like the results of dying from wet. I wet all of my linens and rung them out prior to dying.
  3. Slowly dip linens into prepared dye. I am not one to take a lot of time in DIY projects. I just don’t have the patience. So, instead of dip dying these one at a time I chose to do them all at once. I put each of the napkins in with about an inch of the fabric in the dye water. I let sit for about 5 minutes and then lowered each one more into the water. I continued this process until the first dipped ends were in for about 30 minutes. You can choose to not dye the very ends at all if you’d like the ombre look to go into a full-on white, or dip the ends in the dye for just a moment. I chose to have the entire napkin be covered in the dye with the top ends being slightly lighter.  The ombre on my napkins is very subtle. The ombre on my curtains is much more pronounced because of the difference in fabric. The fabric was a polyester blend and didn’t soak in the dye quite as much as the cotton flour sacks.
  4. Rinse and dry as directed on dye package directions. After rinsing out the dye in the sink a bit I threw in the washer for a good rinse cycle. I then dried the linens in the dryer.

I love how these came out and with the napkins costing around $2 each I could not have gotten the same results for the same price any where else. I was able to do the entire process in one evening as well, so that is my kind of DIY!

Summer Porch DIY Projects - A Well Crafted Party

Check out my other Summer Porch DIYs:

Other great Linen DIYs from around the web:

Have you ever dyed fabric for a project? Comment below telling me all about the project! Links welcome.


When working on my porch makeover for our rental home I knew that I wanted to cover up as much as the back porch’s cracked and ugly surface as I could, but had to do so affordably. If you’ve ever looked up the cost of large outdoor rugs then you’d know that I was looking to spend a large portion of the very little money I had to do my porch makeover. I wasn’t really willing to give up the cash, even when I found some really cool rugs. A quick reminder of what my poor porch area looked before the redo…

Before our Summer Porch Makeover - A Well Crafted Party

I had seen DIYs in the past where people had painted inexpensive outdoor rugs, painted drop cloths to make curtains, or even created their own rugs using thing like t-shirts! I knew I wanted to try out doing it myself, but I wasn’t entirely sure what I was going to do until a trip to Home Depot really lucked out.

While getting my porch paint I decided to check out the drop cloths and see if any of them would work for a thin, inexpensive, and washable outdoor rug. I lucked out and found a 5X5 canvas drop cloth with finished hems and a leak proof backing for just $8! The drop cloth is reusable, which is great because all the shoes across it from our back yard have made it super dirty. We’ve been able to sweep it off easily and hose it off for bigger messes. I chose to paint the rug in multiple sized stripes in three colors that coordinated with the other items going in my back yard decor. The sample sizes were just right for this size of rug, but they only came in interior paint. I decided to go ahead and use the interior flat paint from Behr and then chose to spray it with a few layers of sealant after it dried.

The most exciting part of this project for me was the fact that it was so easy and inexpensive that I’ll be making another one as the Fall season approaches to go with my outdoor Fall decor. Heck, we may even make a different one for the holidays!

DIY Outdoor Rug In Progress from A Well Crafted Party


DIY Outdoor Rug from a Drop Cloth & Paint

This entire rug cost me about $14 which I felt was a great price for a 5X5 rug! The DIY process was super easy and fast… even the drying process wasn’t bad! I taped by rug up on a table and did in sections because I can’t bend over easily now days, but you could easily put this on the floor on top of another drop cloth or paper (in case of paint accidents) to paint it all in one session.

Supplies:

(Below links may be affiliate links. Affiliate links help support this blog with no cost to you the reader.)

  • — 1 lined canvas drop cloth in the size of your choice (5X5 drop cloth via Amazon or grab at your local Home Depot)
  • — Painters tape (I used two different sizes of painters tape to add variety to my rug stripes, though you only really need one. Both were Scotch Blue painters tapes.)
  • — Paint ( I used Behr paint samples in Island Aqua, Upbeat, and Water Park)
  • — Paint brush (a roller would also work depending on size)
  • — Sealant ( I used a spray sealant.)
  • — Ruler if you want to be precise… I didn’t care, so I didn’t use one!

How to make a drop cloth into an outdoor rug:

  1. Pull out your reusable drop cloth and adhere to a hard surface. Don’t forget to protect your surface with a plastic drop cloth, paper or another drop cloth that you use for your painting projects. You don’t want to accidentally get paint on a surface you don’t want paint on! Tape down your rug using the painters tape so that it does not move while you are working.
  2. Tape out your design on the rug. I went with imprecise stripes that were a variety of sizes. I basically just taped out the stripes trying to make sure my tape was straight. If you are a little bit more inclined to like things precise then I’d highly suggest taking a yard stick or ruler and marking out your stripes with a light pencil line before adding your tape.
  3. Paint! The canvas soaks in the paint pretty well so this can take some time. But, it will also dry very fast.
  4. Let dry then remove tape. I let my rug dry for just a couple of hours and it was ready to go. I tested the paint with my finger tips a bit before taking off the tape. The tape comes off easily!
  5. Spray with sealant. Spray the rug with the sealant according to the directions on the sealant you purchased. Let dry overnight and your rug is ready for feet!

DIY Outdoor Rug out of a Drop Cloth & Paint - A Well Crafted Party

Note: These rugs do not help with cushioning the area or taking off mud at the door. If your needs require that then you’ll want to look for an outdoor rug with more heft. (Check out the links below that show some other outdoor rug projects that you can do if you want a different look/feel to your DIY rug.)

Summer Porch DIY Projects - A Well Crafted Party

Check out my other Summer Porch DIYs:

Check out these great porch DIYs from around the web:


Where could you use a rug like this in your home?