Author

Jenni

Browsing
Jenni is a blogger and marketing professional in Portland, Oregon. A Well Crafted Party is a blog about all the little things to celebrate in life. Follow Jenni or A Well Crafted Party with BlogLovin, RSS feed, Facebook, Instagram, or Pinterest.

Coffee is basically life… amiright? Well, it is pretty important in MY life if it isn’t quite an equivalent. I have coffee EVERY day. When I don’t want caffeine I drink decaf coffee. Coffee is a must. It is only natural that I bring my love of coffee and my love of cocktails together at times in creating tasty spiked coffee cocktails for brunches or night caps to fabulous dinner parties. While I absolutely love to craft wonderful more complicated coffee cocktails (and will share some of my favorite recipes soon) today’s post is sharing some of my favorite liquors to spike a coffee with to make a simple and satisfying coffee drink.


Spiked Coffee Ideas from A Well Crafted Party

Easy to Make Spiked Coffee

Affiliate Links marked with *

To make spiked coffee you simply need to make a good cup of coffee— we typically use our french press* or pour-over*, but any good coffee maker will do— and introduce your favorite liquor. You can add cream and sugar (if needed) but, mainly, it is all about the coffee and liquor!

My favorite Coffee Add-Ins:

  • Amaretto — I’ve already professed my love for Amaretto in a past post. Amaretto is a sweet, almond-flavored liquor. This is good all by its lonesome with coffee or with just a touch of cream. (Side note: Amaretto makes an awesome ice cream topper too!)
  • Irish Cream — typically I use Bailey’s, but you can absolutely make your own Irish Cream! Irish Cream is just a mixture of cream, Irish Whiskey, and flavors of coffee, chocolate, and vanilla typically. If you use this in your coffee you can skip the cream and sugar entirely! Of course… you can always just spike your coffee with Irish Whiskey and add in the cream and sugar as needed. You won’t have some of the other flavors, but it will still be a delicious treat.
  • Coffee Liqueur— Some people think it is a tad silly to spike a coffee with a coffee flavored liqueur, but I think it is delicious. You can add in a touch of Kahlua or (one of my favorites) Crater Lake Spirit’s Hazelnut Espresso Vodka with a bit of cream and make a wonderfully decadent coffee. 
  • Green Walnut Liqueur— What? I had never even heard of green walnut liqueur until a recent tasting introduced me to Stone Barn Brandyworks’ Nocino. We bought it on the spot. I’ve found that this is one of my favorite mixers in my coffee. A little Nocino, almond milk creamer, and coffee and you have a tasty night cap on your hands!
  • Whiskey— There is nothing more classic (or satisfying) than a bit of whiskey spiking a cup of coffee. This is a favorite treat especially while camping or sitting around a fire pit!


Spiked Coffee Ideas from A Well Crafted Party


Okay, now I’m off to enjoy my Saturday. I’ve got my bullet journal (hello new organizing obsession), pens, and my favorite mug ready to go. Well, that and a splash of something tasty in my coffee. It is Saturday, after all!


What is your favorite way to spike your coffee?

When planning my 10 Year Anniversary party at a local Peruvian restaurant I knew I wanted to decor to nod to the amazing food that Andina serves. I wanted it to be bright, bold, and a lot of fun. After selecting the color scheme I got completely stuck on what to do for the escort table. In the end, I let my spirit party animal lead the way and I created this fun Party Animal Escort Table as well as some great event table decor.

Read on to see just how I created these elements…


Party Animal Escort Table from A Well Crafted Party with photos by Mary Boyden

Party Animal Escort Table from A Well Crafted Party with photos by Mary Boyden

DIY Party Animal Escort Table

Affiliate links marked with *.

You’ll need:

  • Plain or decorative cards to write the names of your guests
  • Hot glue
  • Plastic animal figurines* – Purchased the set of 60 from the set by Jungle Resources on Amazon.
  • Large animal figurines* – Purchsed the set of Jumbo animals from Jungle Resources on Amazon.
  • Spray Paint in chosen color(s) and a clear coat of polyetherlene
  • Paper, ribbon, glue for making tiny party hats and the like


Party Animal Escort Table from A Well Crafted Party with photos by Mary Boyden


Party Animal Escort Table from A Well Crafted Party with photos by Mary Boyden


Note: I chose to do multi-colored animals matching type of animal and the color. But, you could also do these all the same color. Just make sure your small animals match the animals that you use as your table markers. For instance, everyone at the table with the gorilla got an escort card with a gorilla on it as well.

Directions: 

  1. Spray paint the figurines. I chose have the animals and colors match for each individual table. For instance, all the elephants were painted yellow. This may take several coats and should be done over the course of a few days.
  2. Spray dry figurines with the clear coat spray.
  3. While you are waiting for those to dry, write or type and print your escort cards on decorative card stock.
  4. Hot glue the little figurines to the appropriate escort card. You will need to hold the animal to the card until the glue is dry.
  5. Add hats, bows, and decorations to the larger animals as you see fit. Attached with hot glue. We chose a variety of cut out decorations for our animals. My sister in law created them all on her own with some paper, glue, scissors, and ribbon!


Party Animal Escort Table from A Well Crafted Party with photos by Mary Boyden


Seriously Awesome Vendors and Resources

affiliate links marked *

More Posts from this party

  • My Favorite Cocktails from Andina
    My Favorite Cocktails from Andina
  • 10 year anniversary party
    10 year anniversary party
  • Special Occasion Makeup Ideas from A Well Crafted Party
    Special Occasion Makeup Ideas from A Well Crafted Party
  • 10th Anniversary Party Invitations
    10th Anniversary Party Invitations
  • Party Animal Escort Table from A Well Crafted Party, photo by Mary Boyden
    Party Animal Escort Table

Before I get into the nitty gritty of How to Start a Blog, let me share some facts about me: I have run A Well Crafted Party for the better part of six years. In that time I’ve also began, designed, set-up, assisted with, and coached bloggers on starting and maintaining blogs. I run a local meet-up group and resource for bloggers where we have successfully hosted several different workshops for blogging skills. I have a free blog planner that I giveaway to help bloggers get to where they want to go. I’ve blogged and freelanced as a full-time gig and I’ve worked in Social Media and Marketing for a corporation that has eighteen sites in the United States in which I’m responsible for their social media platforms. I’ve spoken on panels and at state-wide conferences on Blogging and Social Media. I say all this not to brag. If I wanted to brag I’d share a whole different set of stats.

I say all this to explain why the question I receive most often is, “How do I start a blog?”

I also share it to say why I feel I am qualified to share the following steps. There are many, many ways to start a blog and while I’d love to go into them all, today I’ll share my favorite tips for new bloggers.

This post does contain affiliate links marked with an *. I receive a portion of my affiliate sales at no extra cost to my readers. For more information on my affiliate programs and posting guidelines please visit my policies page.


How to Start a Self-hosted blog


The only absolute, you-can’t-start-a-blog-without tip that I have is simple…

1. START

I can’t stress this one enough. Planning the blog is great. Prepping content is awesome. But, at some point, you have to move from the planning and prepping to the actual doing. So, if you plan on starting a blog then make an investment upfront— whether that be purchasing hosting, buying your URL, or simply putting a big fat launch date out into the world so you have to stick with it— and get blogging! There are about a million ways to start a blog, but today I’m sharing how to start a self-hosted blog using BlueHost.com*.


2. Decide on a name — Pro Tip: Search for and purchase URL as soon as possible

Deciding on a name can be the hardest part of creating a blog! There are so many times when myself or someone I am working with have figured out an awesome name and finally went around to buy the URL and found that not only was the name taken, but there were several others using similar names.


Tips for creating a good blog name:

  1. Think about your topic and what you’d like to blog about and search for name that fits that topic. Try to come up with a name that speaks to that topic. Search Engines love names that make sense. The easiest way to get a successful URL is to find a name that might be an exact match for your ideal reader. When creating this blog I started out blogging about crafting for parties and designing thoughtful parties that didn’t break a budget—A Well Crafted Party felt like a perfect fit! I was happy to find that it was available and no one really had someone similar.
  2. Stick with .Coms. This is a slightly controversial suggestion because there are so many different top level domains out there (i.e. .com, .net, .org) but the most common of those, .com, is the one most people will default to when trying to remember your blog URL. Government entities have .gov and non-profits do well with .org. Personally, I stick with .com for all of my URLs (and, yes, I own several).
    • For instance, when wanting to create a website for Portland Bloggers to discover or for people searching for Portland Bloggers to discover we instantly wanted… well, you guessed it, www.PortlandBloggers.com. We were sad to find out someone out there is sitting on that URL and hoping to sell it some day. I had to keep searching and finally landed on www.PDXbloggers.com.
  3. Make sure there isn’t competition out there with your chosen name. There is nothing worse than getting an idea in your head for a name and finding out that there are other sites/businesses out there using the same or awfully similar name. A couple of internet searches can easily tell you if there is competition out there utilizing your name. Stay away from super common names/phrases that other businesses use. You don’t want to finally hit it big to just have to change your name because another company has rights to it.

Check your domain name here:


You can absolutely purchase your domain name now… or you can hop to the next step because you get a free domain name while signing up for hosting with Bluehost.
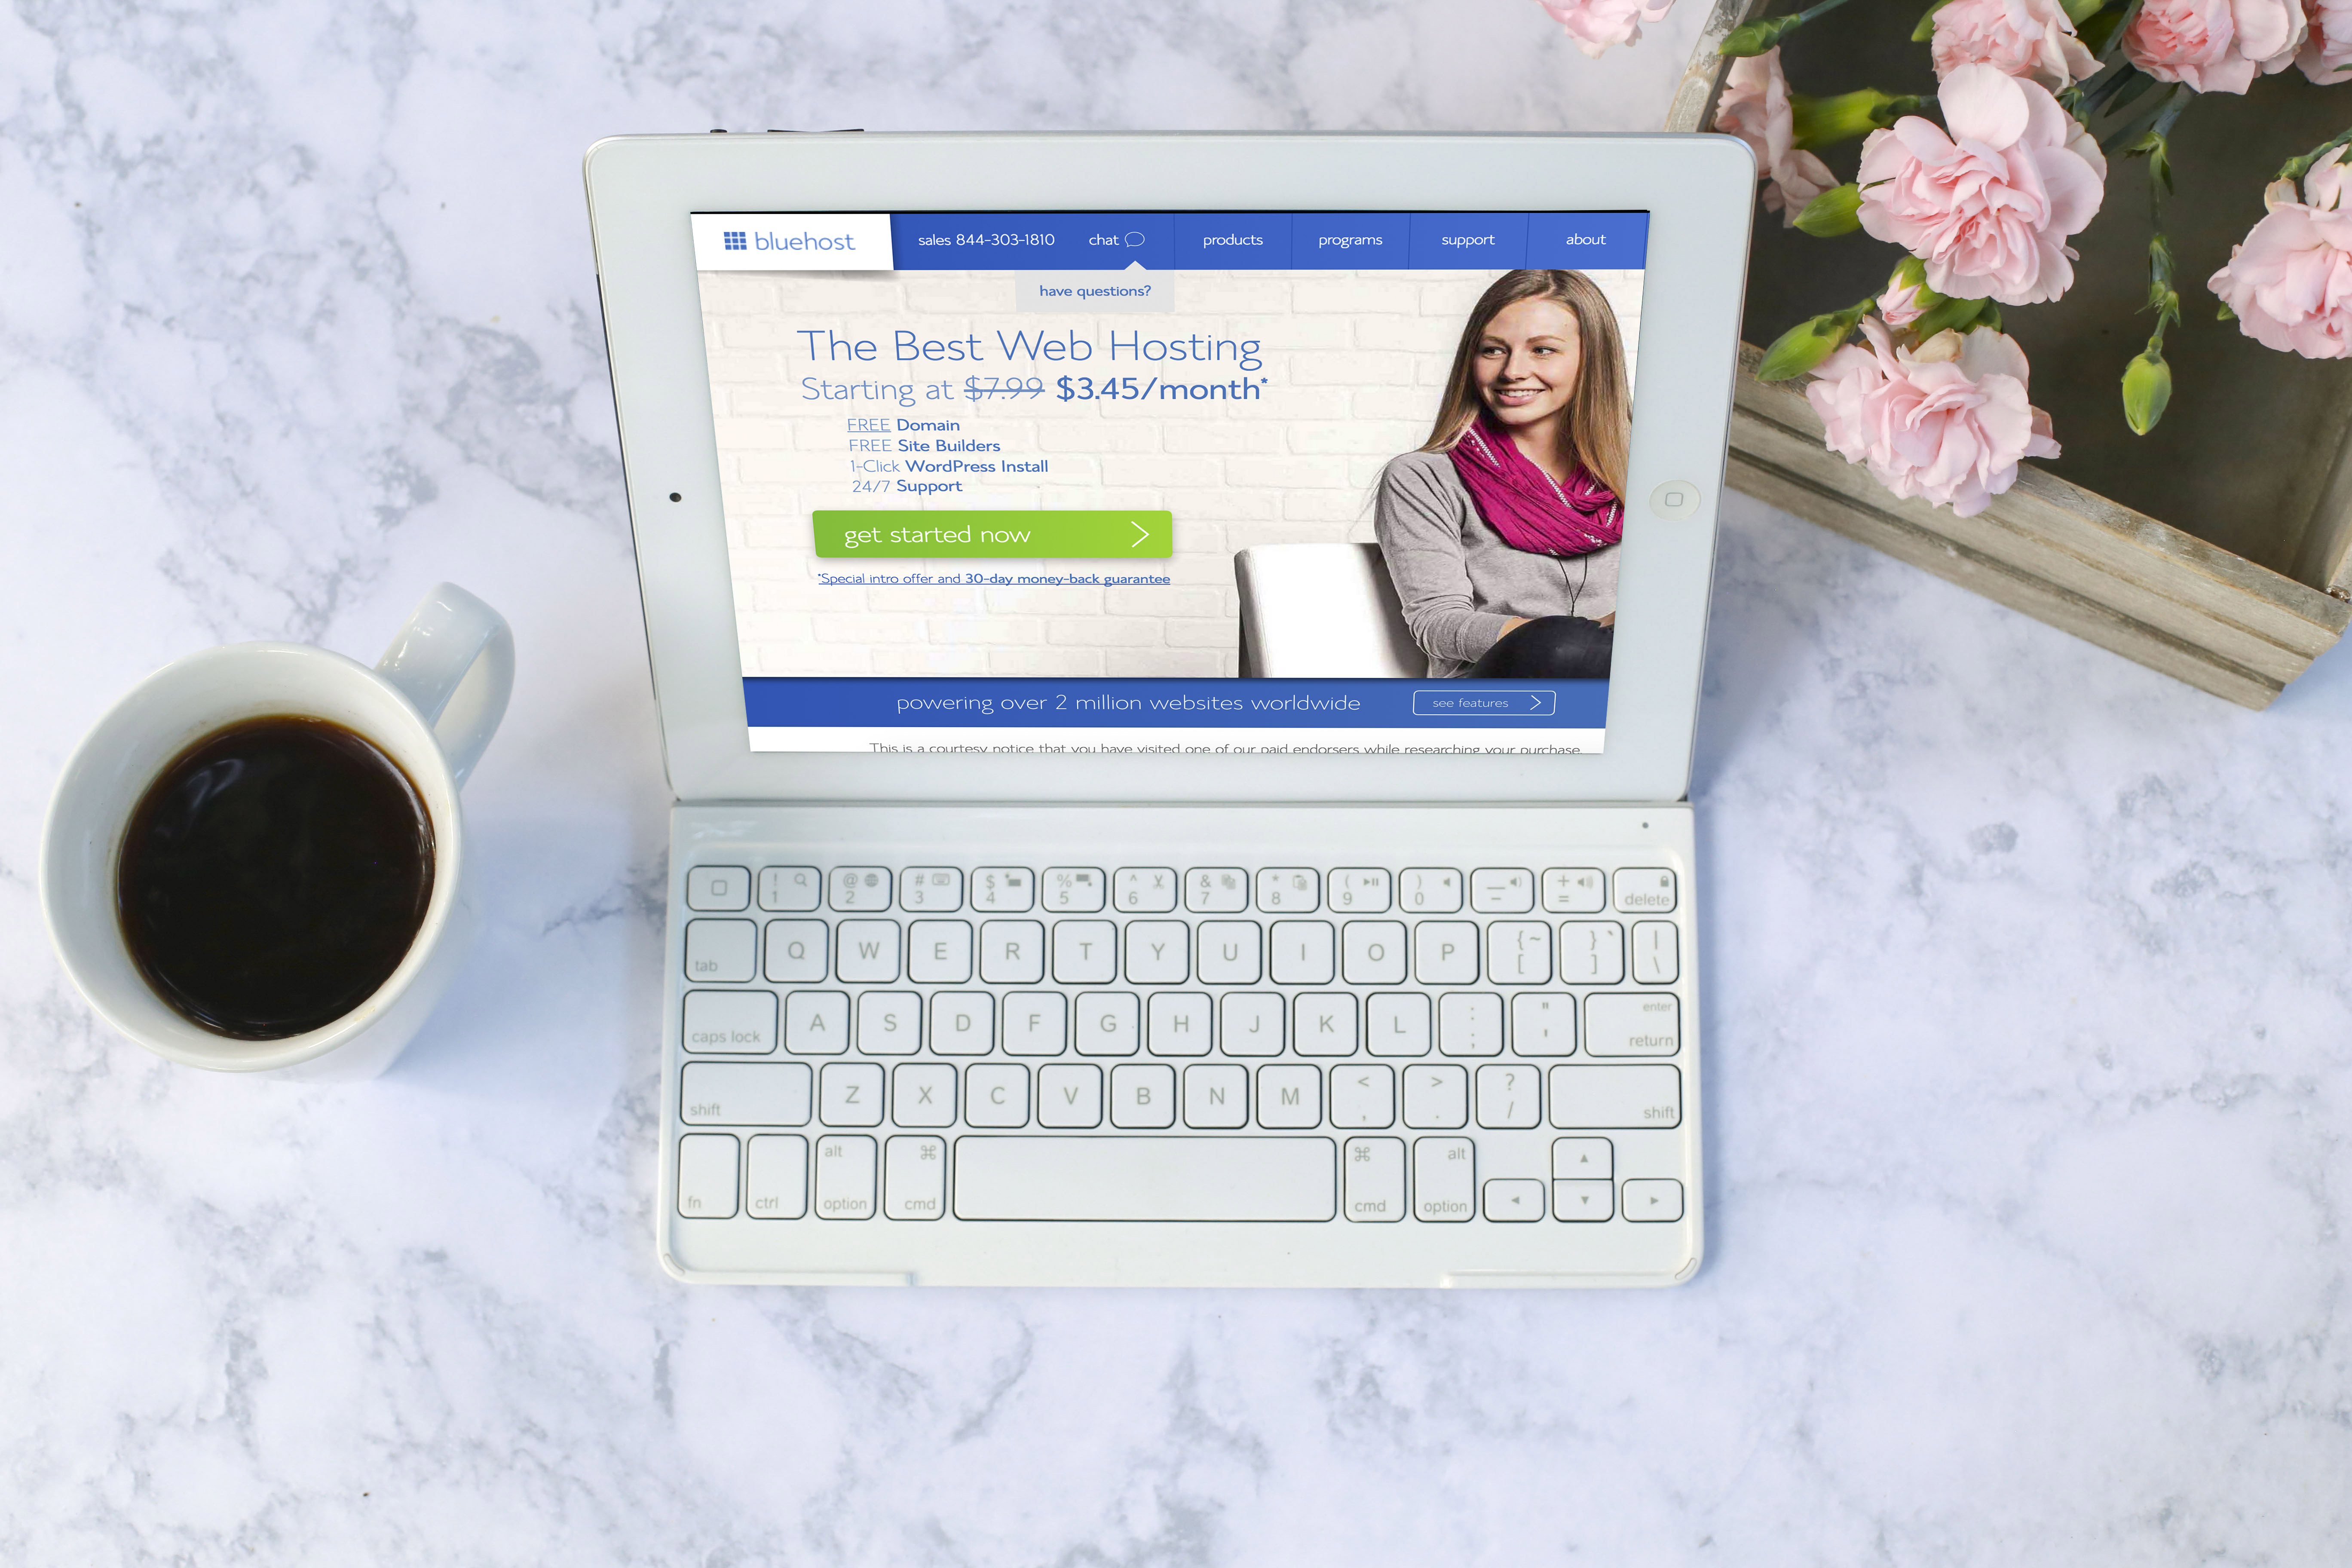
 

How to Start a Self-Hosted Blog

3. Purchase Hosting

There are a ton of hosting options out there and different blogging platforms to boot. Today I’m sharing the hosting platform I use for the majority of my websites, BlueHost.com. Signing up is easy. You simply need to select the big green button that says “get started now.”


Setting Up Hosting from A Well Crafted Party


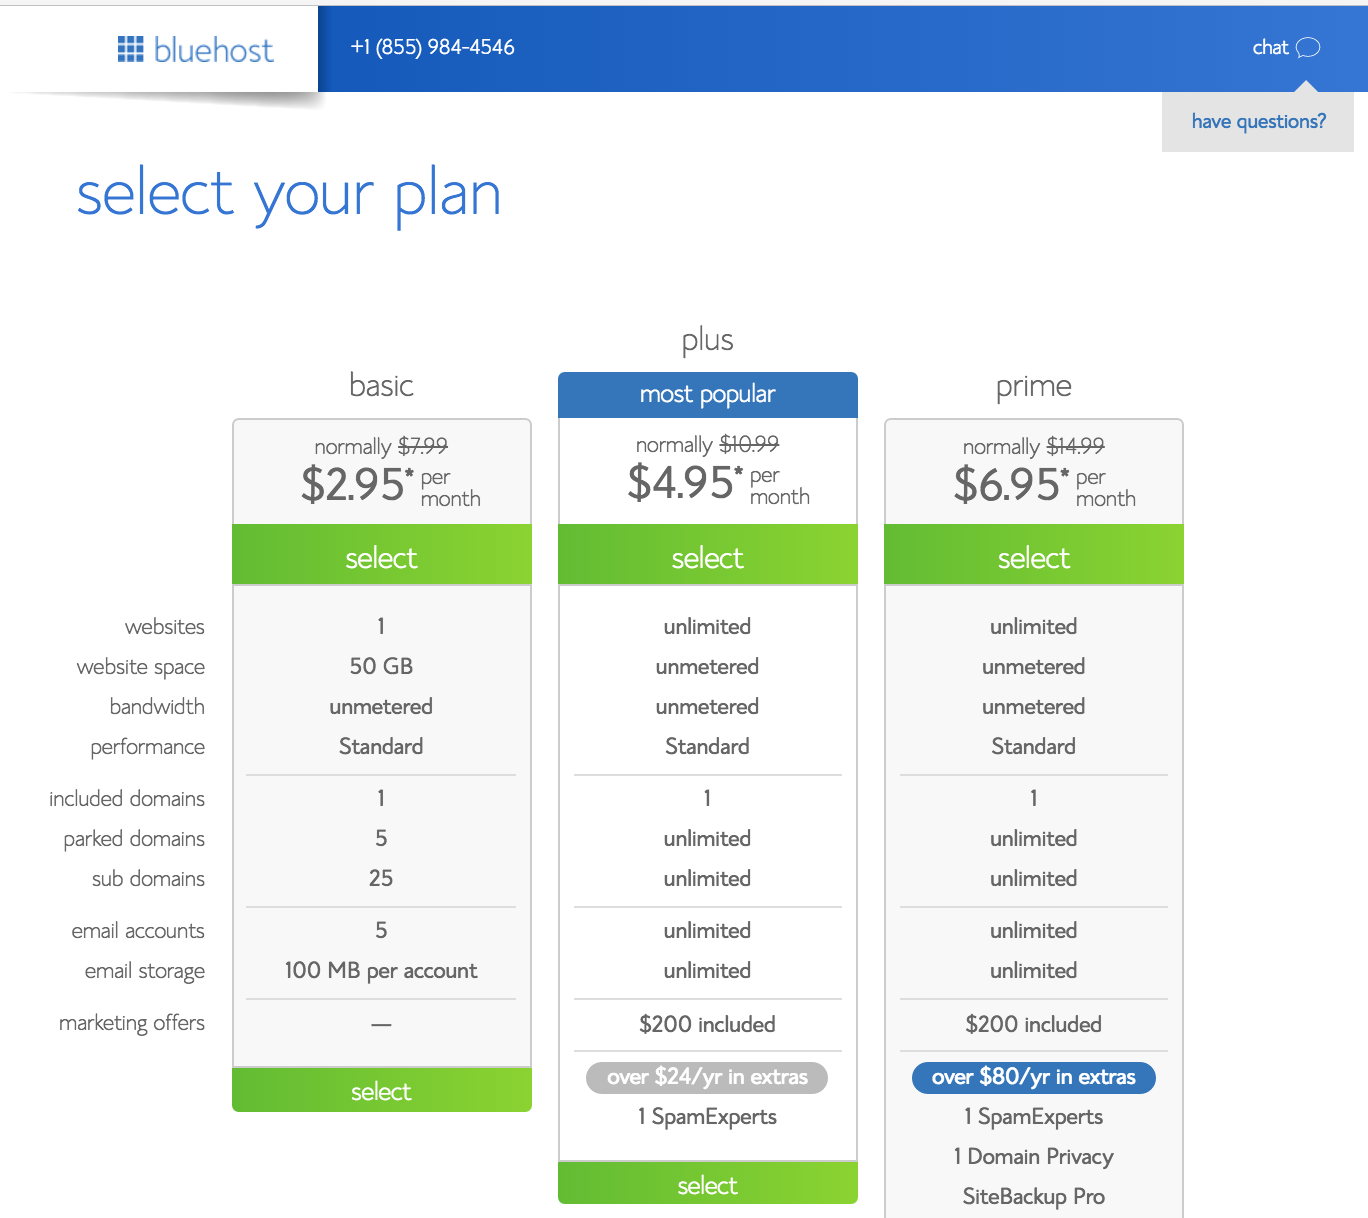
Selecting a hosting plan

This is where I feel like a lot of people get stumped. When you are just starting out then it is pretty easy to know that you don’t want to put in a huge investment upfront. That is when the basic plan fits best. It starts to get confusing (and important) when you blog begins to grow. The majority of my websites run all on one plan— the plus plan. When I was blogging full-time I had increased my plan to the prime plan. I easily changed my plan when I needed less. I also know that if/when my blog becomes more of a full-time gig again I also have the option to upgrade my hosting to pro with even more performance increases.

Setting up your blog

The coolest thing that I’ve found with BlueHost is that setting up WordPress was seriously ONE CLICK. That is all! I was able to have my site up and running in just a few minutes.


What made you think of making the move to self-hosting? Are you self-hosted already? Why did you go that direction? Comment Below!