I had a lot of fun creating simple props to be used in the “Breakfast for Dinner” Birthday Party that I co-hosted a few weeks ago. I thought I’d share some links, photos and tips for my DIY projects, including the chalkboard frames and mugs!
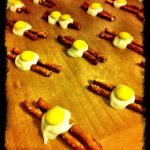
(If you like the “Eggs and Bacon” favors from the party check out this {DIY} post.)

One of my favorite projects from the party was creating the Chalkboard frames and mugs to showcase elements of the party. These were super easy and super inexpensive ways to dress up the event.
Beware though… once you discover the wonders of chalkboard spraypaint you may just have chalkboards on every available surface.
*Read on to see the tips, photos and tutorial links for making your own Chalkboard frames and mugs*

I had been seeing chalkboard paint being used throughout houses and party goods for awhile now.
I’m so glad I finally decided to give it all a shot!
To check out the tutorials that I used PLEASE visit:
 |
| Image Credit Fireflies and Jellybeans |
&
Vintage Wanna Bee: Chalkboard Mugs!!!
 |
| Image Credit Vintage Wanna Bee |
 |
| Image Credit Offbeat Bride and Ang Armstrong |
Tips from me on how to make your own
Chalkboard Mugs and Frames:
{TIP ONE}
If you are good with spray paint then just buy the spraypaint chalkboard paint… it is so much faster! These tutorials use the paint on kind for the most part, and I’m sure they are more precise… but, I like things quick so I used spray paint.
{TIP TWO}
Get painters tape to tape off sections you don’t want to have painted…. I didn’t grab some even though it was mentioned in the above tutorials and tried to work with paper and scotch tape. The results varied and ended up looking OKAY but, it was certainly a pain in the neck!
{TIP THREE}
DOLLAR STORE!!! (Or a good thrift store will also work.) I got my mugs and frames for just a buck each… that way it didn’t hurt near as bad if I messed one up. For the frames you just remove the glass and paint the glass with the chalkboard paint—easy as that!
{TIP FOUR}
Use a primer and then do two coats of the chalkboard paint.
 |
| Priming the surfaces for the chalkboard paint. |
 |
| Letting the mugs dry with the paint on them. It would have been so much neater if I’d used painter’s tape! |
{TIP FIVE}
Smudge chalk on the dry surface and then erase to prep for writing. It really does help!
 |
| Prepping the surface by smudging it with chalk before writing really helps the writing to stick! |
{TIP SIX}
Mugs are NOT dishwasher safe. 🙂 Learned this one the hard way…
Thanks for stopping by and checking out these tips, links and photos! If you’ve seen another great Chalkboard tutorials please leave a link in the comments!